


Ouch!
What's a season's worth of rubber come out at? Barring punctures et cetera, how long can you expect a set to last?
*n

Ouch!
What's a season's worth of rubber come out at? Barring punctures et cetera, how long can you expect a set to last?
*n
set of slicks or wets is in the sizes im looking at are about £950 inc
this car isnt actually too hard on tyres i could probably get a season out of a set
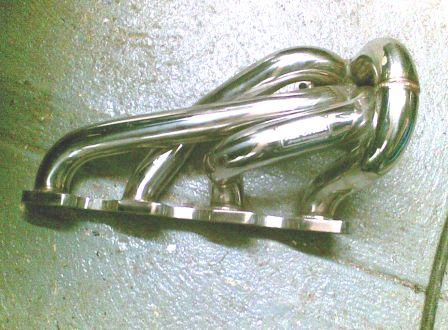
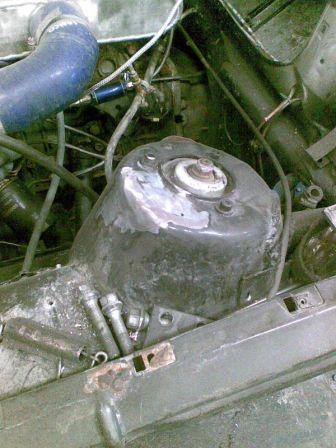
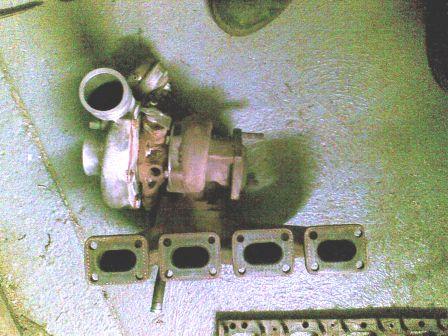
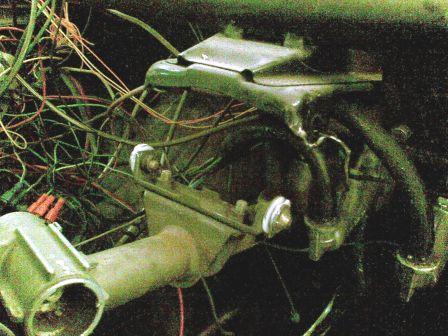
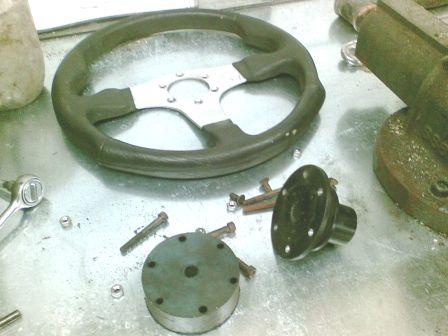
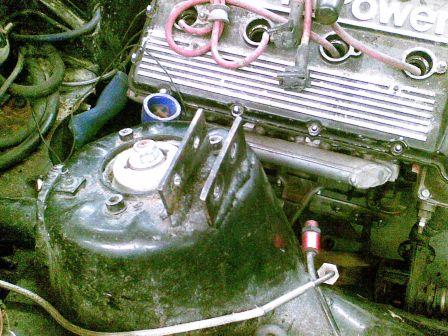
a little progress from yesterday, drained the coolant removed a few hoses, teh turbo and the manifold adapter plates
1 turbo on a wont stay tight manifold,
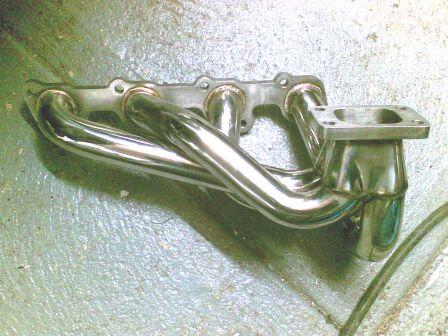
i also offered this up to try for size, an ebay special, its for a volvo, it nearly goes, unfortunatly its just a bit to bulky in one spot so i wont bother with it, although i have an idea it would easily adapt to suit a pinto though, now i wonder who also has one of them???????????
Last edited by Graham; 04-10-2007 at 20:35.
I just had a random thought about your rear wing again...
If the rules state it can only project a certain distance past the rear bumper, can you fit a US-spec (ie massive) rear bumper?
*n
I like him ...Originally Posted by penski

yes a bigger rear bumper is possible, we'll see im a long way off thinking about bumpers.
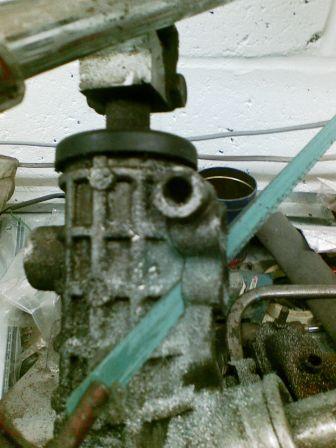
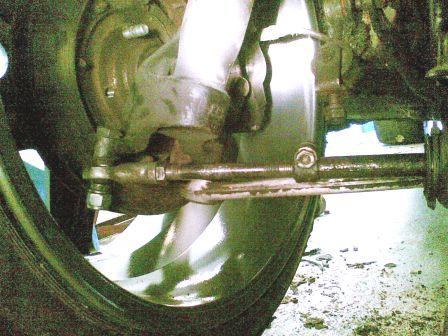
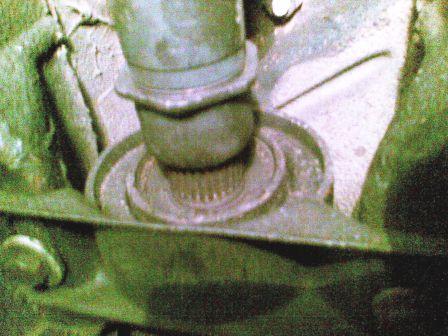
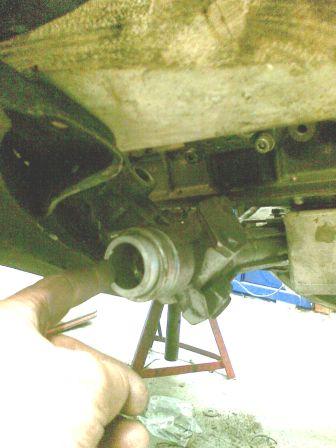
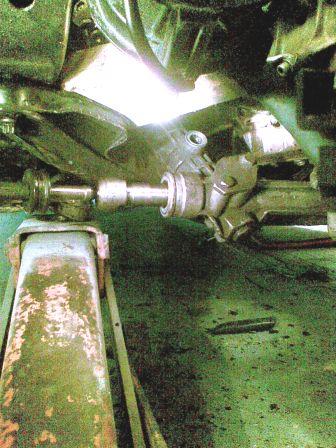
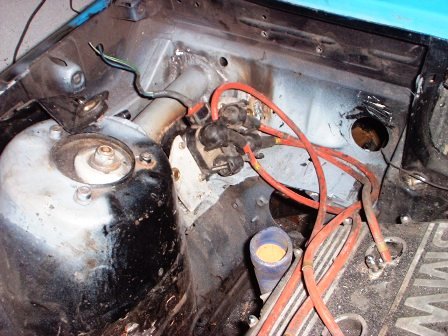
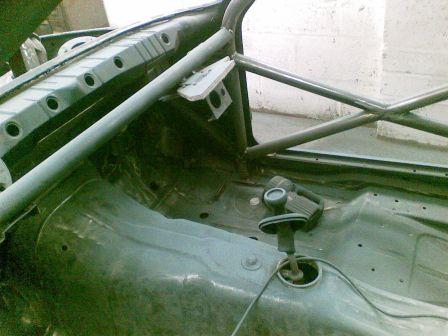
i've had a quick meassure up with regards to moveing the engine back and the effect that would have on the prop, as you can see from the poor quality pic the prop has a sliding middle section, so i can shorten the prop nearly an inch just by compressing it, i then investigated the "nut" on it, it compresses a dust seal that lives behind it, if i remove the nut and seal i can shorten the prop 2 inches without spending a pennywhich is the maxmium i can move the engine back under the rules anyway.
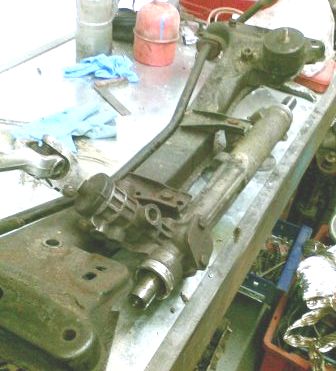
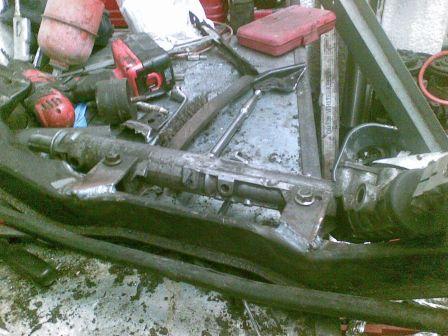
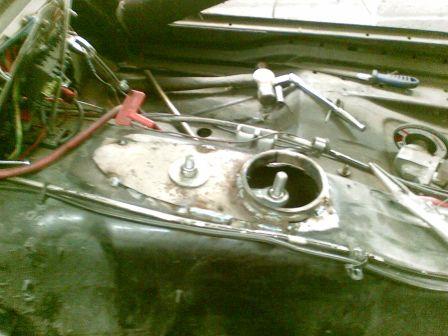
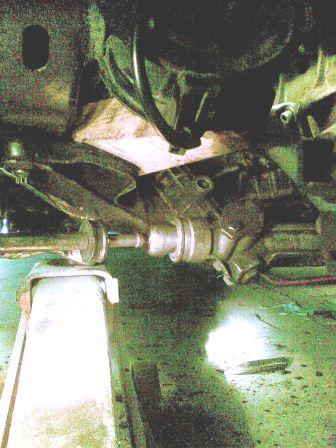
so i now know the prop is ok for moving the engine back i have a problem in the sump and steering rack want to occupy the same space, one way and probably the besy way round that would be to dry sump the engine, but i dont really want the added weight and complication and i dont have the budget for it either so the steering rack has to be moved backwards, apart from making the steering arms too short it shouldnt effect the geometry and will help with the fact the steering wheel is too far away now i've moved my seat back, so ive now dropped out the x member
and started to hack some of the redundant bits off the rack to give more clearance around the rack neck allowing me to get it in closer to the x member
Last edited by Graham; 16-10-2007 at 11:14.
Rules are there to be interpreted
I was browsing pics of US Ovlovs and BMWs before bed...And the first thing I thought of when I woke up was 'US-spec bumpers' :/
*n
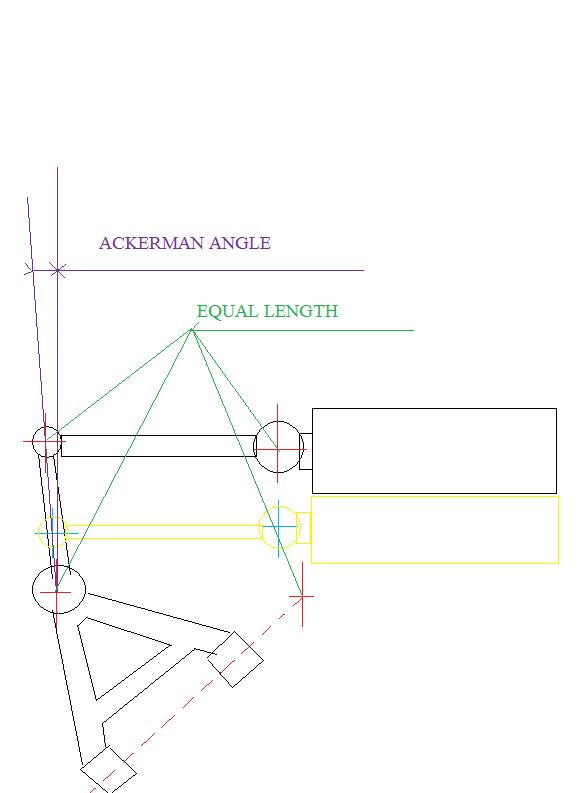
Graham, can plot your steering out for me ... as i think we may head towards a bump steer situation ...
the yellow arm is shorter than original
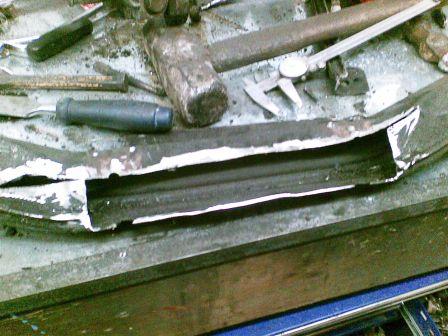
a small dave roberts style exploritary incision and the X member looks like this
yes bump steer, i have thought about it, to be honest i dont think its going to be an issue, im going to use some M3 offset rear bushes which will move the bottom arm a bit and reduce the amount the steering rack link arms will be too short by,
its never going to bump steer by much, the front suspension is allmost zero droop and only compresses by 2 inch infact i think its a little less than that so the total travel is only about 2.5 inches maximum.
i remember wickes escort should of bump steered like hell because i moved the TCA pivots but never got around adjusting the rack to suit, but it didnt, that i put purely down to a very limited amount of suspension travel
Last edited by Graham; 16-10-2007 at 12:39.
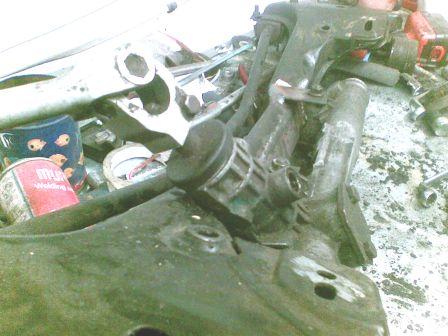
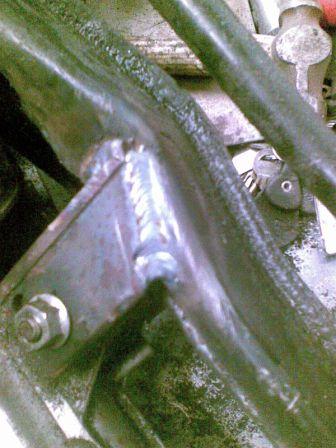
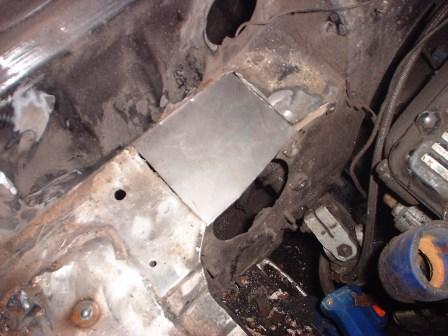
a bit more progress, hole in the x member filled in and the rack back on with some newly fabracated mounts thankfully the welder was having a good day and produced some lovely welds
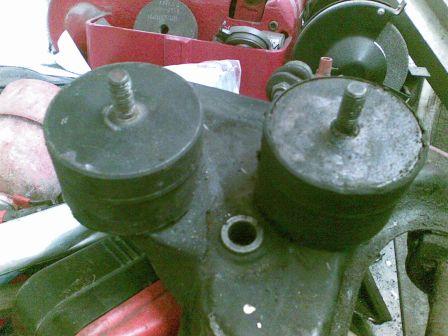
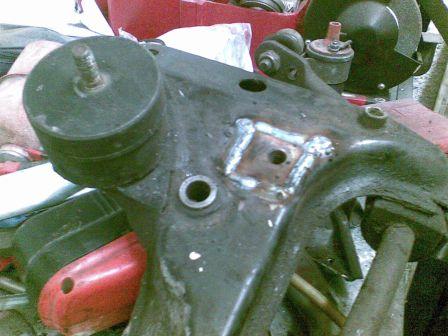
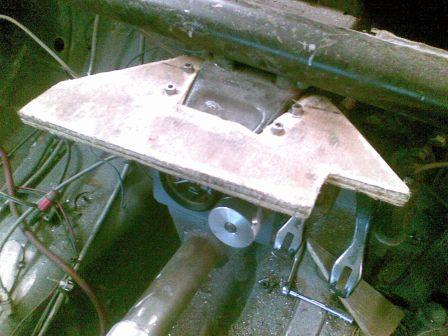
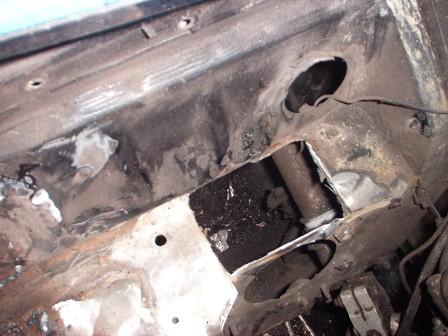
i now had a new problem now that rack has gone back 45mm, the engine mounts want to bolt to the x member just where the lower arm is bolted on, the solution was to add an extra engine mount to both sides of the x member and for the engines mount to sit on a plate bridging the two, that left a new problem, no way to bolt these extra mounts on without cutting enorous holes in the x member and robbing it of a lot of strength just where it needs it, as a fix, i cut out a piece of the member drill a hole in it welded a nut on and welded it back in place, hey presto, capitive nuts into which i can screw the engine mounts which are actually RS2000 ones
Last edited by Graham; 28-10-2007 at 14:09.
now the engine has gone back 45mm, i can reach the gear leverpic shows it right at teh back of its hole, infact i've had to notch a bit out of the back of the hole
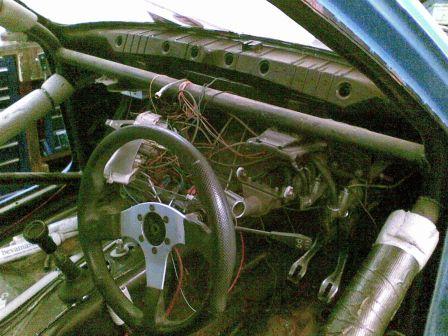
having prized the steering colume out of its mounting bracket you can see how much it needs dropping, strangly where it naturally wants to sit is the right heightyou would of thought it naturally wanted to go where bmw attached it!
after grinding off the shear bolts i've extended the bracket attaching teh colume to teh body, the bottom bolts on the colume as std, i'll weld the top to the body
steering wheel is still too far away, but i found a handy block of nylon to turn into a spacer to go between the steering wheel and its removable colume mounting boss
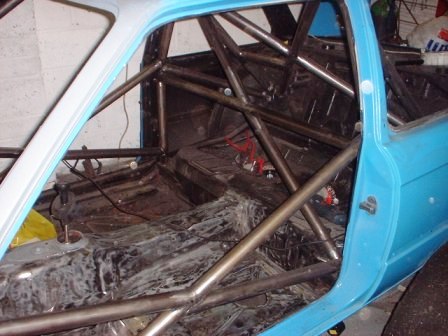
without the dash in inside of the car looks a huge mess!, but its not going back in i shall fabricate a small instument binical instead, it also save quite a few kilos in weight, the pic quite nicely shows the low slung height of the steering wheel to suit my new on the floor nearly in the back driving position
a little more progress, i tidied up the gear lever hole with a pair of tinsnips and make a new one, its a bit thicker than origonal as the factory tunnel is made of fairly thin metal and the rose jonted gearlinkage was pulling through it, i also put a nice lip on it to retain the gearlever gaitor
its only tacked in place for now i'll seem weld it later when doing other bits inside the car
struggling a bit for motivation last night i removed all the windows, doors and 95% of the wireing
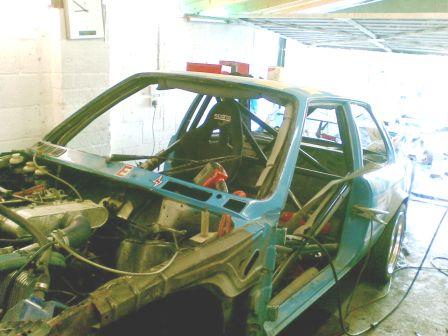
keep at it grahampopcorn:
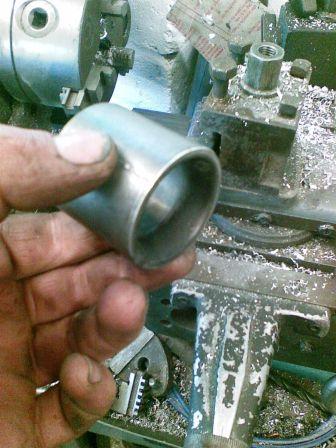
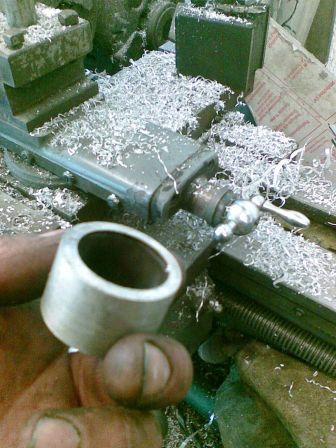
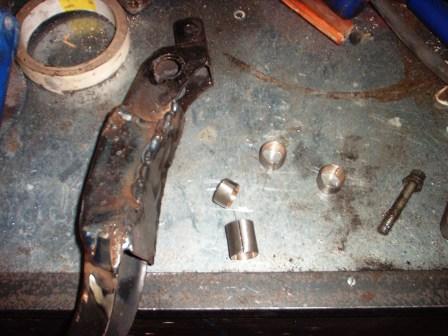
this morning i thought i'd better do some proper work on the car i knew i would need some lock stops to stop the bigger wheels and tyres fouling the inner arches so i dug out some old carb chokes and turned them down to fit inside the outer rack casing to liimit the steering movement.
its amazing how times change, 20 years ago i would of never dreamt of remachining chokes to make spacers they were far to valuable for that!
finally i did a quick visual check on the tracking with the car back on the deck, it was toeing in miles but i have plenty of adjustment because since i rose jointed the steering to clear the big discs i fitted the other year each side adjusts at the rose joint as well as at the OE bmw adjuster
Last edited by Graham; 29-10-2007 at 15:47.
Stop with the seam welding of that tunnel... it wont come out with hit an inch miss an inch stiches .. and every time the arc strikes and the wire feeds your adding grammes ...
Looking good though, much better driving position
yeah its really comfy to sit in the steering wheel is a nice height and distance away, door bars are now high enough to make great arm rests, it might take a tad of getting used to when i actually drive it because the new seat position is so far back i can only just see the nose of the carLooking good though, much better driving position
It seems you have been a very busy boy Graham.Nice work
tommy 2000
cheers tom, i too hope all this moving stuff back works, it should, if you take my weight into account im effectivily moving 25% of the cars weight back by a couple of inches, the car has always had a 52% front bias in weight distribution, i'd like it to be more like 55% rear, i doubt i will get anything like that as the weight saving i have planned will lighten the back end, if it comes out 50/50 or better i will be happy,
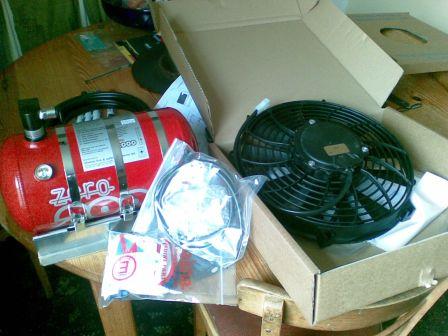
i did some shopping yesterday, a more efficient pacet fan which now i've moved the engine, will fit on the back of the rad which is the best place for a fan rather than infront of the intercooler like the current one, and a nice electric extinguisher which can go in the boot ( more weight moving meassures) and save me using poxy bowden cables although i wanted to go that way for a while the cost put me right off, but PLR did me such a good price i couldnt resist, oh and a cable for my bias box, i dont really need one but now i dont have a dash the scruits might get a bit jumpy, cos they can see there isnt a locking devisce on the bias bar.
Last edited by Graham; 31-10-2007 at 12:34.
Great progress Mr Bahr, should be lighter and have better weight distribution for sure, good work
Sierra cosworth turbo race car
QMN saloon car championship
RETRO Motorsport
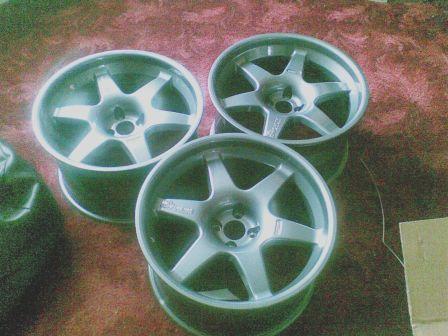
rest of my new wheels just turned up
not much more progress
i spent a while pondering how to make my new dash, and decided i had a perfectly good one i just needed something to attach it to, in the i found a lovely piece of composit materail which slide into the back of the dash with a nice snug fit making no other fixings nec and it quick release
i also drilled the colume mounting bracket to take the fuel pressure gauge (actually an oil pressure one) and the bias adjuster knob. and ground off all the redunant bits of upper steering colume which used to carry the ignition barrel and the switch gear etc
i thought tom burgess wood appricate my choice of composit material for the dash mount
plywood, thats a composit!

Last edited by Graham; 01-11-2007 at 16:13.
cant see nothing wrong with the choice of materials used there
lightweight aswell
although all my wood has gone now
Oh and the rims look wicked
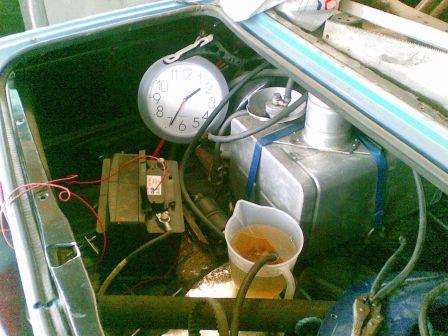
long long shifts and finally getting the builder back to finish the garage roof mean little progress, but i did get as far as testing the fuel pumps and plumbing for flow
meassuring the amount of fuel returned to the tank after going through the pumps, fuel lines and pressure reg showed that the pumps are still in good shape and on normal pump fuel can flow enough juice for 600bhp, i think the 8mm fuel lines are restricting the pumps a bit because the pumps will flow more than that when tested with shorter fuel lines, but im not worried they are flowing plenty enough for my needs
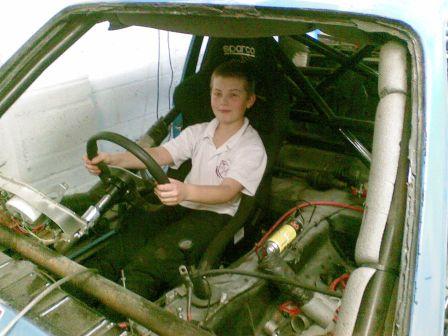
my son stephen testing the driving position
now the engine has moved the strut brace wont fit any more to i removed its mounts, its main purpose was actually to support the bonnet anyway as the struts are tied into the roll cage
Last edited by Graham; 12-11-2007 at 19:14.
This looks like some kind of bomb your building there Graham!
Timing device, power supply, combustant - Al Queda would be proud of that!
not been totally idle, i've taken the pedal box out and welded the pedals back up, they looking a bit messy now having been cut and rewelded twice, while i was at it i boxed in the back of them to stop them flexing and twisting, i also adapted some small end bushes to replace the worn/broken o/e nylon ones
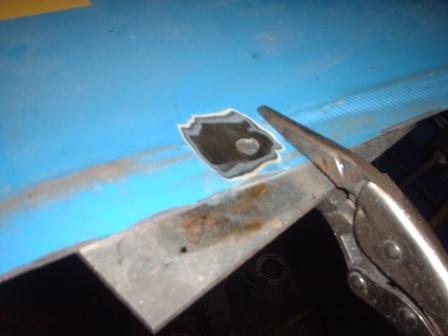
onced id removed the pedal box from the car i found a small half penny size rust hole under one of the spreader plates which secures it, after a dave roberts style exploritary inscision its was some what bigger!
next a welded some brackets on to hold the coil pack, which became homeless now im not running a strut brace
thers no money in the kitty for a fibreglass boot lid so i removed the outer skin form all its stiffening and mounting gubbins, its not now much heavier than a grp one and very cheap
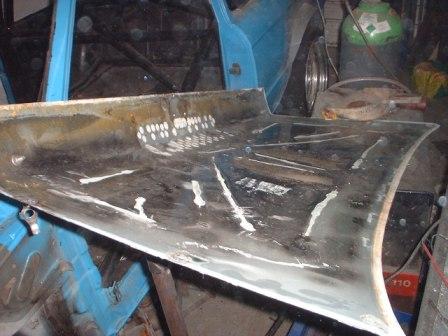
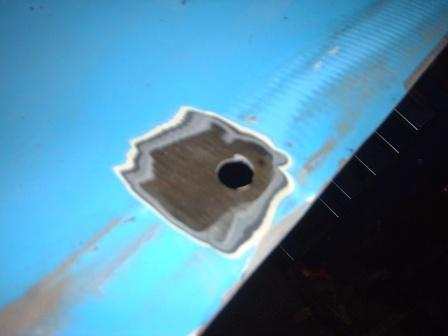
one drawback with reusing the boot lid, it has holes in it from the old rear spoiler, such holes are difficult to weld up in a thin single skin, so i hatched a plan
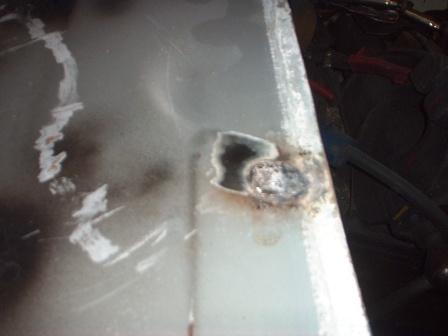
grind area around hole
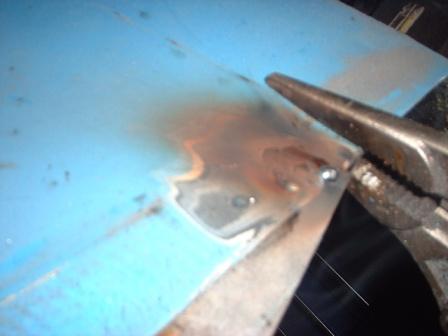
place piece of aluminium under hole
weld up hole, the weld wont do any more than barely stick to the aluminium
pull aluminium plate off
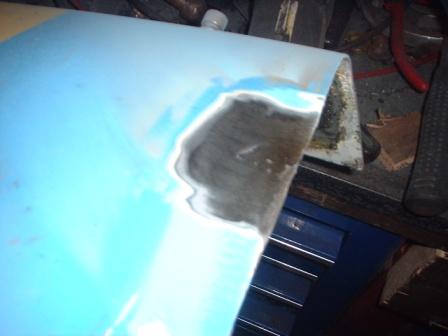
grind smooth
almost flat underside of repair
once you have ground off both sides you have invisably repaired a thin skin with no or almost no distortion
so i can repaint and have it looking nice and shiney i've been cleaning the inside of the car with a wire brush in an angle grinder, the idea isnt to actually strip it back to bare metal, just get rid of and remaining bits of underseal, dirt, crap, my previous efforts at tidying it with a pot of paint, rust etc.
googles and thick clothing are a must though, in the angle grinder these brushes shed bits of wire like like arrows, they get everywhere and often go through you clothes, even found one in nesting in my pubes in the bath last night
once i got feed up with wire brushed i started to mock up for my bigger rear brakes, im using alloy 5 series calipers which give 35% greater pad area than the current 3 series ones aswell as being a lot bigger they are also much wider and take a vented disc they weigh the same as the old ones

Last edited by Graham; 24-11-2007 at 17:25.
A bit too much info there Graham..
Great progress as usual Graham, I'm jealous
You could have just stuck a grommet in the hole in the boot you know
Sierra cosworth turbo race car
QMN saloon car championship
RETRO Motorsport
could of done but the holes werent symetirical, more sort of random so it would of looked stupid
Ok I'll let you off then. Boot lid looks nice and light, like you say probably not much different in weight to a inner skinned fibreglass lid
Sierra cosworth turbo race car
QMN saloon car championship
RETRO Motorsport
Thats a fair bit of progress you have done there Graham
The boot looks very neat aswell
its something i do at the end of most seasons, review what worked, and what could be improved, usually the things i change one season if they work ok then stay untouched for the next couple of seasons, the suspension is basically staying the same as is the drive train, most of whats changing is in the name of weight saving and distribution to avoid making the car too light at the back end,
at the end of the day its because i want to be able to run at the very front of the grid, the aim is to take an overal championship win by anialating the opposition, the trouble is the opposition are getting stronger so i have to as well,
secondly for me half what i get from racing is developing the car, which is probably why i never plump for a car you can build into a winner with of the shelf knowledge and parts
Last edited by Graham; 24-11-2007 at 20:40.
whoopsi've just gone a bought a very chavtastic rear spoiler
my daughter is pretty disgusted with it
and suggested i'd be buying noens next
my sone had a grin though because he knows no way is it gong to end up on my car looking like it currently does, so take a look now cos its never going to be seen like it again

Nice progress graham
Also your aluminium trick also works with copper pennies (make sure they are the older copper and not the newer plated steel ones which came in in '98 or something!?)
steering colume out
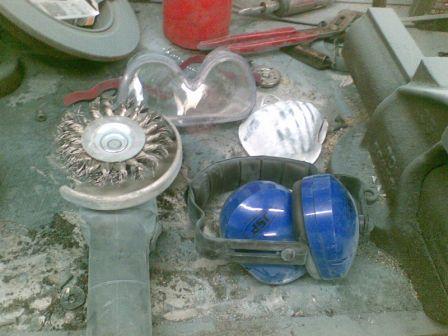
spent most of the evening using these removing the last of the loose/really yukky paint etc from inside of the car
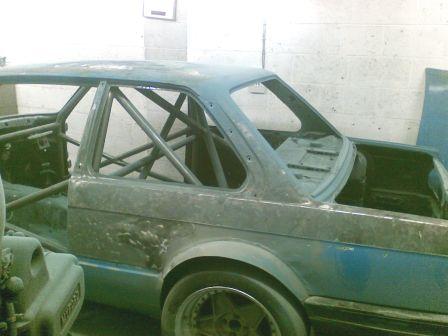
then went onto the outside, where i've taken off about 3rd of the paint which is pretty thick as its been resprayed twice ontop of the factory paint
forunatly i havnt found any rot, ther are just a few spots that could do with some worm poison
finally just for dave roberts a pic of my hammer draw
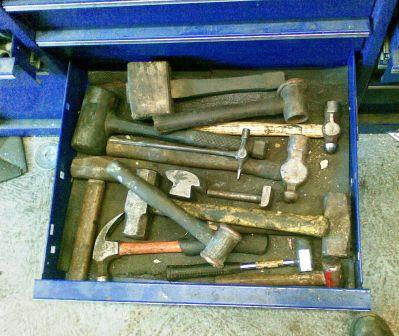
One day I will get round to gathering all my hammers for a pic.
How come you have stripped the paint on the outside, it isn't for weight saving is it?
I suppose 2 extra layers of paint on top of the factory paint must add something to the weight.
err yes! was going to get repainted again adding yet more weight so i thought i'd loose the paint already on it, think how much a gallon of paint weighs, with several repaints primers etc thats quite a lot of weight in paint on the car, and some of it was looking pretty ropey in terms of finish, runs, orange peel etc so it would of taken more work in sanding and DA discs to give a nice surface to apply paint to so i fugured it would be better to remove it all
I did think about how much a tin of paint weighs, but reckoned most of it would evaporate anyway.
It all helps though I suppose.
 Posting Permissions
 Reply With Quote

 Gary
Gary


.jpg)


Bookmarks