


I'm writing this tutorial mainly because after reading up on doing this conversion myself, using all the sources available, there was a load of stuff I never knew until actually carried out doing the conversion.
Things needed:
All of these things were (and can) be sourced from eBay, car forums, friends, autojumbles, motorfactors and scrapyards.
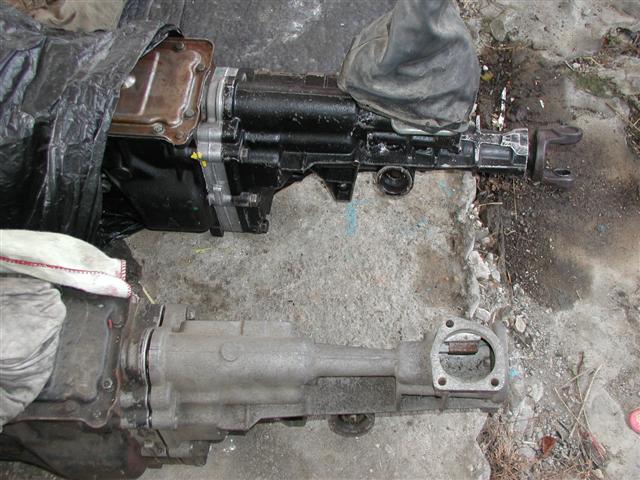
Type 9 gearbox 0-£5,000+ (eBay, scrapyards, burtons + more)
Out of any 5 speed RWD ford, Sierras, Capri's, Cortina's, and Granada 's. Best bet is to get one already mated to a pinto engine, you can use the 2.8i one from a Capri , but you need to either get the input shaft machined, or swap it over from a type 9. general consensus is that these gearboxes are the best because the ratios are equal to the mk2 escort rs1800, with an added 5 th gear, a lot of people find that there's too much of a gap between the 1 st and 2nd gear with the type 9, but if you've ever driven a car with a type 9 in, then you can be the judge of that.
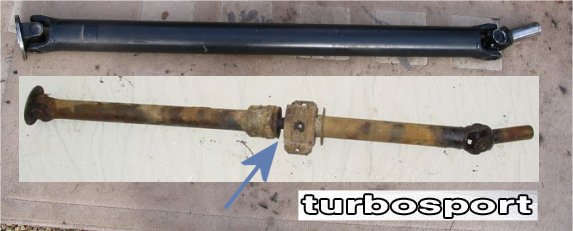
Propshaft £20-100 (eBay, burtons, rally design + more)
You'll need the shorter RS propshaft, depending on what axle you are running will depend on what propshaft you will need, for the non RS back axle you have to use the pre-rs2000 custom propshaft, as the flange is a different size. If your using an RS axle then an RS propshaft will do, either single piece or 2 piece will do the trick, there are arguments for and against each propshaft, but I ran the 2 piece one mainly because it puts less stress on the gearbox (or so I have heard), but there are arguments that the single piece is stronger, up to you, but I don't think there's a lot of difference
Quickshift gearstick or adaptor £60 (full stick) or £15 (adaptor) (burtons)
Otherwise the gearstick hits off the handbrake lever, for a while I just bent the stick forward so it didn't hit it. But this isn't a great way of doing it; needless to say I went out and paid the £15 from burtons for the adaptor plate.
Clutch (£15-£50) (motorfactors, halfords, and burtons)
You'll need a sierra (or Capri I think) 1600 OHC, 5 speed, 23spline, 190mm clutch plate. I went to most local places to find one and they only sold them as a kit, which includes a clutch pressure plate and a release bearing, the release bearing can be used, and should really be changed when you change the clutch anyways.
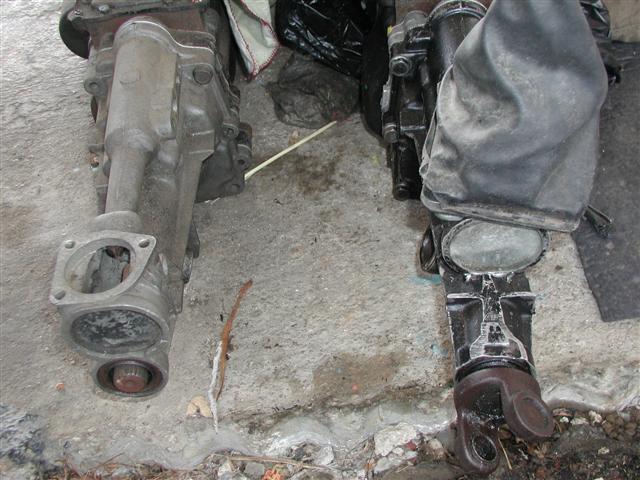
Bellhousing (£50-200) (eBay, burtons, forums)
I've heard this doesn't necessarily need changing, but have also been told that if you don't you have to persuade' the start of the tunnel with a big hammer, as it isn't quite wide enough, I binned the cast one for an RS Bellhousing, mainly because one came along at the right price at the right time, but also because they are lighter, and smaller, so fit into the standard mk2 tunnel without mods. Remembering if you do change it, you'll need to either bin or modify the dust cover (ill talk more about that below) and work out how to connect the clutch cable up, as there isn't a hole on the Crossflow engine where the cable would normally sit on the pinto.
Standard Capri Bellhousing RS2000 alloy Bellhousing Crossflow
Bellhousing
Dust cover N/A (home made)
The RS2000 has the dust cover as part of the sump, this isn't the case with the Crossflow, and they use a metal sandwich plate that sits between engine and gearbox. I've heard of a lot of people not running them without much quibbles, but I wouldn't recommend doing this as it's clearly there for a reason. Instead I ended up modifying my dust cover with the correct cut outs for the clutch cable bracket and the starter motor. Ideally I would spend time fabricating the correct bits onto the dust cover.
Modified dust cover (bit missing from where starter motor goes)
Clutch cable bracket (0-£10) (RetroFord)
I used an alternator bracket for this task, as it was the correct shape for the job and plenty strong enough. But I've recently seen ones being made by RetroFord for there Zetec conversions that would do the correct job ( http://www.retro-ford.co.uk/ )
Speedo cable (£3.25) (halfords)
You need a longer Speedo cable, mainly because the Speedo sender sits further back, you can use the standard one, but it stretches the cable a little, and for under £4 its not going to break the bank, just don't lose the circlip because this isn't included. You'll need a sierra one.
Gearbox mounting bracket £0-10 (scrapyards, eBay)
There are 2 methods as to how to do this, either carefully move the old ones back, or cut them off and attach it through the floor pan. I mounted it through the floorpan, and unless your cars worth a few quid and you don't want to go hacking up the floorpan fitting a new gearbox, id suggest you do it this way, because it's a lot easier. If you use the original mounts, but moved further back, then you use the original escort mount as it's the correct width for the brackets. If you mount it through the floorpan, then you will need a Capri/sierra mount.
Floorpan bracket for above N/A
You need to weld 2 set of plates with 2 pieces of threaded rod coming from them, in order for you to mount the gearbox through the floorpan, I've seen a few conversions where the person has simply used bolts, but for one, I think this would pull your floorpan about a bit, and 2, leave little lumps in the carpet where the bolts heads stick up. Plus you'll need some 25mm spacers.
How the gearbox needs to be mounted through the floor, and brackets + spacers
Clutch release arm. £23 (ford)
You can buy a pattern one from burtons for £25 inc VAT and inc delivery, which brings it nearer £40. alternatively you can buy a genuine one from ford for £23 inc VAT.
Standard rs2000 release arm
1. First remove the front half of the interior, front seats, carpet centre console.
2. You will want to jack the car up as high as you can, front and back, I used ramps on the back and some big logs for the front (not going to move this way!)
2. Remove the gearbox, ill not go into that, that's what the Haynes manual is for, that includes starter motor and propshaft.
3 remove clutch and replace with new one, once again, this is what the Haynes manual is for.
4. The gearstick hole sits further back with the type 9 gearbox, so you'll have to modify it to fit. A lot of people just cut it as an oval and leave it at that, I done it the proper way and marked it out as below:
This is after welding, but basically I marked out an oval, with the gearstick hole at the top of the oval, turned it around an welded it back in, the new oval should be 24cm from the edge of the handbrake hole to the edge of the gearstick hole, so you can make the appropriate oval from that (I did). Also, I found that for marking it out, a standard CD is exactly the right size for the curve at the tops and bottoms of the oval, as it's the size of the hole, plus about 10mm each side.
Also, you'll find underneath there's a strengthening gusset right in the way of the new hole, I had bad feelings about cutting through this, but when I had a look at pictures of a standard mk2 RS shell, the underneath of the hole looked like this:
That's the standard mk2 RS shell, which clearly shows a big chunk cut out of the gusset, and if it's good enough for an RS, then it's good enough for my lowly Crossflow. So I just cut through it and added a little bit of metal to complete the box section I cut out, whether you want to do something different then that's your decision.
Mine looks like this:
5. Cut out the old gearbox mounts. This is a pain, and means sitting under the car with an angle grinder whizzing about a foot away from your face. These need cutting away because they foul the type 9 gearbox. Goggles are a must!
6. Lower engine down. This is done by replacing, one by one, the 4 crossmember bolts, they are a 5/8 UNF thread they need to be a lot longer. You basically replace them one by one, and then undo them all slowly so that it lowers the crossmember down, but without removing it from the car, makes fitting the gearbox a lot easier because you have about 1-2 more space above it.
7. You should have attached the clutch bracket, to the Bellhousing and Bellhousing to the gearbox. Lift it all into position and bolt it back onto the engine the same way you took it off. I put the gearbox on a skateboard, with blocks of wood underneath it to support it and get it into position, then used a scissor jack to raise the gearbox into position.
8. Once it's bolted into place attach the gearbox bracket back onto the gearbox.
Find out where the holes need to go for the mounts and drill them.
Then put the mounts you've made through the holes from the interior side, on the other side add the spacers and bolt it into position add or subtract spacers to get the box to the correct height, generally they should be about an inch, but that will vary depending on mount or how you want it sitting.
9. Replace Propshaft. If you are using the 2 piece Propshaft you will need to space it accordingly usually the same amount as the gearbox. Of course you don't have to do this with the single piece prop.
10. replace all the other bits; speedo, clutch, gearstick, and so on.
11. add gearbox oil.
12. Before I put all of the interior in I just bolted the driver's seat in and took it for a spin just to make sure there were no unusual knocking noises or vibrations everything seemed fine.
13. Bolt back the rest of the interior and other bits you've broken or faffed with.


 Reply With Quote
 Great thread, I was going to do something like this on a website but never got around to it


 , so £50 well spent i say


 but drop me a line if intrested in how it looks; maybe i can email some one the pics for posting


 The gearbox mountings are the same for the auto and mk9 so if the propshaft is the right length, it will go in a treat.popcorn:


 What is not tooo clear is leccy sender in the 2nd picture


Bookmarks