


dont forget as the clutch wears the fingers move out again
so you need to design some slack in the system or lose clutch clamping force
oh re read you already had some slack inbuilt

dont forget as the clutch wears the fingers move out again
so you need to design some slack in the system or lose clutch clamping force
oh re read you already had some slack inbuilt
Last edited by Darbo; 18-10-2012 at 12:33.
Thanks for that, I remembered about the slack but not the fingers moving when tightenedOriginally Posted by Darbo
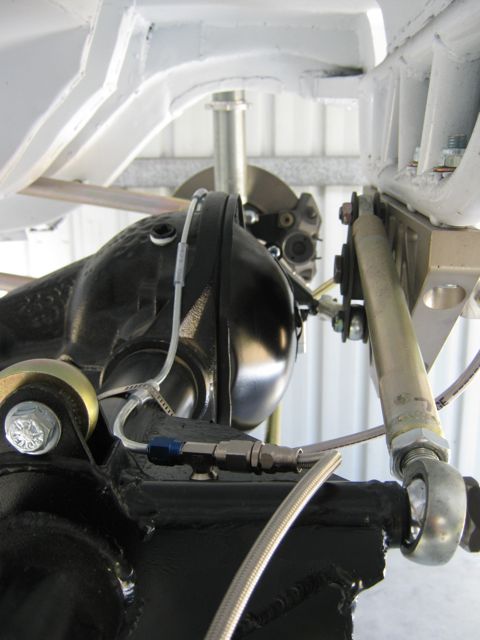
I have plumbed in the rear brakes
That will be it for a while as my back is protesting again so I will have to rest it but I will still beabout how to do things: for example I am working on a better way to sort the throttle cable and pedal.
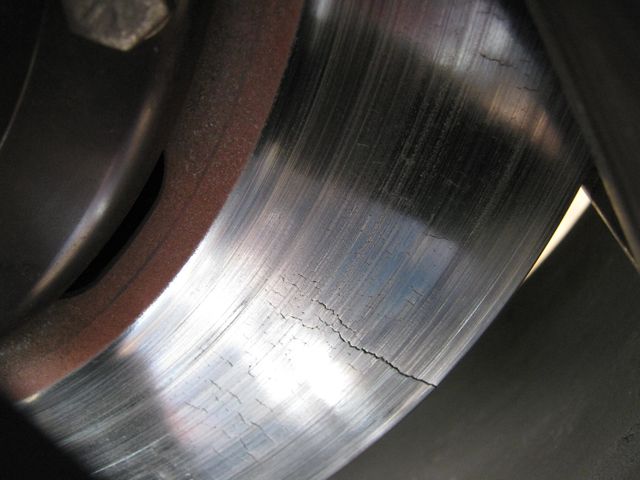
BTW the mate who borrowed my trailer had a bit of a problem in the supersprint with his BMW E30.
Looking good!
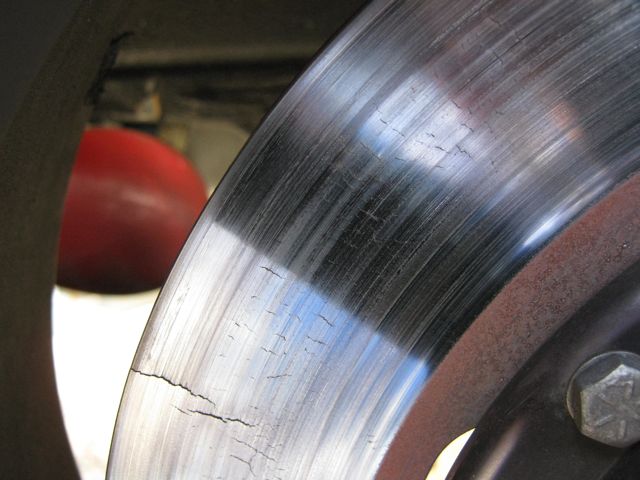
I had the same problem with one disc on my trackday car btw.
http://escort.accelerator.org
1968 MK1 Escort 1300GT
1969 'Big Wing' MK1 Escort
1972 MK3 Cortina 1600XL
1984 Sierra XR4i
And other junk I don't like to talk about!
Back to it
I have fitted the longer clutch slave cylinder spacer. I was able to use the same hard lines with a little tweeking but had to make a new plate for the bleeder.
Next on the agenda is making an exhaust system.
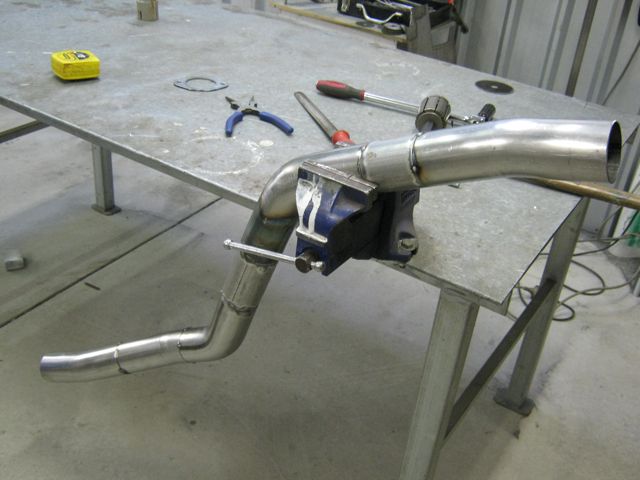
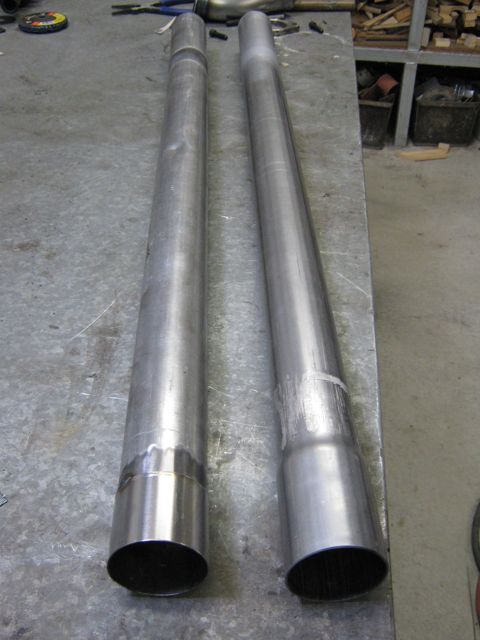
I had some 2.5in exhaust pipe lying around so I bought some mandrel bends to make my own. I could have taken the car to an exhaust shop when it is finished but as usual I wanted to see what I could do myself.
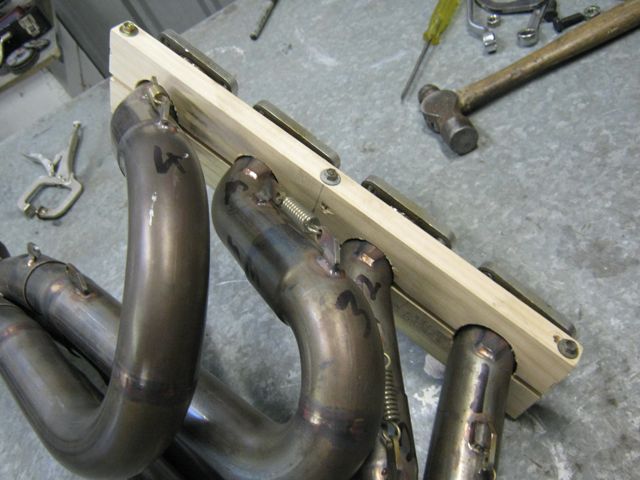
The first thing I did was to make a clamp to go on the manifold to stop the primary pipes flopping around when fitting it to the head. The problem is that 4 hands were needed to guide each pipe onto the studs. Now I can do it myself with a bit of juggling .
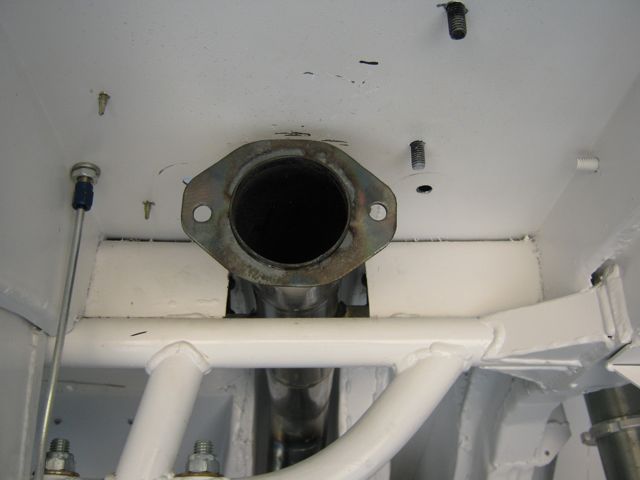
I made a flange to go on the manifold so that the system can be bolted on. The manifold is stainless steel but with some searching on the net I found that mild steel can be welded to stainless steel but stainless wire should be used. I tried with mild steel wire and it does weld but I may get some stainless wire to weld it properly. I have only tacked the flange on for the moment.
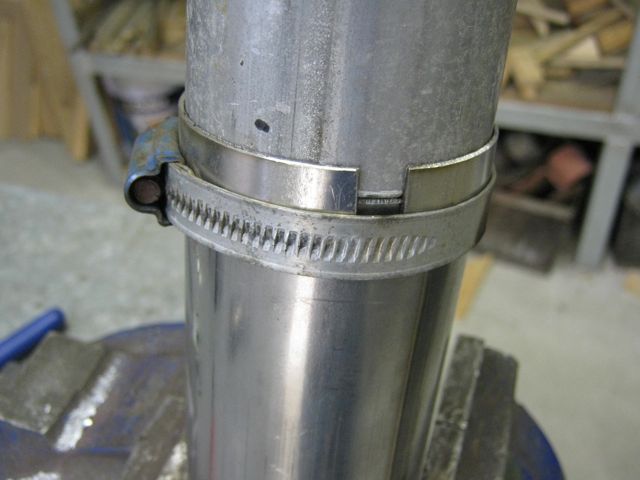
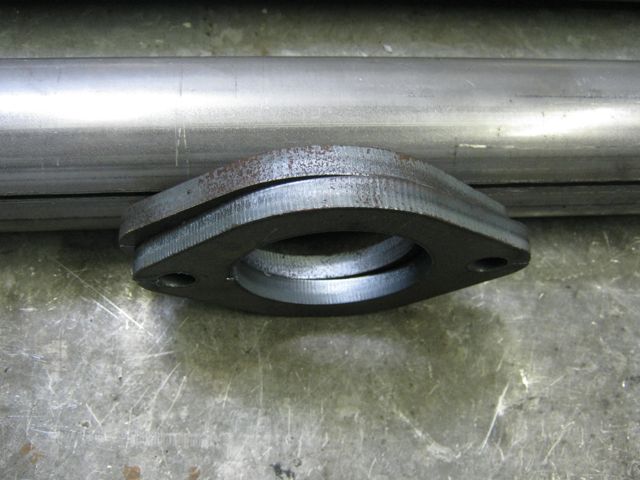
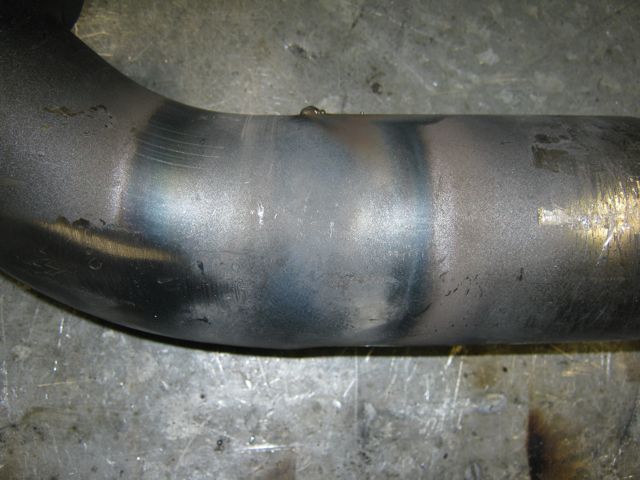
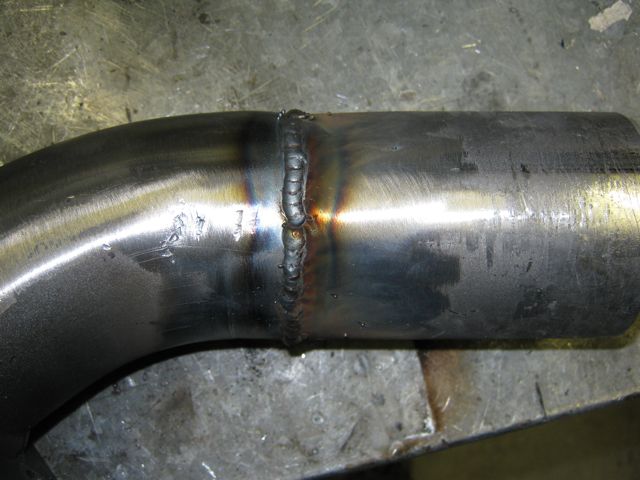
I made this clamp so that the pipe could be butt welded with some accuracy.
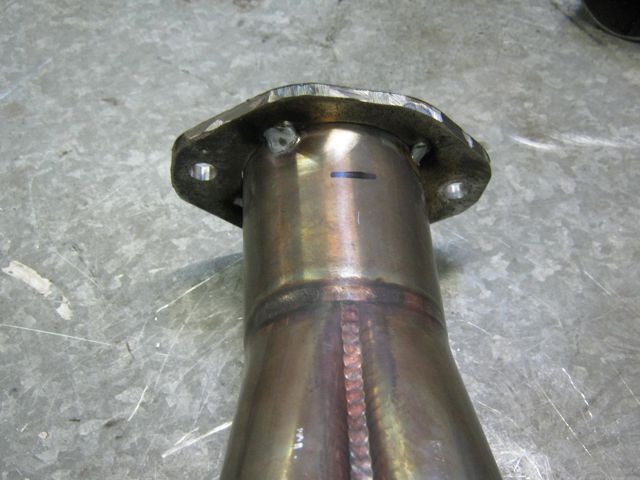
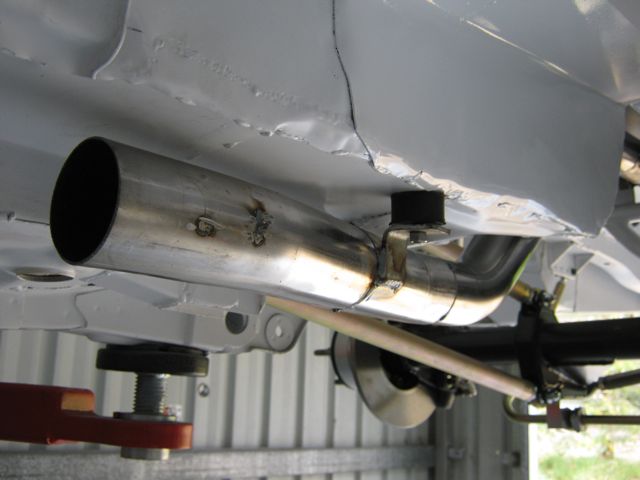
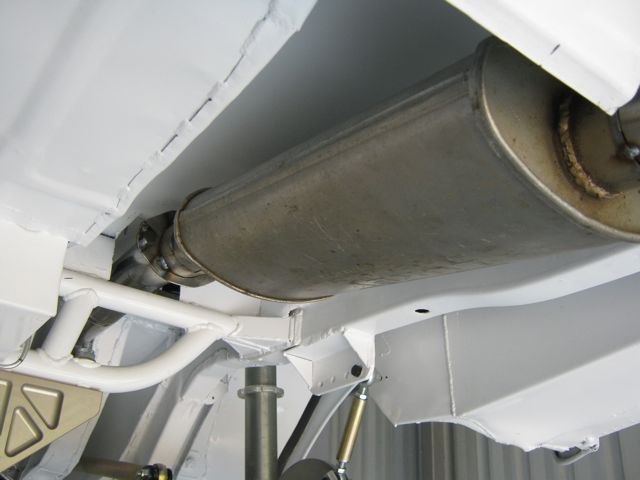
This is the section that goes over the axle.
Looking good, but I think that flange might be a bit too thin, and may be prone to warping.
I was told 8mm thick was the optimum size
http://escort.accelerator.org
1968 MK1 Escort 1300GT
1969 'Big Wing' MK1 Escort
1972 MK3 Cortina 1600XL
1984 Sierra XR4i
And other junk I don't like to talk about!
More progress on the exhaust
Fantastic build have really enjoyed watching the progress of this car
Is this thick enough
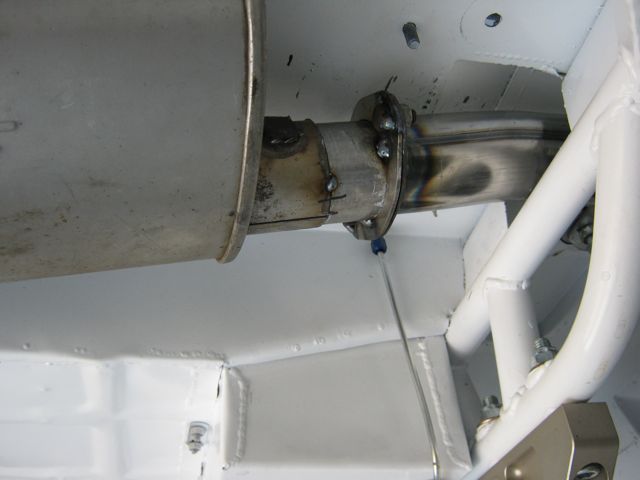
I have used 6mm before with no problems, the trouble was I ran out of 6mm steel for the rear joint so I used 3mm but the pipe does protrude into the flange so with some sealant and a gasket hopefully it will be OK.
I did get some proper flanges for the centre joint and also lashed out and bought a stainless steel flange to go on the manifold.
I made patten centre pipe and took it to an exhaust shop to get it done properly, expanded on one end for a loose slip fit onto the manifold end and a slight bend to line up with the rear pipe
I reckon those should do the job just fine

http://escort.accelerator.org
1968 MK1 Escort 1300GT
1969 'Big Wing' MK1 Escort
1972 MK3 Cortina 1600XL
1984 Sierra XR4i
And other junk I don't like to talk about!
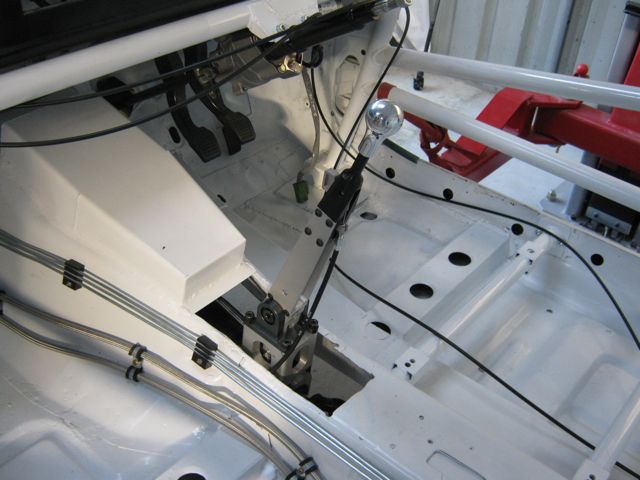
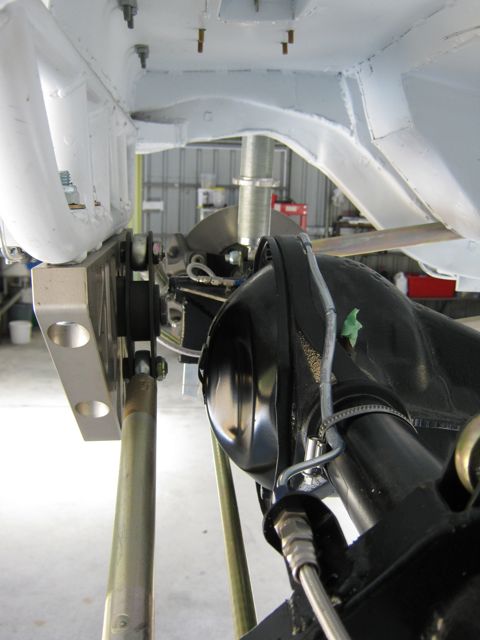
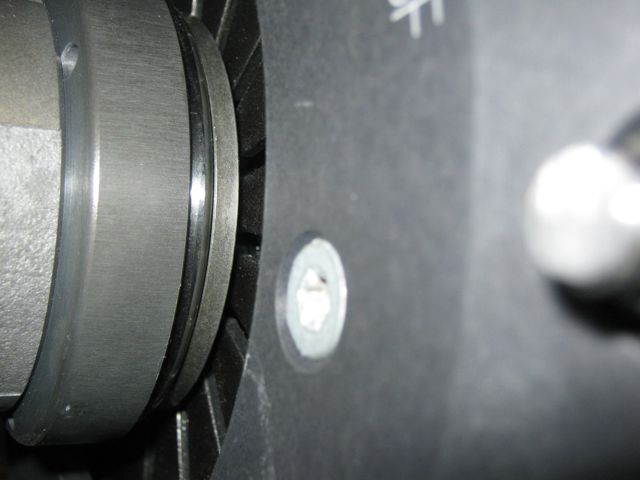
Gearbox back in
The photo isn't clear but there is about 4mm clearance between the release bearing and the fingers.
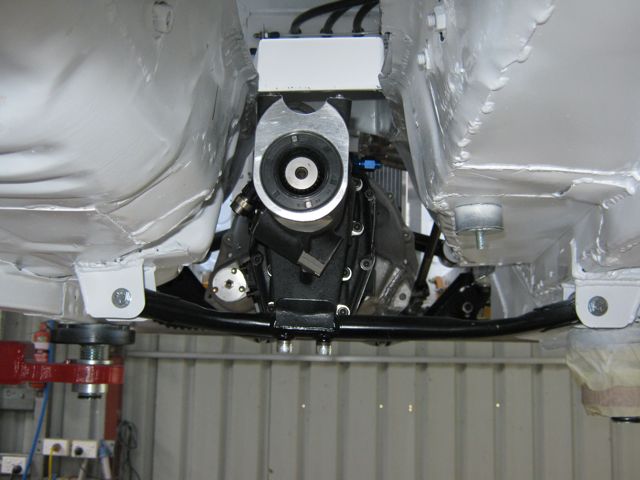
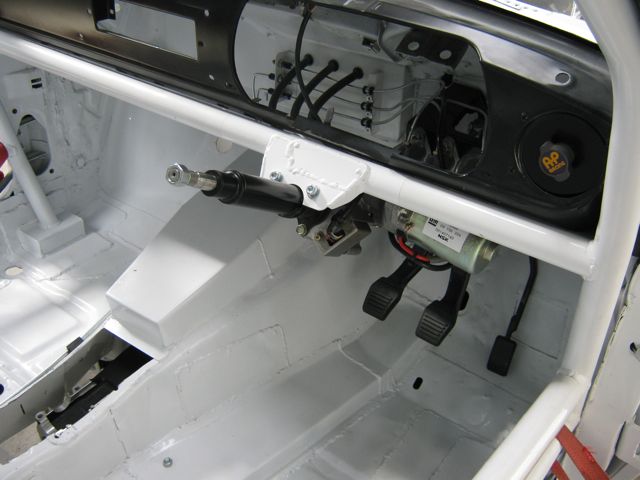
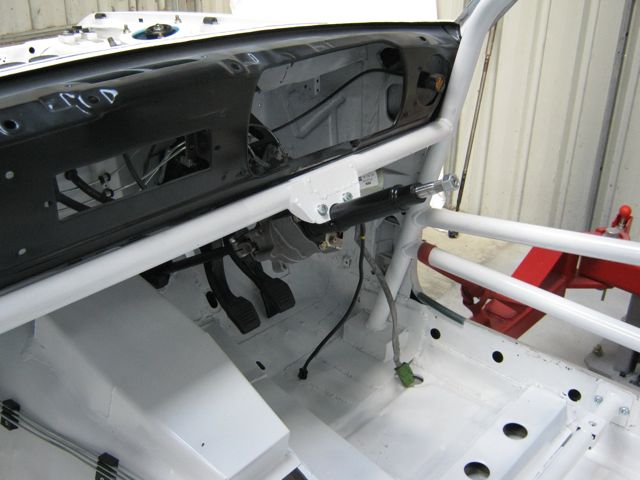
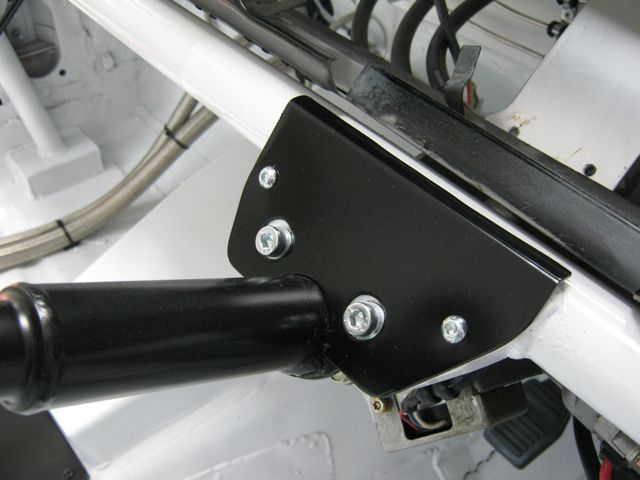
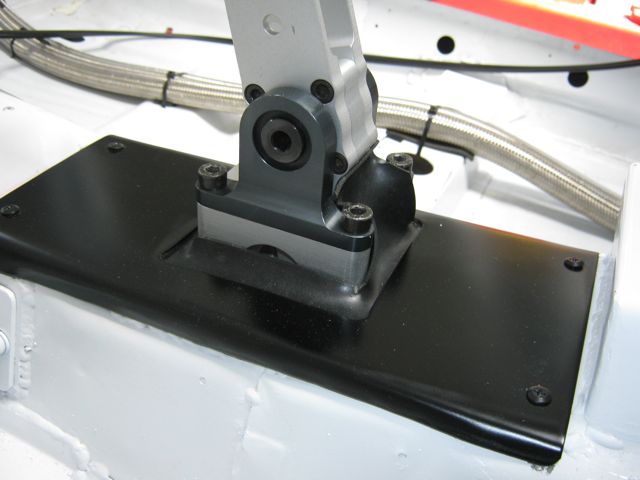
Power steering in.
I had to move the steering a bit towards the centre of the car to get more clearance between the steering column and the exhaust so I had to add a bit to the bracket on the cage.
I will put a piece of trim over where I have welded the bracket to make it look better.
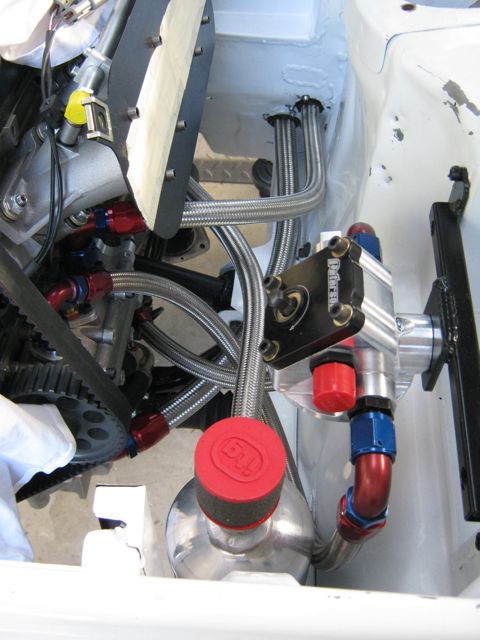
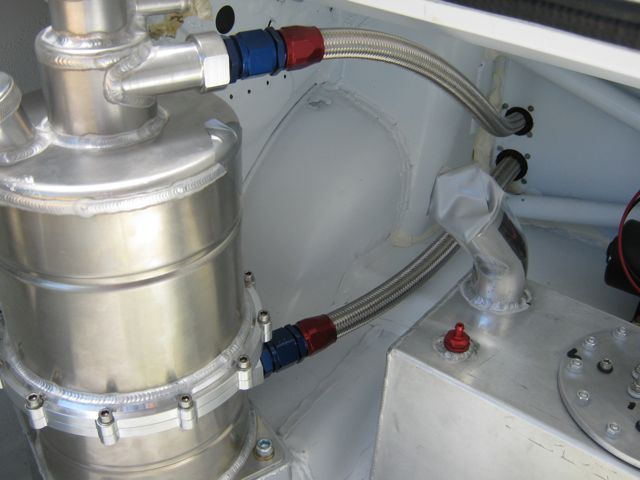
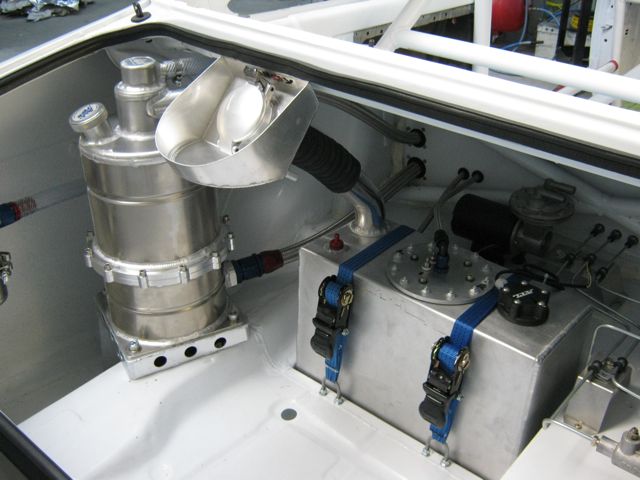
I have started the plumbing for the dry sump system
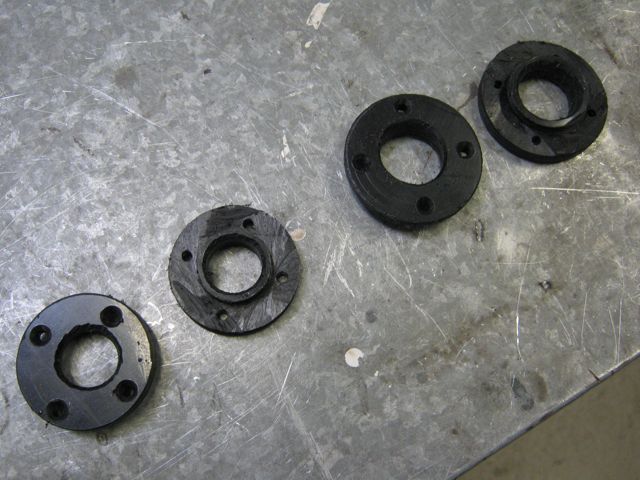
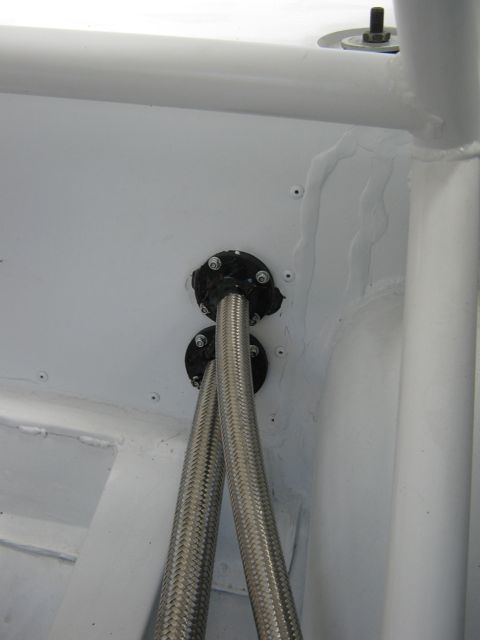
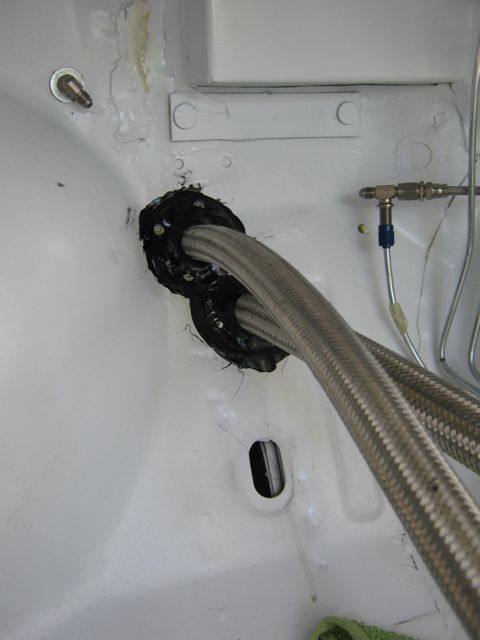
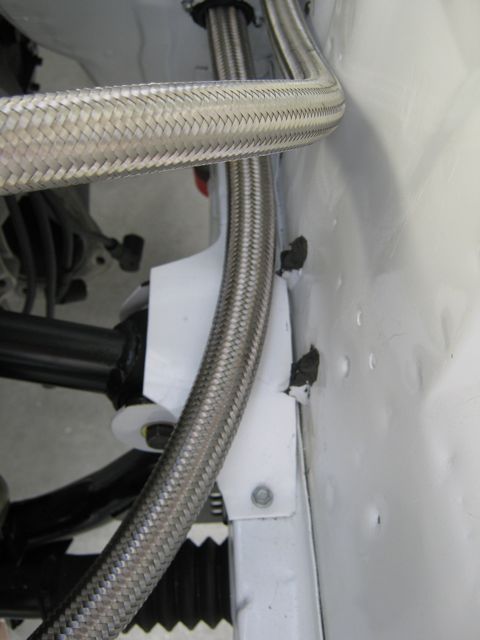
The first thing I did was to make some plates to go onto the bulkheads where the lines from the tank go through. I made these because the lines will only have fittings on the tank and pump ends so the hose needs to be protected where it passes through the bulkhead. Because there is fitting on the end the hole needs to be bigger than the hose size.
I made these from plastic. They really should have been turned up in a lathe but my machinist is out of action so I had to make do with a hole saw and angle grinder.
They are a bit rough but will be sealed with Sikaflex to tidy them up.
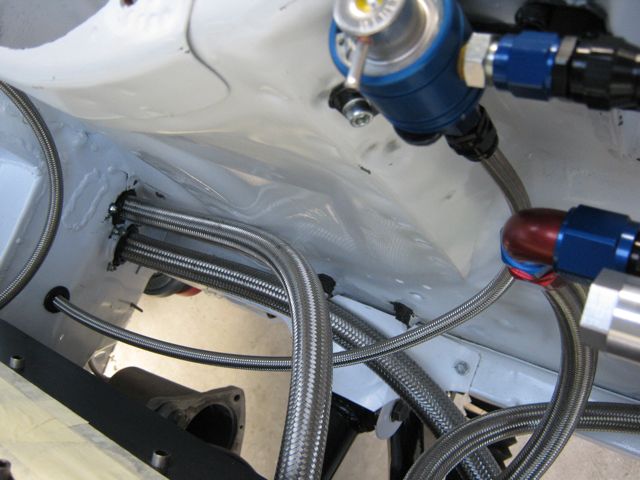
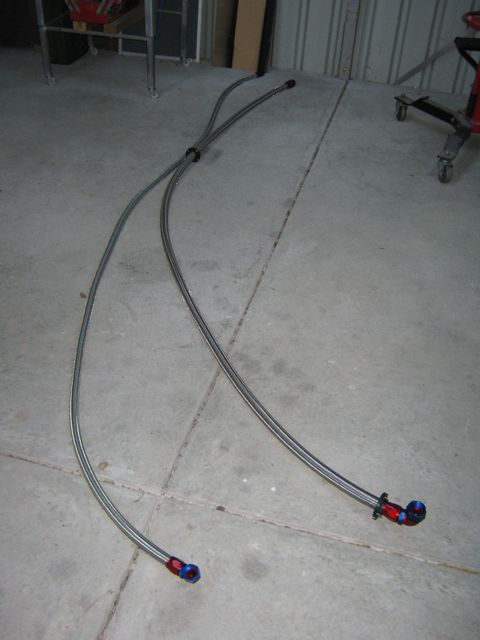
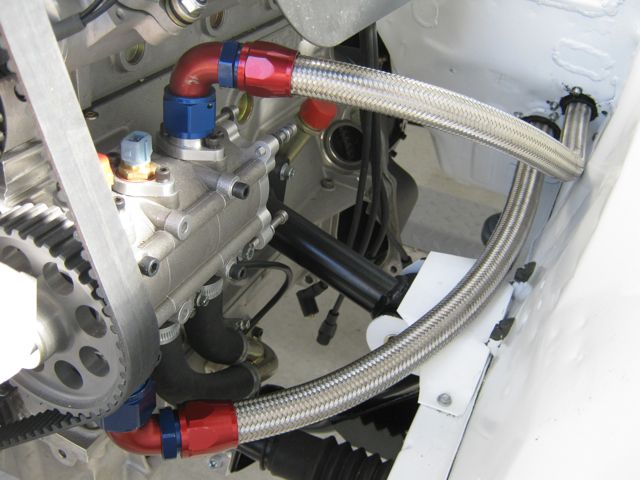
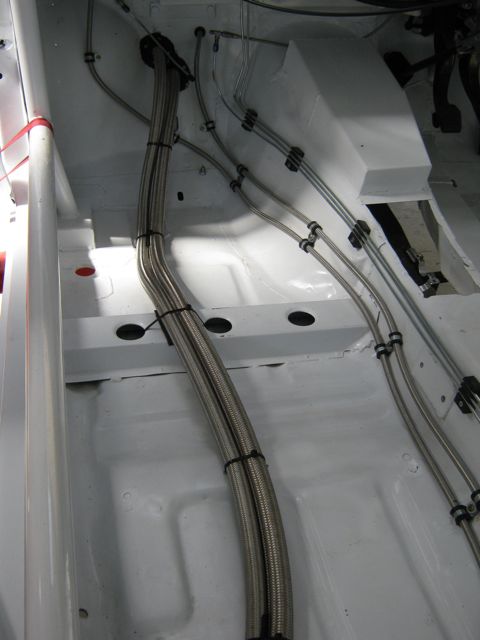
Next was to make the long hoses between the pump and the tank. The feed is dash 16 and the scavenge is dash 12.
You may notice that one line has the bulkhead plates on and the other hasn't. That is because I forgot to do the scavenge one and it was pretty hard making the lines so I am not going to redo it. What I will do is cut the plates in half so that they can go over the hose in 2 pieces.
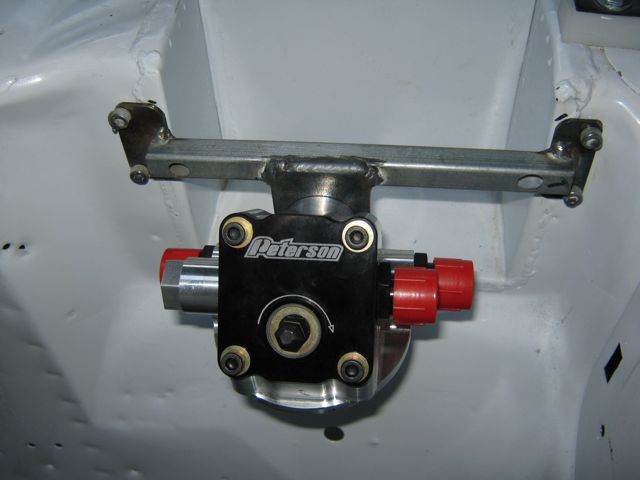
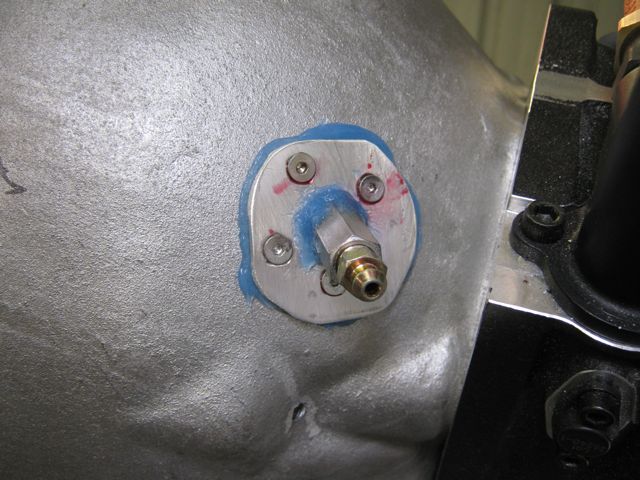
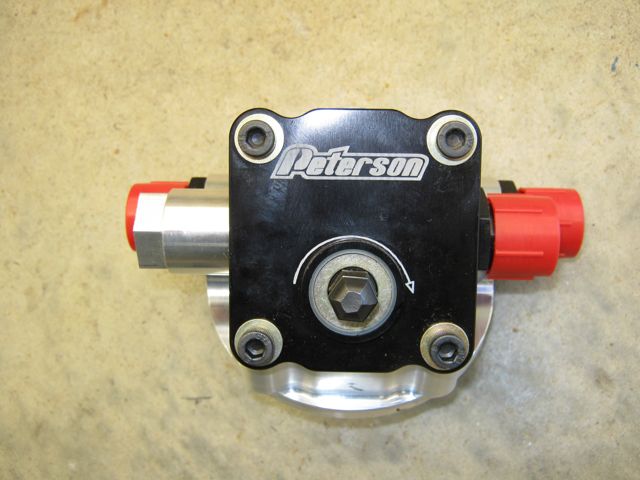
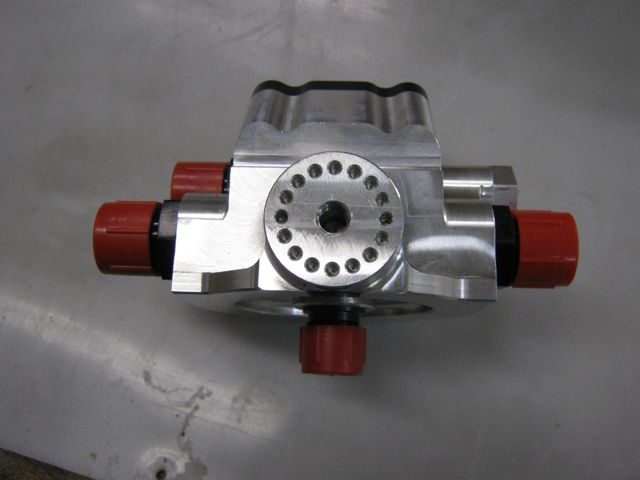
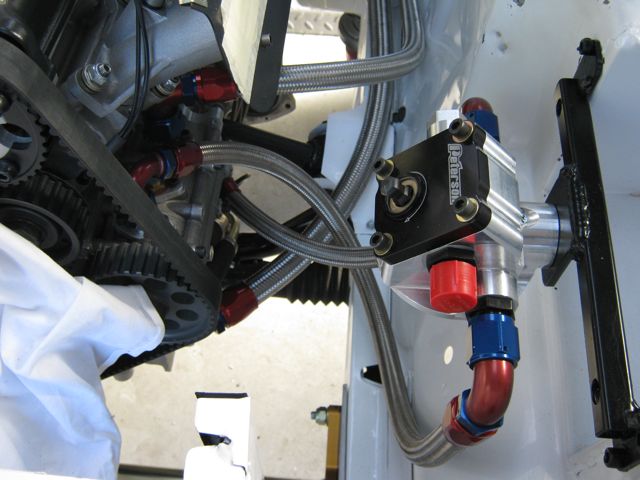
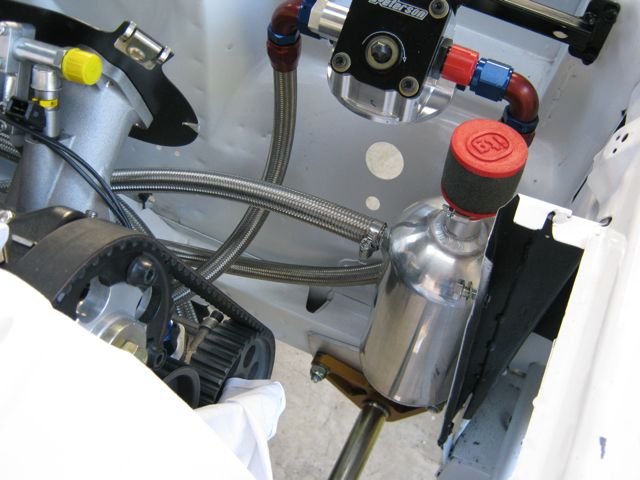
The Millington has the dry sump pump driven by the cambelt so priming the system can only be done by removing the belt which I don't want to do. I came across this Peterson part while looking on the net for a remote oil filter plate.
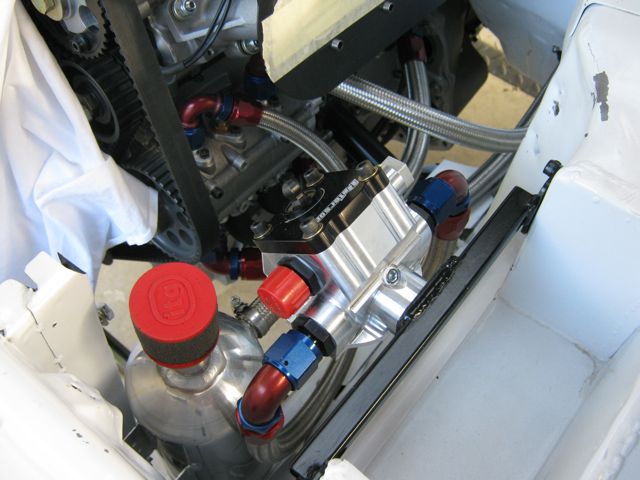
It is a remote filter that has a small oil pump built into it that is driven by an drill. The pump has its own oil feed that can come from the tank but I will have a container that I can connect to it only when I need to prime the system which will be when the engine has not been started for some time.
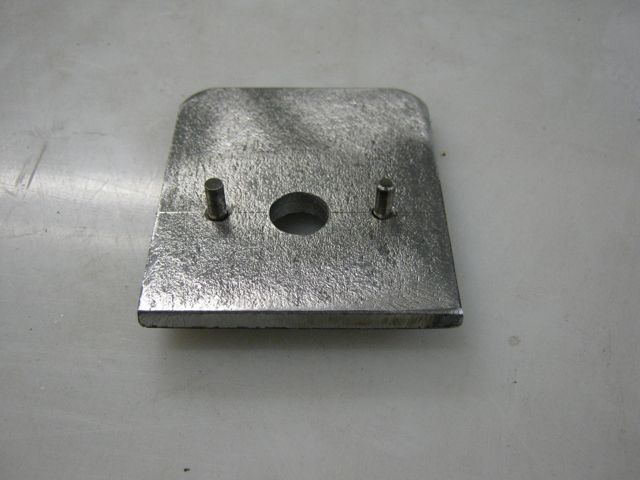
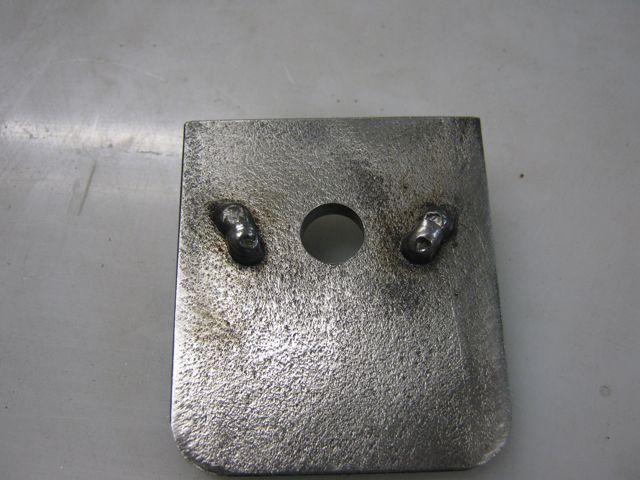
Mounting it was a bit of a challenge as it only has a central bolt and a circle of 1/8in holes. After some careful measurement I drilled two 1/8 holes in a plate and welded in two studs that I cut from a 1/8in drill bit. I was amazed that I had been able to drill the holes with enough accuracy for the studs to fit straight in, usually when I do something like this it doesn't fit.
Then I made a bracket so that it could be bolted to the inner wing.
Nice work!
http://escort.accelerator.org
1968 MK1 Escort 1300GT
1969 'Big Wing' MK1 Escort
1972 MK3 Cortina 1600XL
1984 Sierra XR4i
And other junk I don't like to talk about!
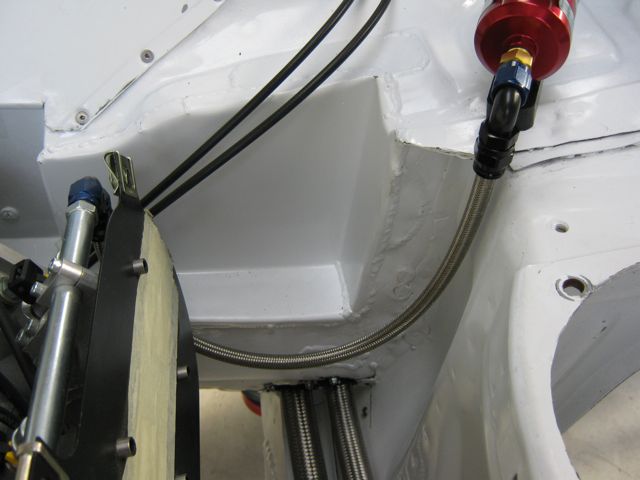
Yes, apart from forgetting the flange plates which caused problems when putting the oil lines in . My mate who was helping was not impressed. He was in the car trying to get the plates to line up with the holes in the bulkheads.
I told him it wouldn't take long but it ended up taking 2 hours.
Anyway the lines are in with plenty of Sikaflex sealing the flange plates.
Of course there had to be a problem. I didn't take into account that when the -12 to -16 adaptor was screwed onto the pump inlet the hose would sit lower which meant that it fouled the engine mount. The fitting did screw on but I didn't like the angle it was at so I had to cut a bit off the mount and put a piece of plastic over it to protect the hose.
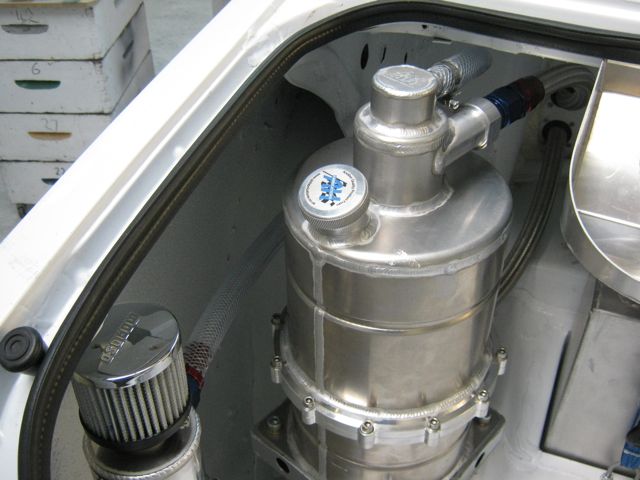
Then all I had to do was make the lines for the remote filter and fit a catch tank to satisfy the scrutineers. ( Well I was a bit more difficult than that but it is done now
very nice mk2 this
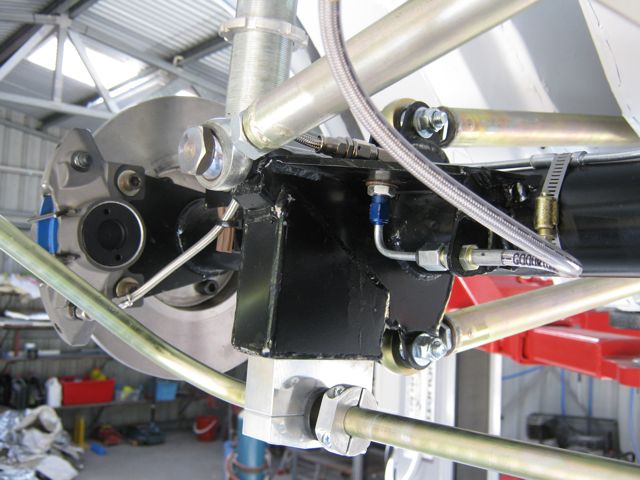
nice set up on the rear end
Major panic today.
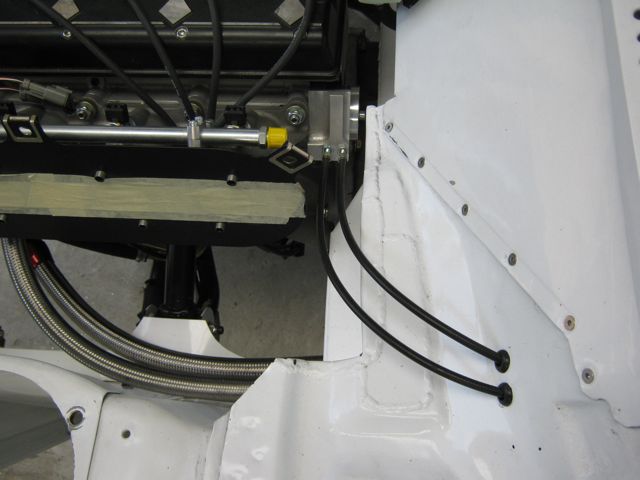
I thought I had better put the throttle cables on to the engine before I mounted the fuel pressure regulator so they wouldn't interfere with each other ...BUT... I couldn't get the cables on
Apart from there being very little room to get my hand in behind the engine the front cable would not squeeze between the head and the roller barrel. The only way I could see to get it on was to open the throttle half way to get enough clearance but I couldn't get two hands in the space to do that. So it was looking like the engine would have to come out a bit to get the cables on which I did NOT want to do. So I had do do some
I raised the car up on the hoist and had a look from underneath and saw the solution. I was able to put an allen key in the grub screw that held the throttle cable boss on and turn it enough to slip the cable in place but it wasn't easy. The rear one went on easily though.
The cables go through the firewall on the LHS not the RHS , more about this later.
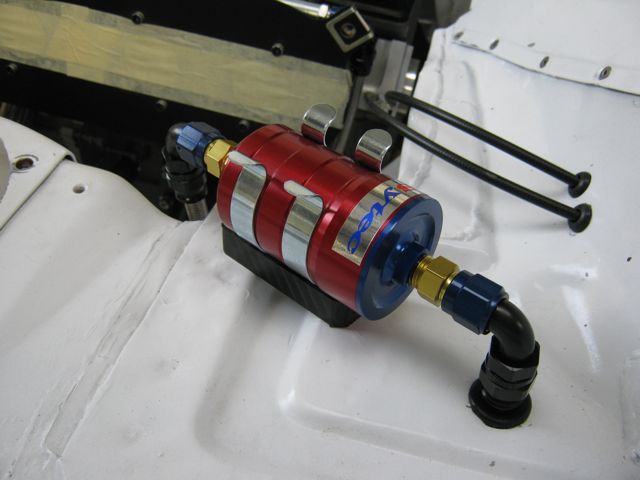
So relief that the engine didn't have to come out BUT then things didn't get any better when I tried to find where to mount the regulator. No matter where I wanted to put it there was a problem with clearances and where the fuel lines would run.
A couple of times I thought I had it sorted and I even started to make a bracket for one position until I realised that wouldn't be any good. It took me 5 hours ( YES 5!!) to finally find the solution. I was trying to mount it on the firewall but that was impossible so it is mounted on the inner wing.
Bracket made and fuel lines connected to the regulator
Nice work mate, the devil is in the detail!
http://escort.accelerator.org
1968 MK1 Escort 1300GT
1969 'Big Wing' MK1 Escort
1972 MK3 Cortina 1600XL
1984 Sierra XR4i
And other junk I don't like to talk about!
I can't believe i only found this the other day. Looking great and great choice of engine
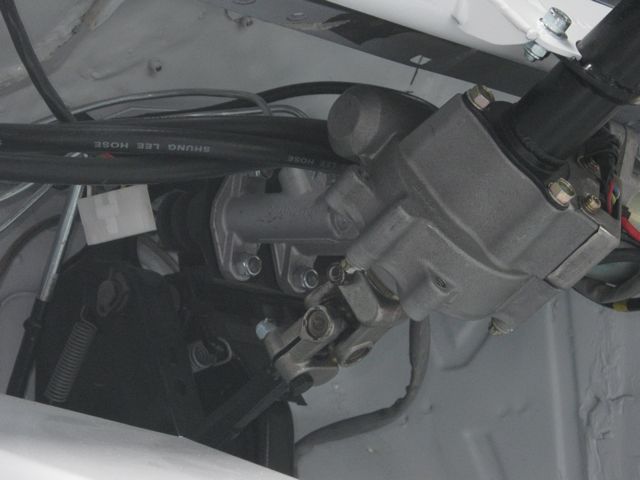
Is this your oil pressure sensor fitted into the top of sump pump?
I assume it is, I have only had a quick look at the loom that came with the engine so I will find out when I get to fit it. There are identification tags on the loom so hopefully it will be easy to fit.
I was going to put the fuel filter in the boot but again it proved to be difficult so I have mounted under the bonnet.
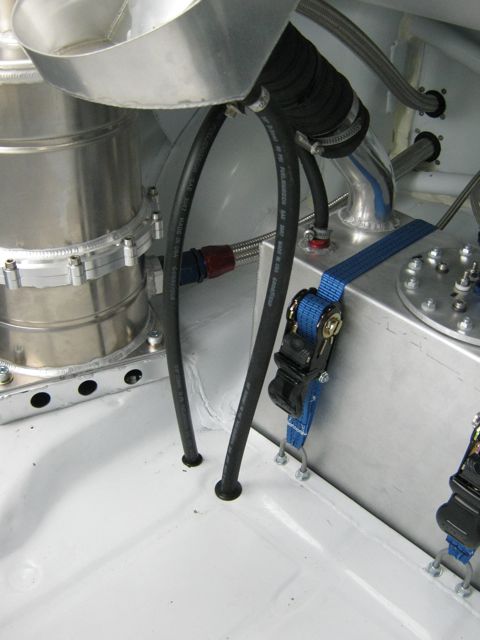
Fuel tank strapped in, just need to put some clamps on the filler hose and install the breather and filler bowl drain hoses.
Lots of detail done in the last 2 days. I am getting closer to meeting the deadline imposed by CAMS (our equivalent to the UK MSA). This deadline is because I want to have the car logbooked but CAMS (along with the MSA) changed the roll cage rules after I had welded mine in. Fortunately they recognised that there would be people in my situation and will allow cars that are being built that have roll cages complying with the previous rules to be logbooked. The car had to be registered with CAMS (and the log book fee payed) with photos of the completed cage. The only catch is that the car has to be logbooked by the end of 2012, and that is getting closer and closer.
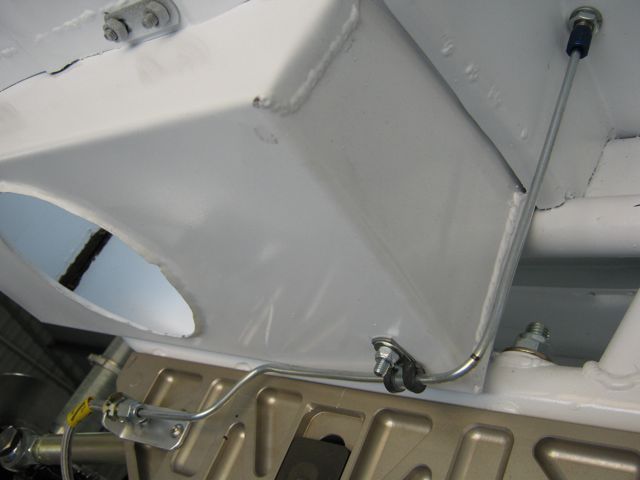
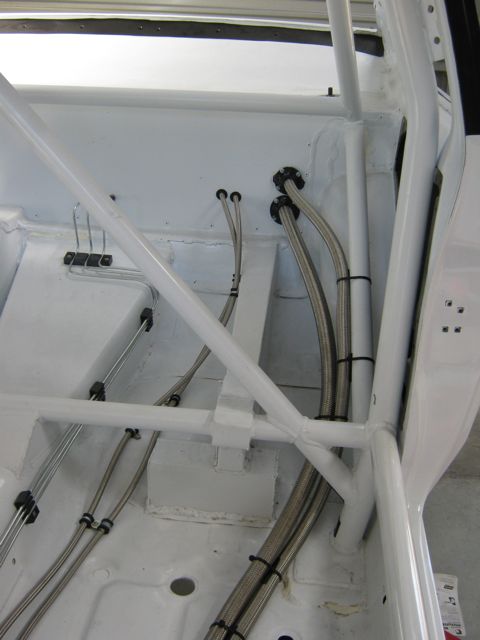
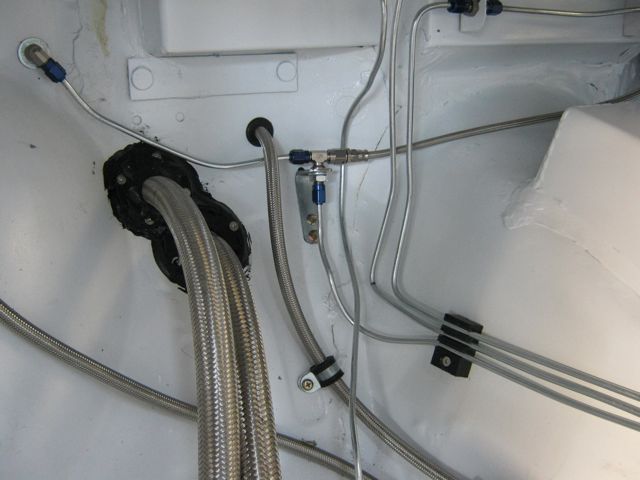
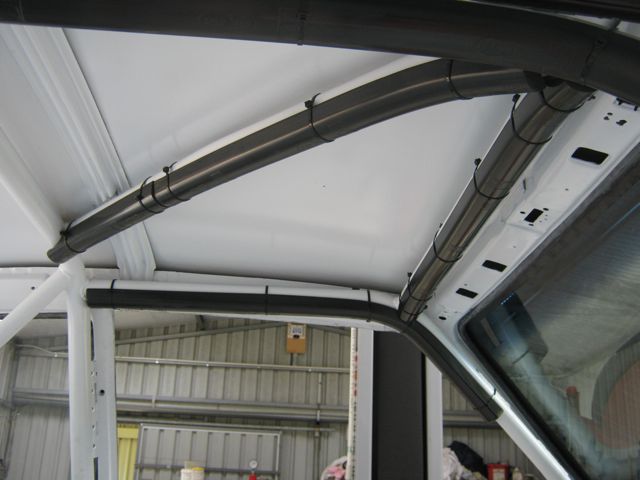
The fuel and oil lines have been mounted inside.
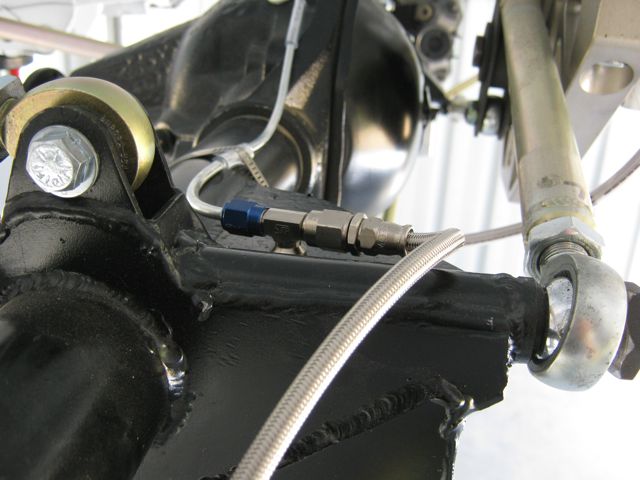
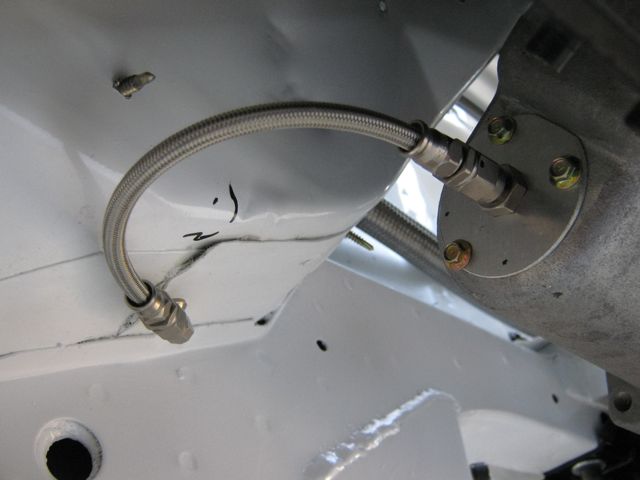
The clutch line connecting the gearbox to the body is in.
The brake and clutch lines completed inside. This all looks a bit messy but I wanted as much as possible inside and not in the engine bay. I will probably tidy it up when I get time later on .
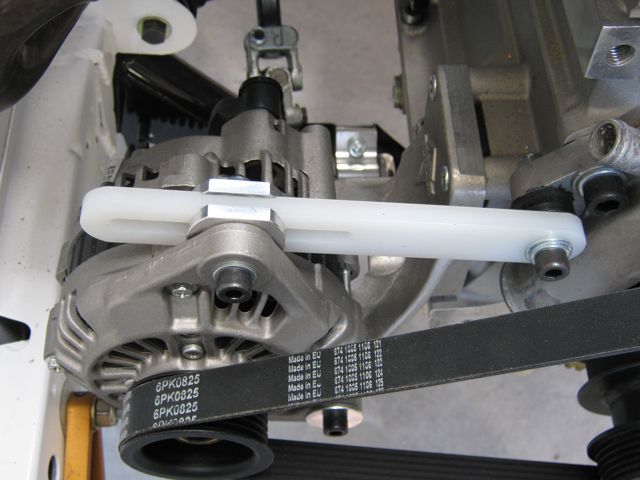
Alternator mounted.
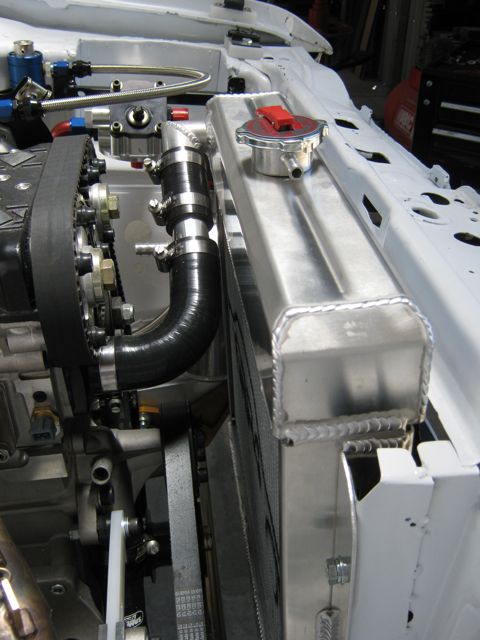
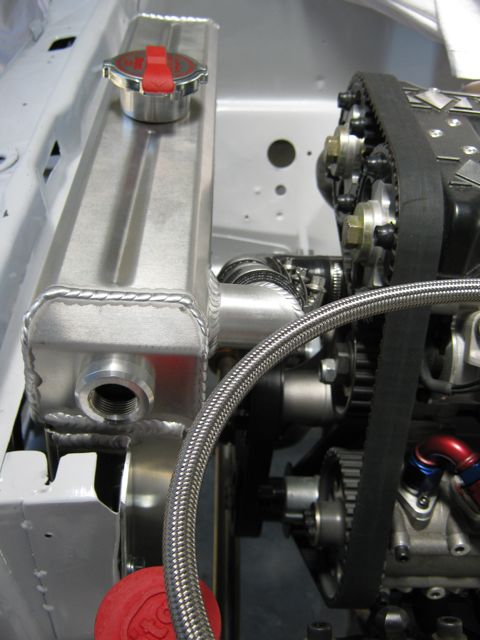
Radiator and hoses in
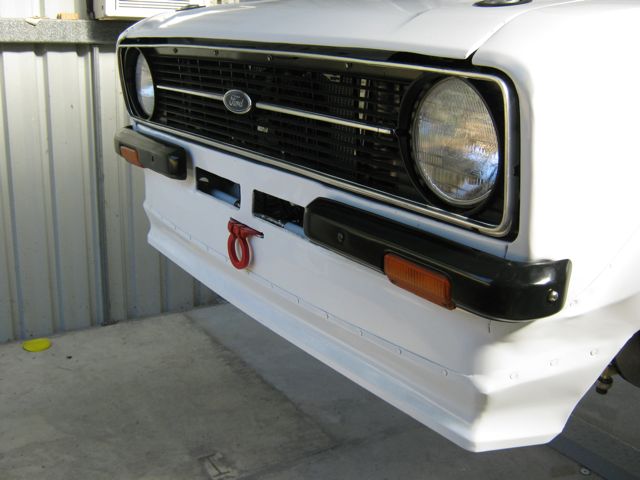
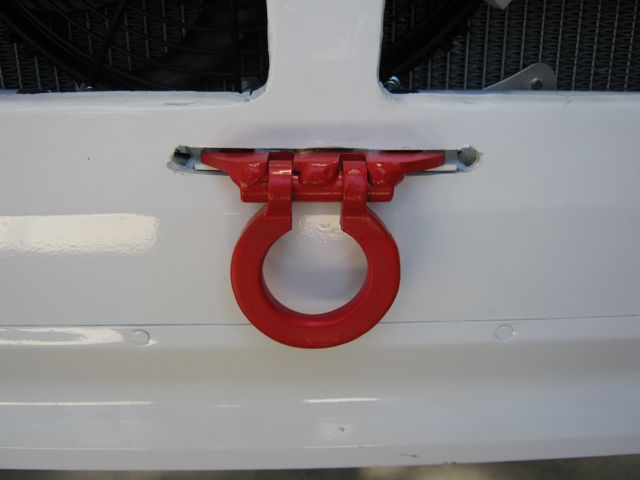
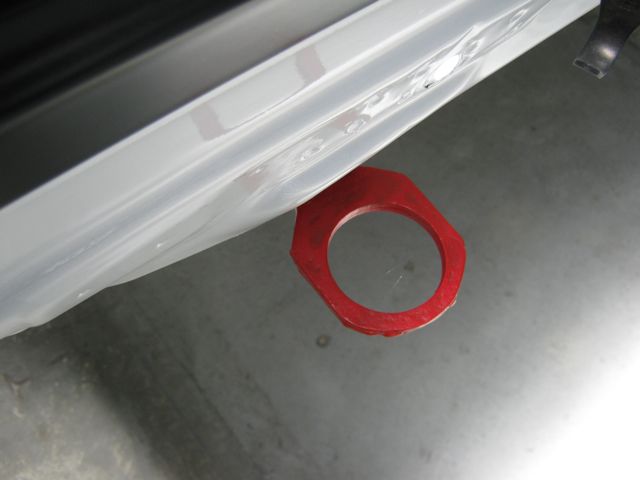
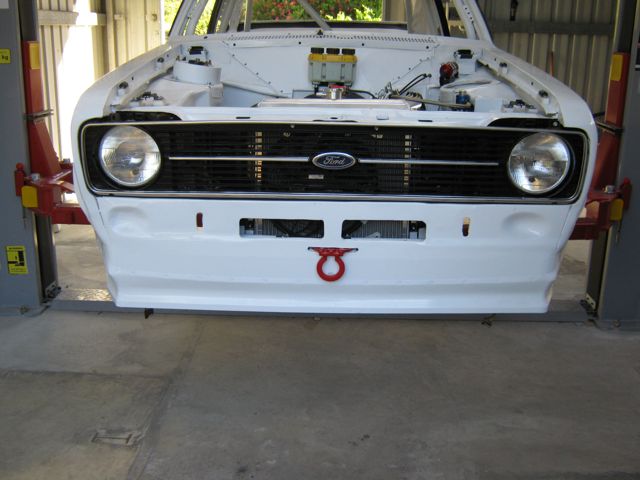
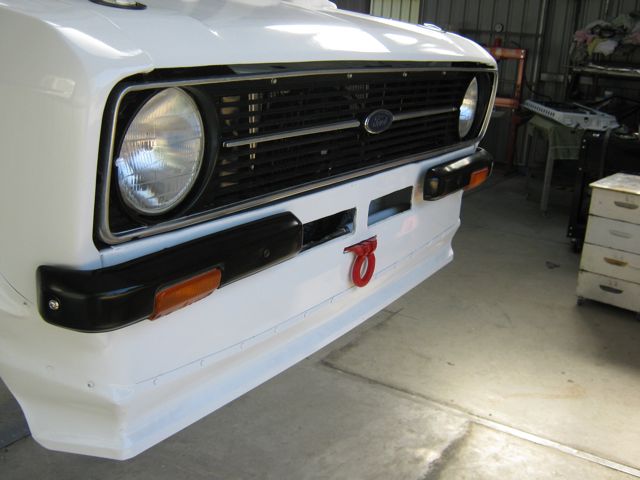
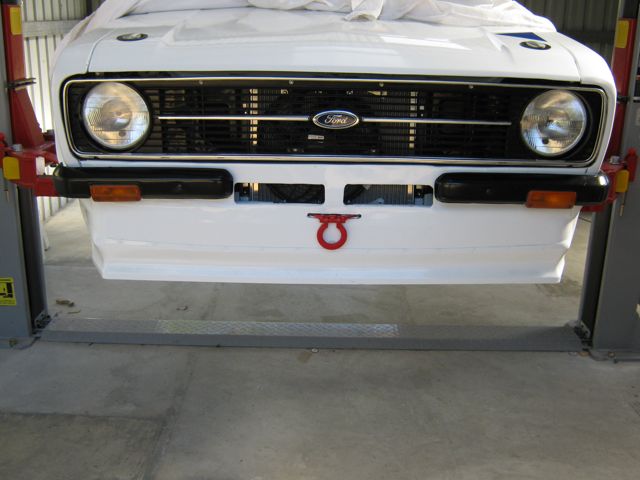
Front and rear tow eyes mounted. The front one was dipped in Plasti-Coat which worked well and the rear one had the Plasti-Coat brushed on which didn't work as well so it will need further work.
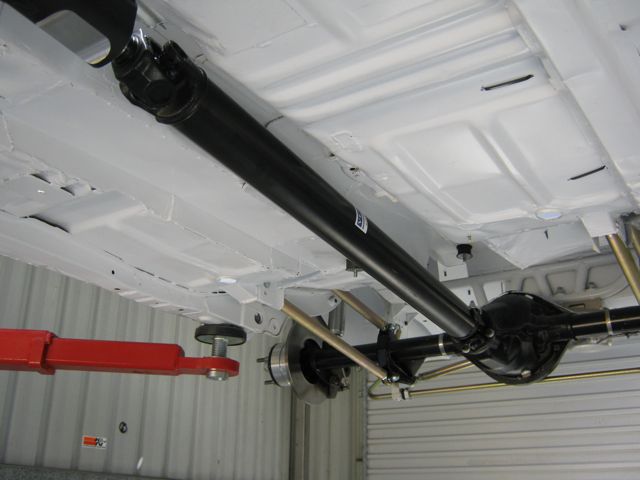
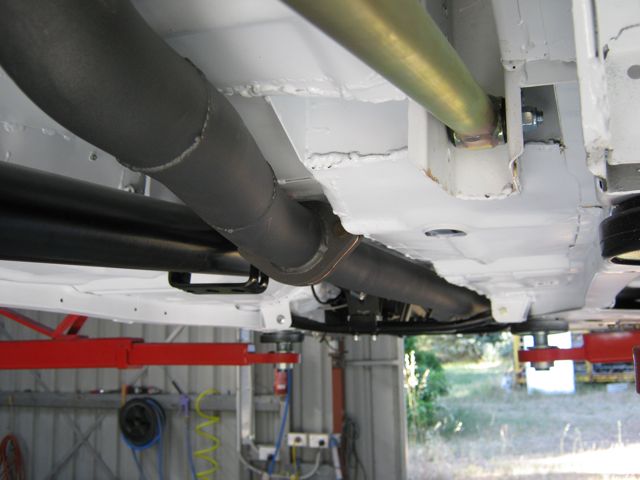
Propshaft in. I had to get this shortened by 30mm.
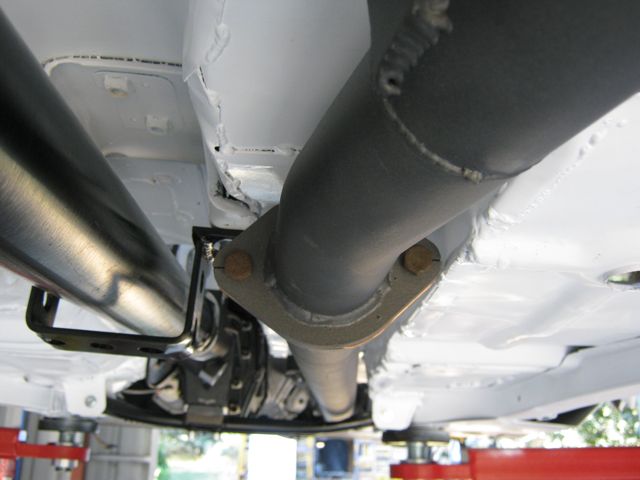
Then I went to mount the exhaust but as you can see it didn't fitI still don't really know why this is because it fitted perfectly before. The only thing that is different is that I raised the gearbox 10mm but that should not account for the lateral difference. The only thing I can think of is that when the stainless steel flange was welded onto the downpipe it has got out of position.
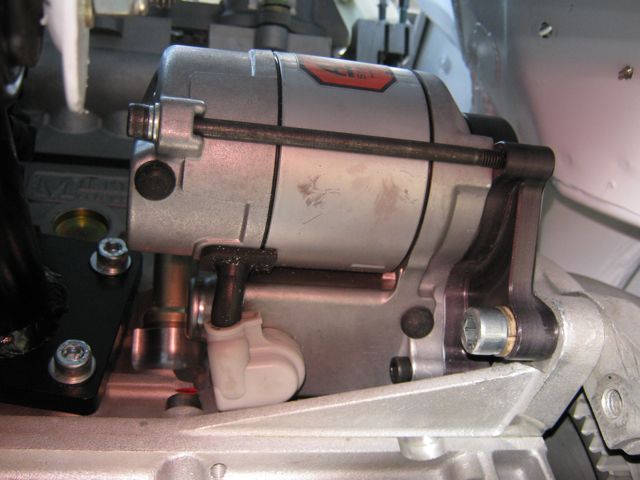
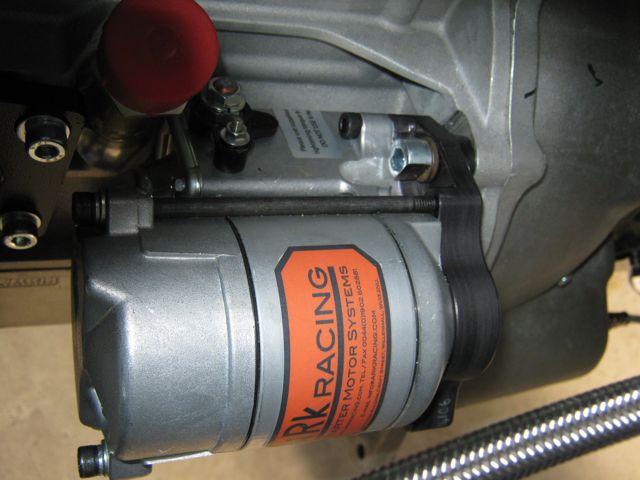
So I left the exhaust so I can think about how the sort it out and decided to pop the starter motor in.
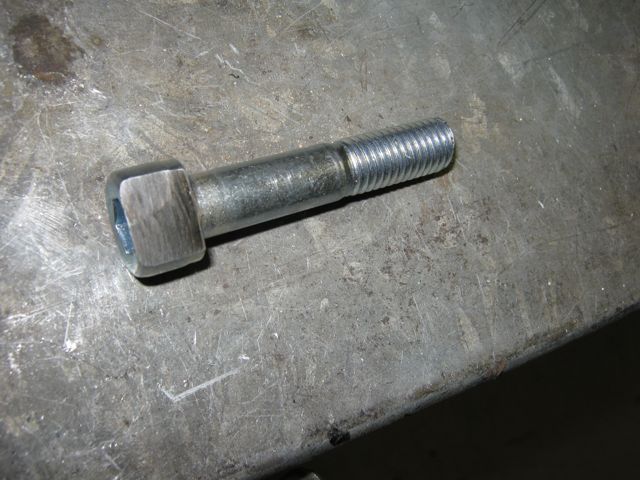
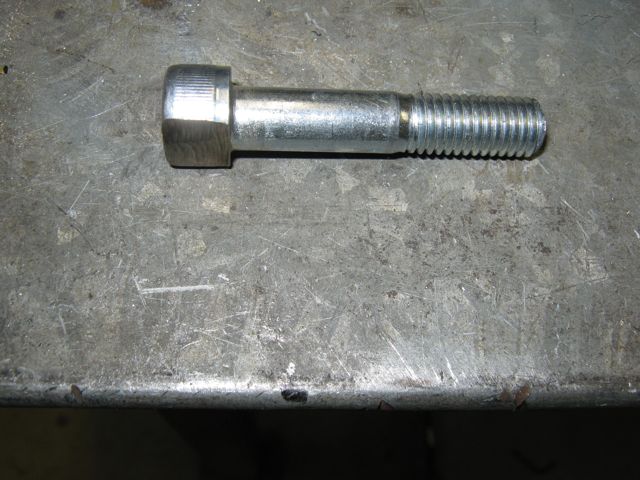
Well that gave trouble also. First I had to cut the head of one of the bolts so it could slide into the top mounting hole and then I had to file out the holes so everything would line up.
Got it sorted in the end.
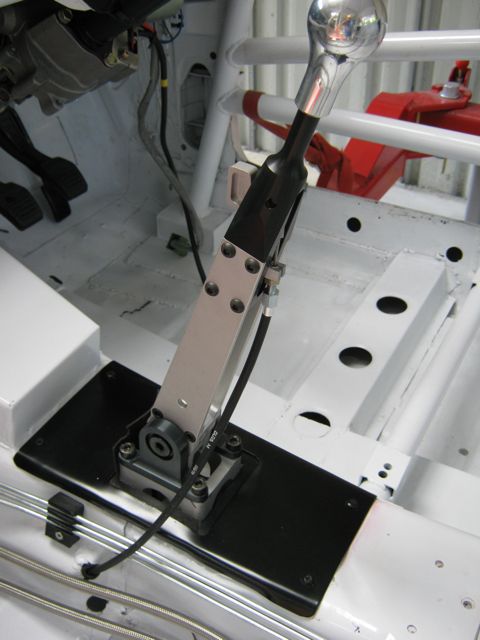
Something I have wanted to do for quite some time: fit the gear lever. I have to admit that one of the reasons for choosing the Sadev gearbox is to have this:
So impressive!!!
1970 Mk1 Escort Tarmac Rally Car
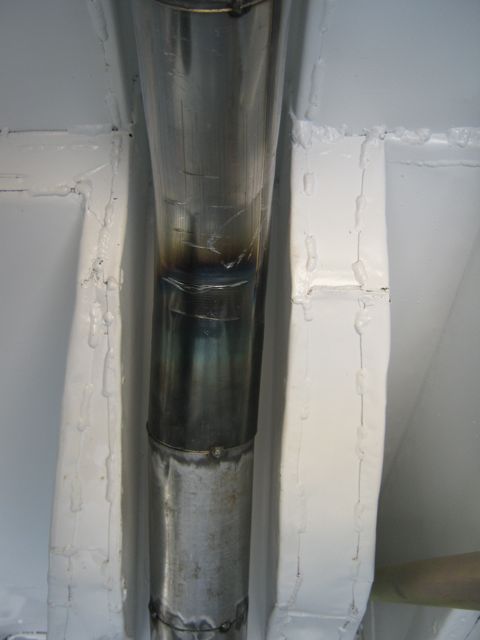
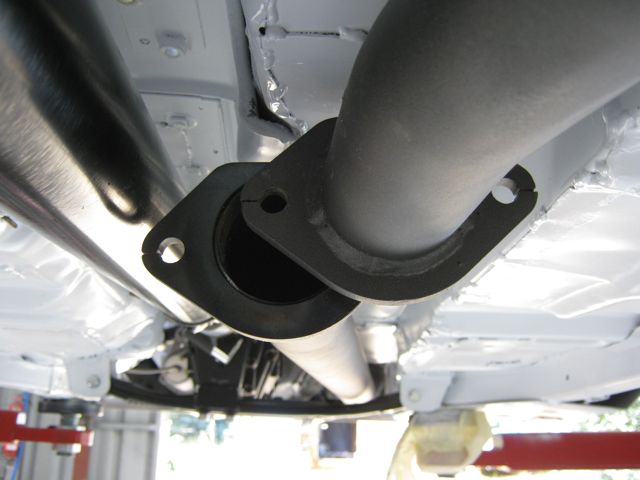
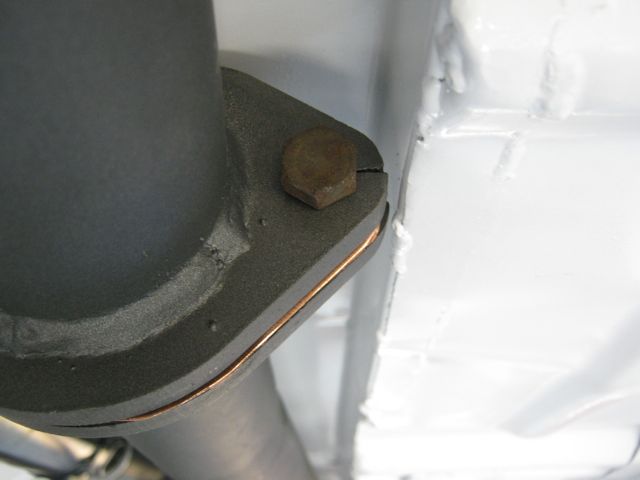
It fits now
Although the flange needs a bit of trimming
.
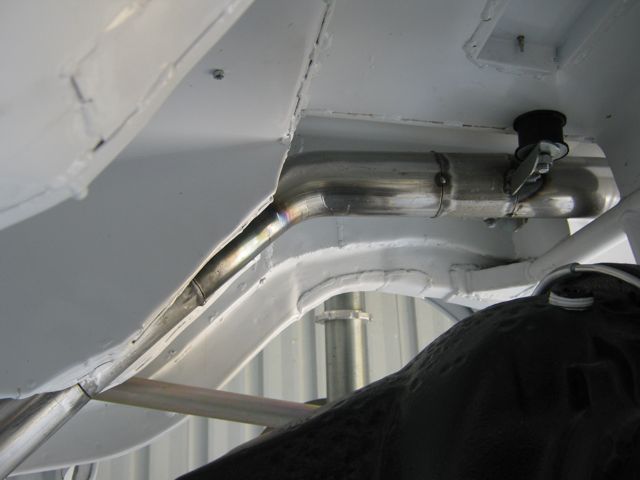
To make it fit I had to bend the section that bolts onto the downpipe. I cut the pipe halfway through and heated the other side to bend it. It only needed to bend 3mm to get the centre pipe to line up.
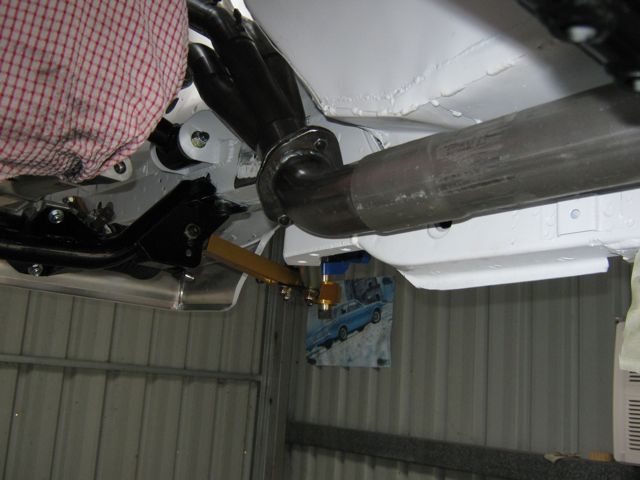
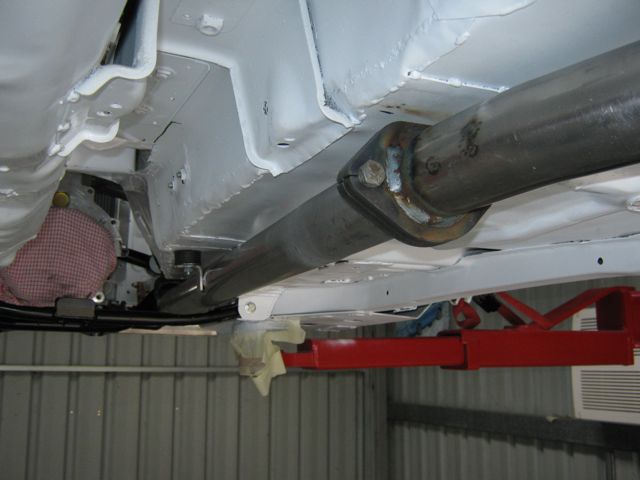
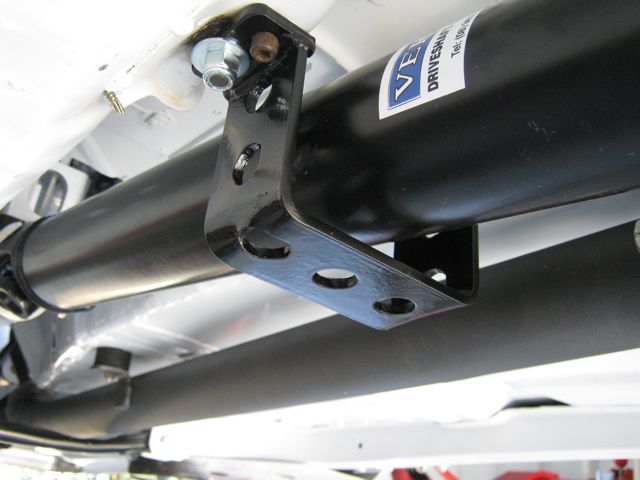
The rules require a strap to stop the propshaft from hitting the ground if a unijoint fails.
Fortunately I didn't remove the centre bearing mount that the original prop had so I was able to use that to mount a strap.
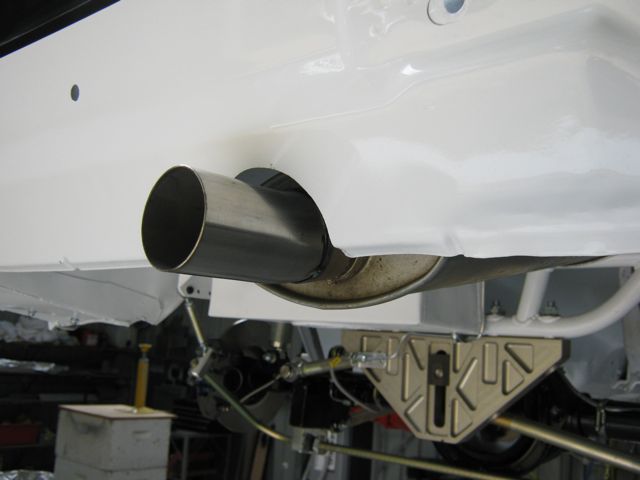
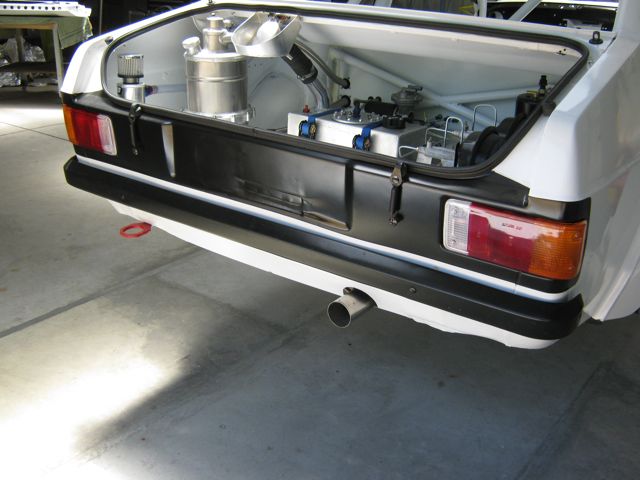
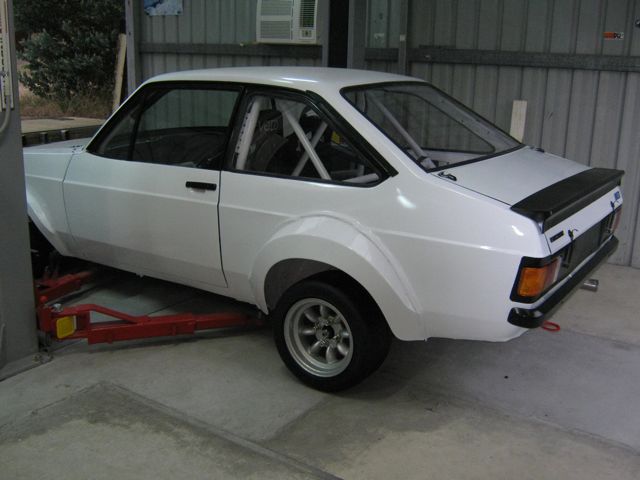
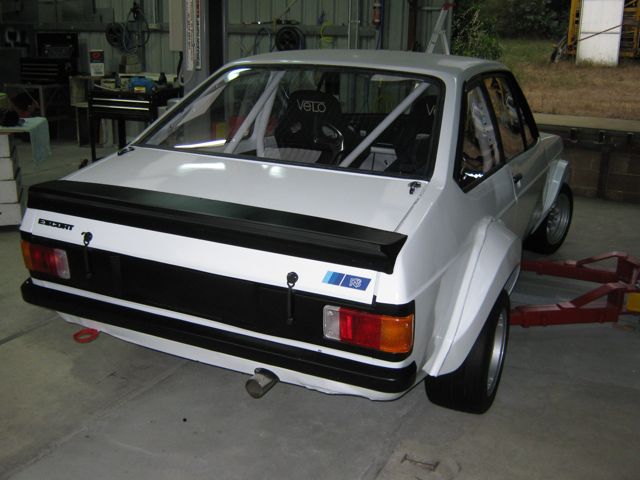
The exhaust is tucked up nicely in the tunnel and none of it hangs below the chassis rails which is how I wanted it to be.
Looking like a proper car
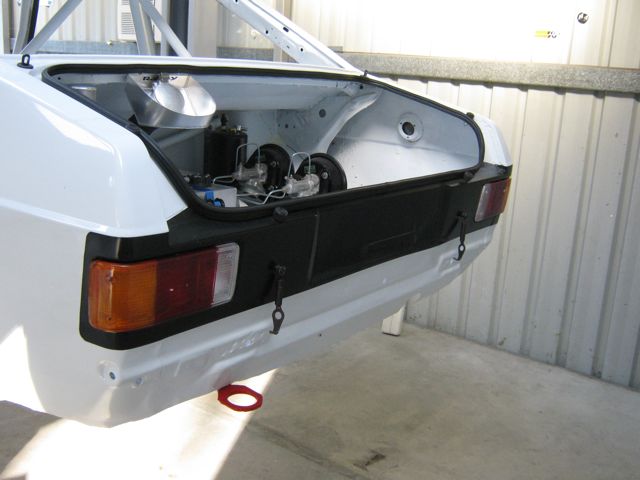
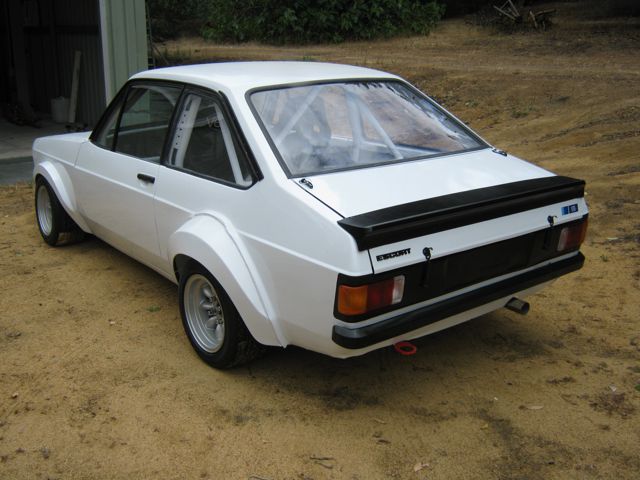
These are after market rear lights, they are alright for a race car but would rubbish on a show car. The sealing rubbers were useless so I didn't use them.
One of the best projects in turbosport
Well my deadline just got closer
I have spoken to the scrutineer who will sign off the car for a logbook and he says have only 3 weeks to get it ready as CAMS closes down for Christmas early. I won't be able to have it totally finished but it will have enough done for the logbook inspection.... just.
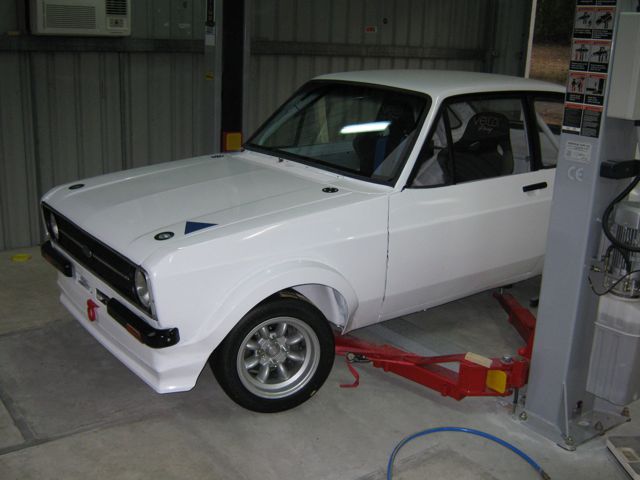
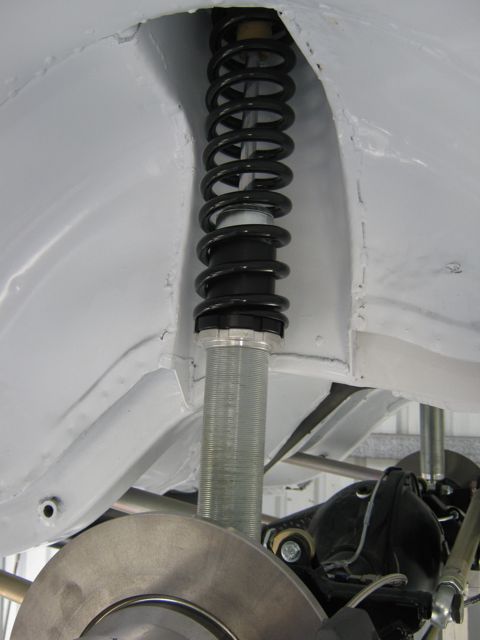
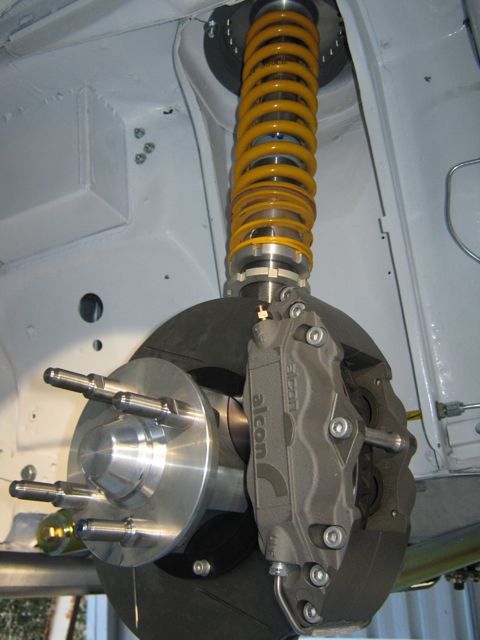
Springs fitted front and rear. The front ones are off my old car so they are not the same colour as the rear ones but I may put stiffer fronts on so I will get them in matching black
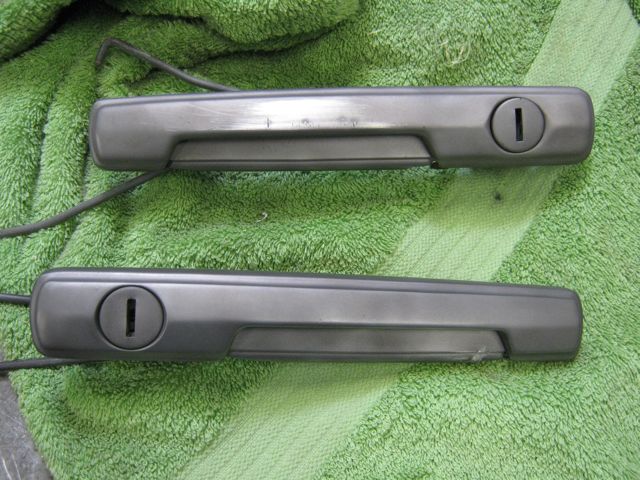
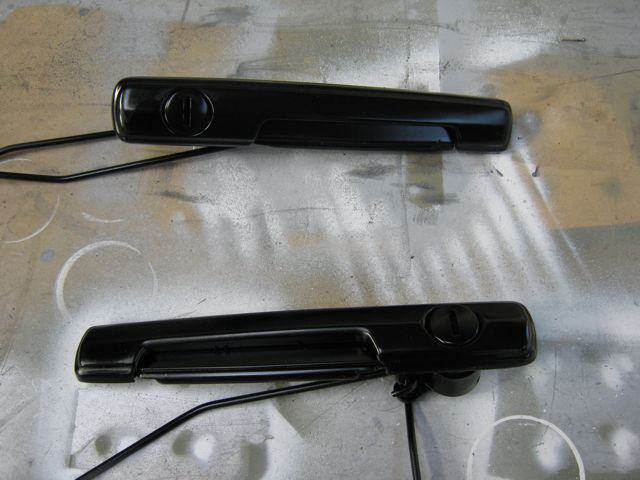
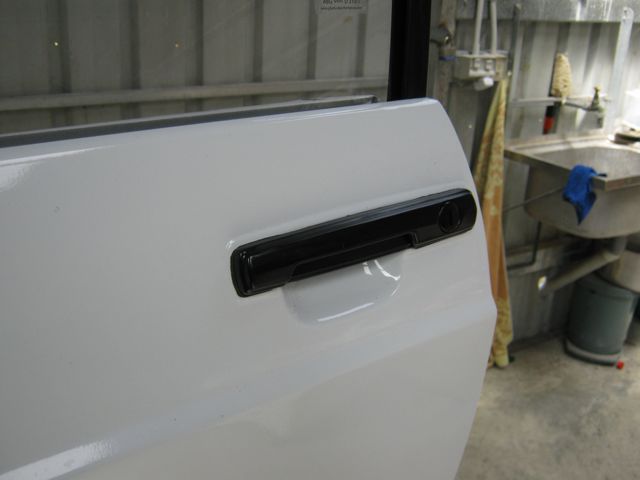
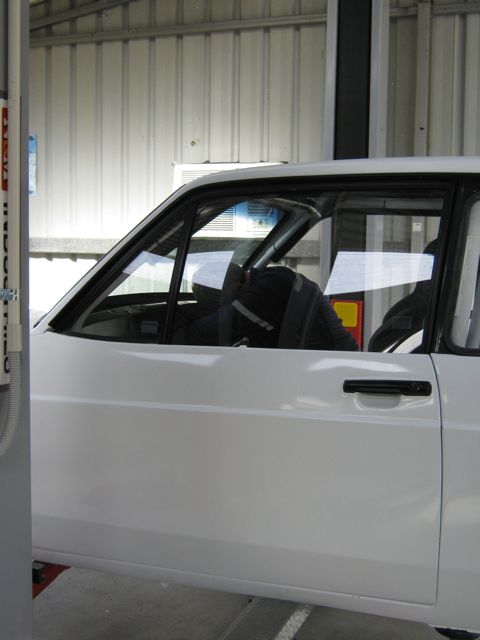
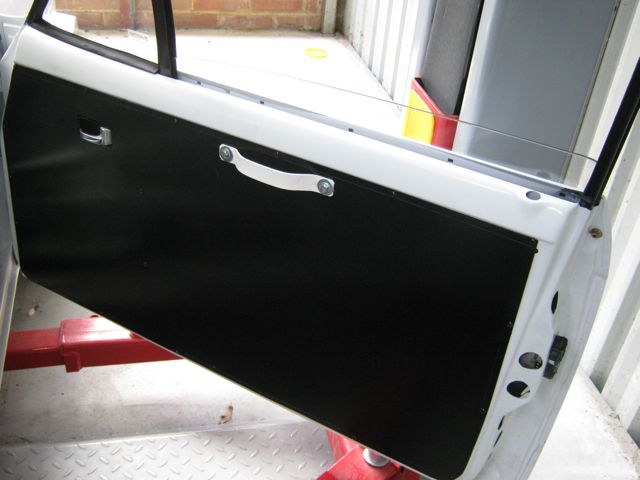
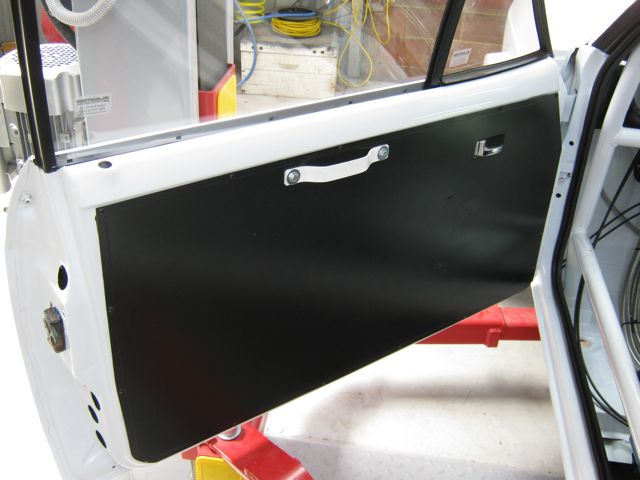
I have brought the doors out of hiding to fit the handles but I need to paint the outer ones black so a bit a sandblasting was required to remove the chrome.
Been "cracking the whip" today. All the front suspension and steering is in. Still needs some sorting but it will do for the inspection.
"RS spec" door handles
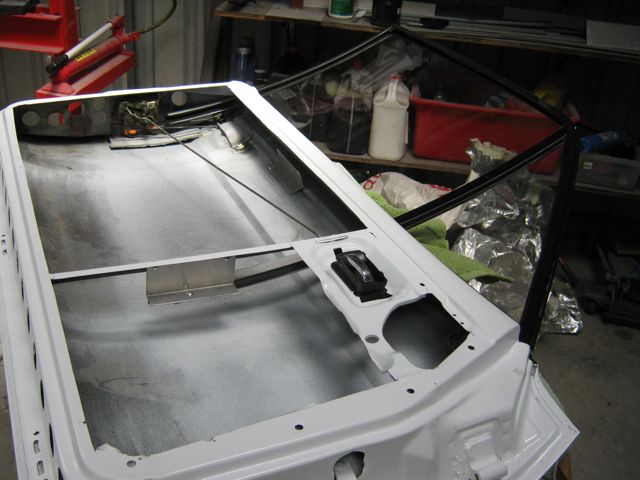
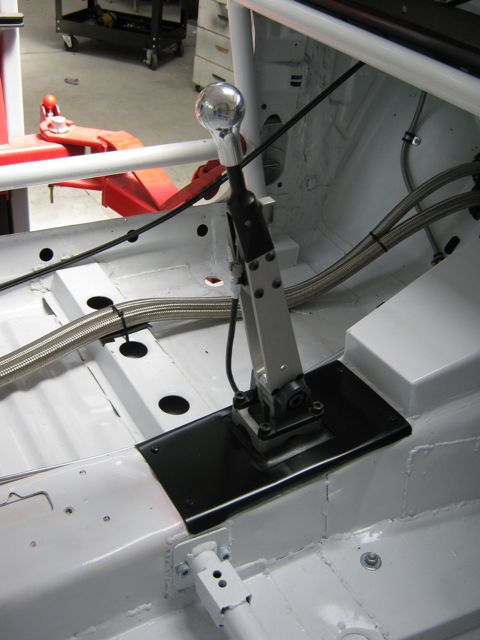
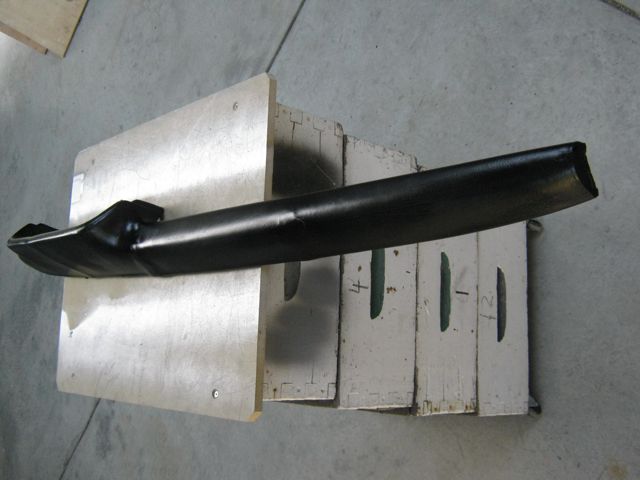
I have made some trim for the steering column and gear lever hole....photos next time.
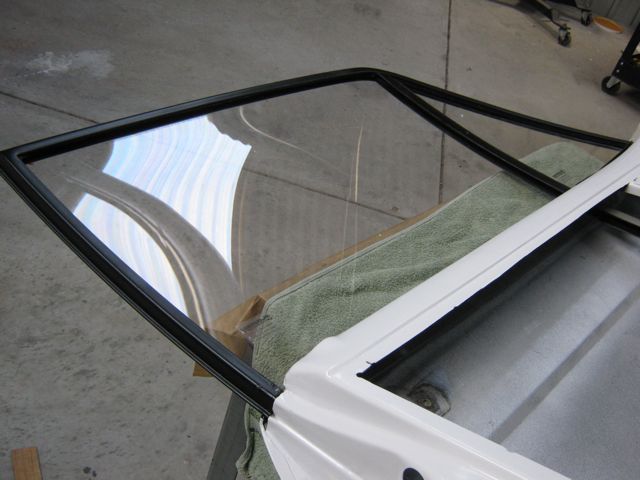
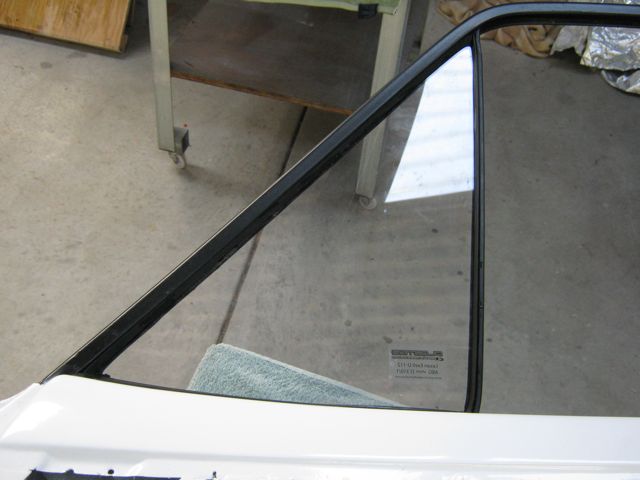
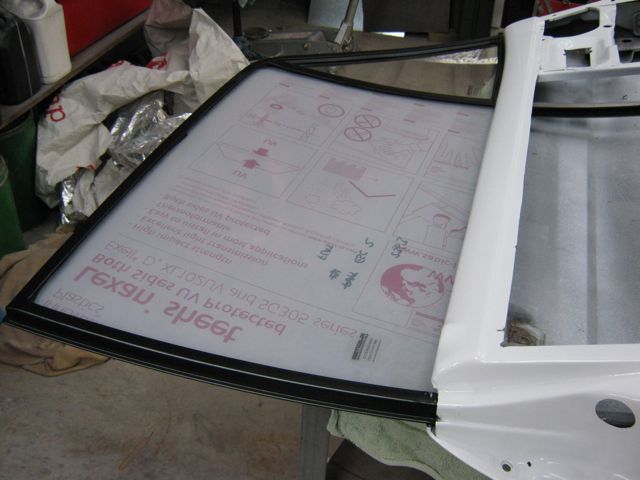
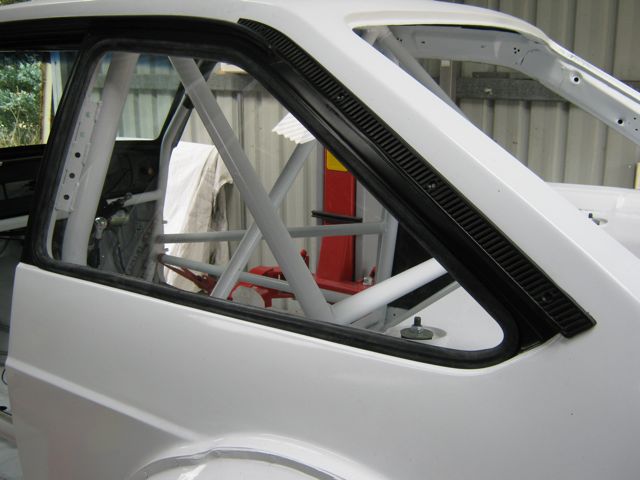
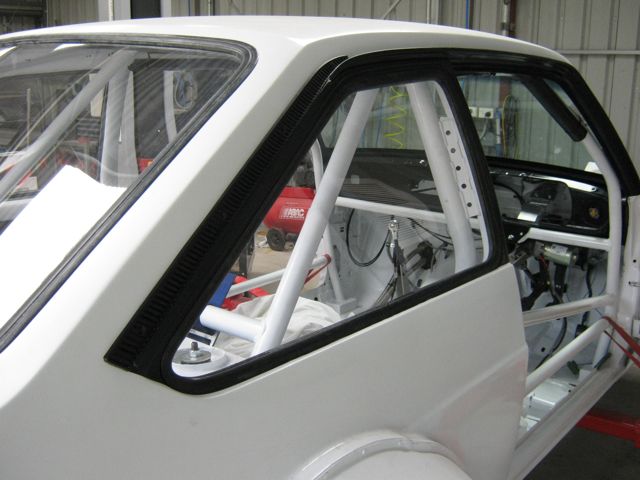
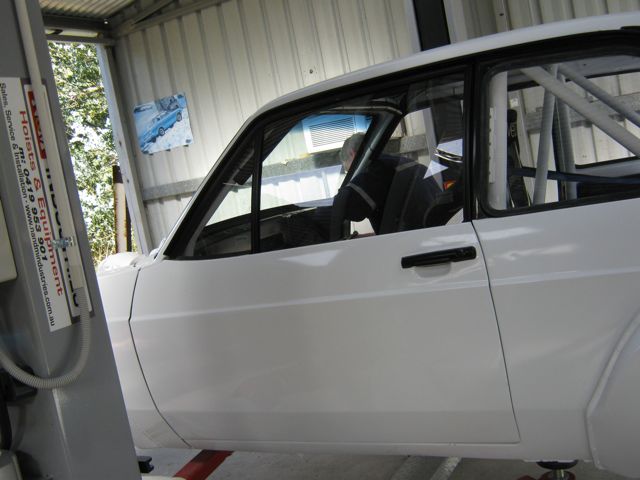
Got on with assembling the doors. I have gone for the 2 piece windows as I want to have the driver's window to be able to slide up and down.
This is what I have managed to do on the passengers door...it was easier than I expected. Luckily I have 2 good rubbers for the quarter window as I don't think new ones are available.
Wow.... just Wow
what a very impressive car, and the attention to detail makes this one awesome escort everything about this = First class and a lot of Money .
Love the car
Old skool forever
Just don`t tell the wife
how much it really costs!
What a bit of kit that is!A credit to you well done sure you will have fun with it!
Cranking work there, good luck hitting the deadline!
http://escort.accelerator.org
1968 MK1 Escort 1300GT
1969 'Big Wing' MK1 Escort
1972 MK3 Cortina 1600XL
1984 Sierra XR4i
And other junk I don't like to talk about!
Thanks again for all the positive comments
I have been cracking the whip again today but I have to say it is wearing me down especially as I am having to rush things so I can't do some things as well as I want to.
The list of things to do before the inspection is slowly getting shorter.
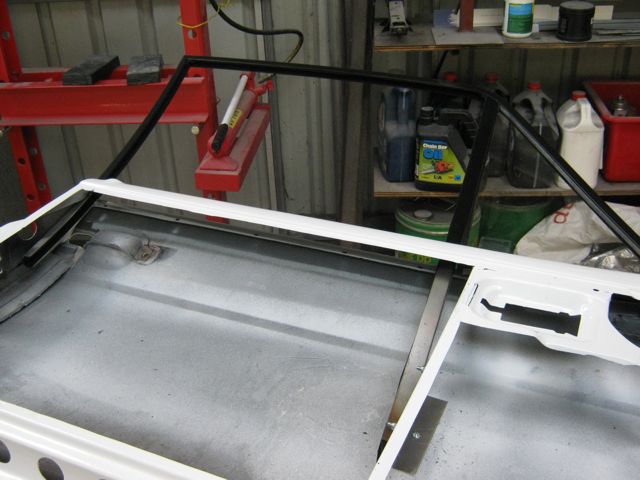
The windscreen was supposed to be fitted this morning but the fitter rang to say it hadn't been delivered even though it was ordered on Monday and only had to go 10km across town
It should be fitted tomorrow morning.. it had better turn up as it appears to be the only one in WA.
I want the screen to go in before I do the roll cage padding , seats and steering wheel which I was going to start today so I had to do other things.
I have finished assembling the doors but I have left the driver's window fixed for now... still
Slight panic when the LH door handles wouldn't work the closing mechanism but some WD-40 sorted it.
Paint had dried on the trim panels I made the other day so they are fitted.
Rubber gaiter around the gearlever mount is not complete but again it will do for now.
Next was the rear fibreglass bumper that I thought would take 5 min to fit as I had bought some alloy mounting brackets so it would bolt straight on.... WRONG.
After a lot of head scratching I realised that there was no way they would allow the bumper to fit properly... it would have been too far from the body and not at the correct angle.
So again I had to modify something that "wasn't fit for purpose" by straightening one side of the bracket and re-bending it to get the bumper closer to the body. Even after modifying it I had to drill new holes in the body to get it right.
Maybe the bumper being a fibreglass reproduction was part of the problem but only part
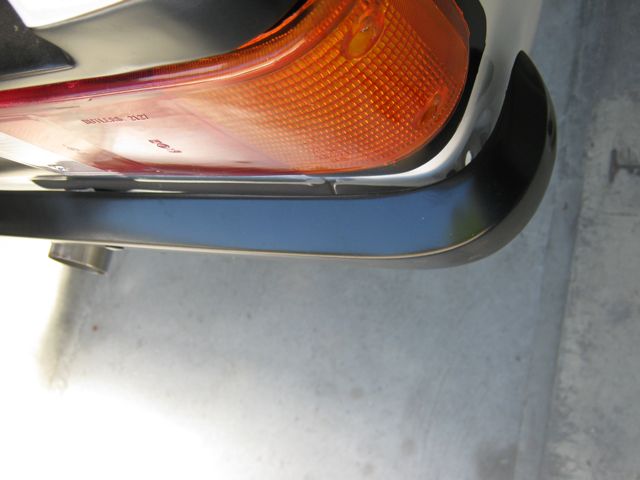
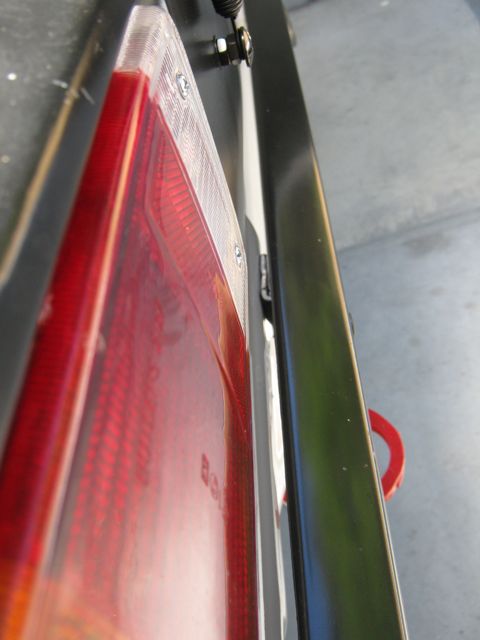
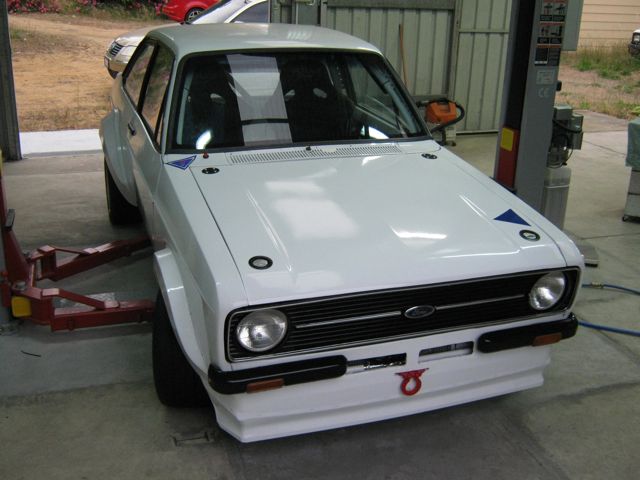
Now it fits nice and close to the body and at thee correct angle
In contrast the front bumpers went on easily although one of the indicators had a broken mount so I had to fix that with outdoor double sided tape. I have just discovered how useful this stuff is.
Gee you must be wrecked by the end of a day!!! Looking great and more importantly you're going to meet the CAMS deadline.
1970 Mk1 Escort Tarmac Rally Car
Totally wrecked Glenn. I reckon I feel like you looked in that photo on the first night of Targa Adelaide
After 4 days of hard slog the car is now ready for inspection
The windscreen fitter turned up on Friday morning and fitted the screen. I was hoping to get him to fit the rear and side windows as well but he didn't have time ( I should have booked the fitting when I order the screen) but he did take pity on me and quickly fitted one side window to show me how it was done. I was pretty sure I knew how to do it but watching him gave me some tips like using a 6mm cord rather than some string to pull the rubber lip into place.
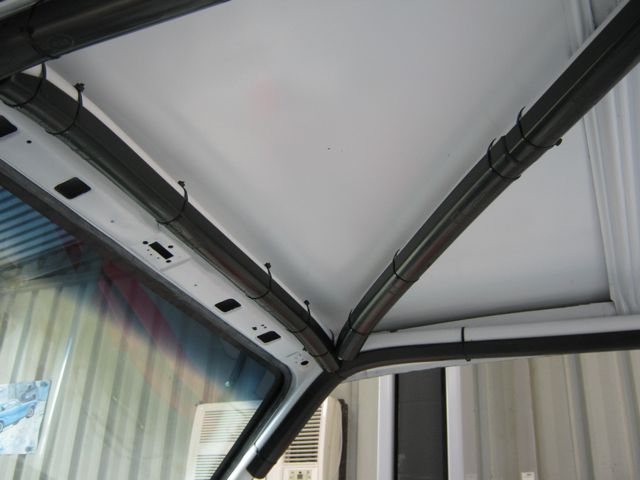
Once the screen was in I was able to fit the roll cage padding. From 2013 the rules require the padding to be the high density stuff that is FIA or SFI approved. The SFI padding is cheaper so that it what I have used.
Fuel tank breather hose and drain for the filler in place.
Saturday my mate John came round for the "big push" to get as much done as possible in a day.
First job was to fit the rear window. After a bit of messing around we worked out how to do it. The solution was to have someone inside slowly pulling the cord to fit the rubber lip and another person gently tapping the outside of the rubber with a soft hammer. We were pretty pleased with getting it in so we tackled the side window the same way.
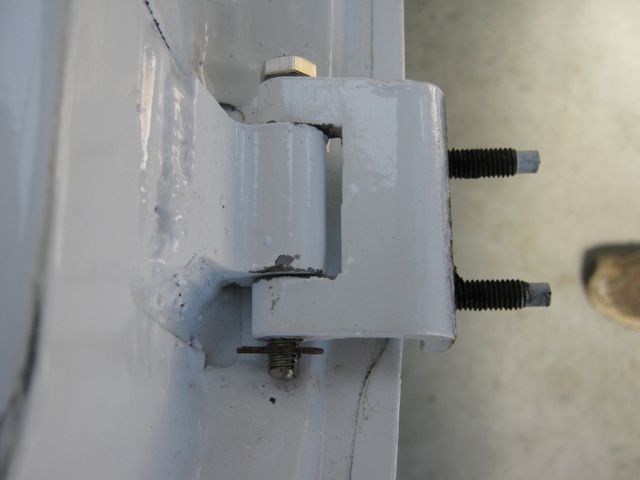
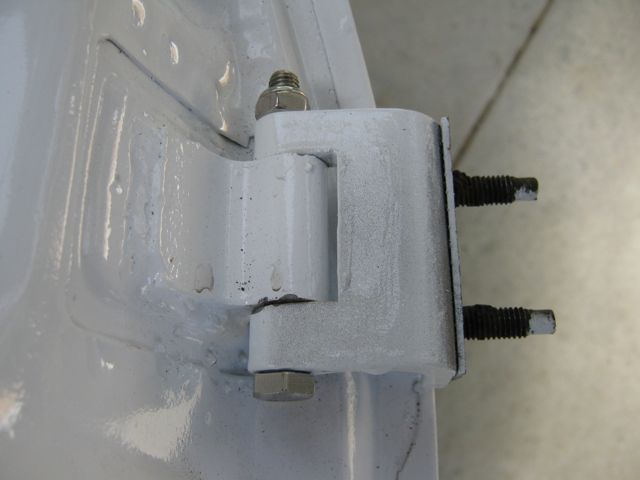
Next up was fitting the doors. I was hoping to leave the hinges on the body and slot the doors on but because the doors didn't come off the car they wouldn't fit. So we had to unbolt the hinges and assemble them on to the doors to bolt the whole lot on.
I didn't want to use pins for the hinges so I got some stainless steel bolts instead. The only problem was the nut would not fit on the lower one so I used an R clip instead.
After a lot of effort ( it helped having taken 12kg out of them) we got both doors on with the passenger one shutting perfectly but the only way we good get the driver's door to shut properly was by giving it a hard slam. No amount of adjusting would cure this and eventually we worked out what was wrong. The hole in the top hinge part that is welded to the door is worn so that the doors drops. The only way to fix this is to drill it out to a larger size and sleeve it back to 8mm. Hopefully that will fix it but for now it will just have to be slammed( it is more of a hard push than a slam really).
The shut lines are not very good but this is a race car not a show car.
After doing a few more things it was getting late but I wanted to bleed the clutch. Well what do you know fluid started dripping out of the bellhousing
I am hoping that it was caused by John using ring spanners instead of open enders when he opened the bleed screw. The fitting that the bleed screw is in has to be held while undoing it and John loosened the fitting when he put the spanner on, there is not much room to get to it. I have tightened the fitting but I think it is still leaking so the gearbox will have to come out. The clutch does work though.
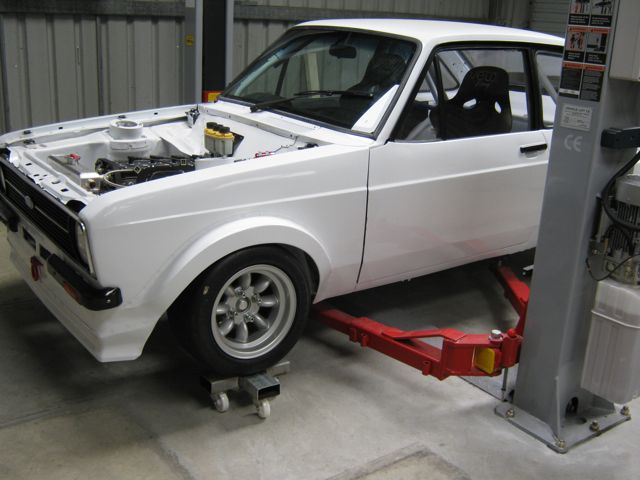
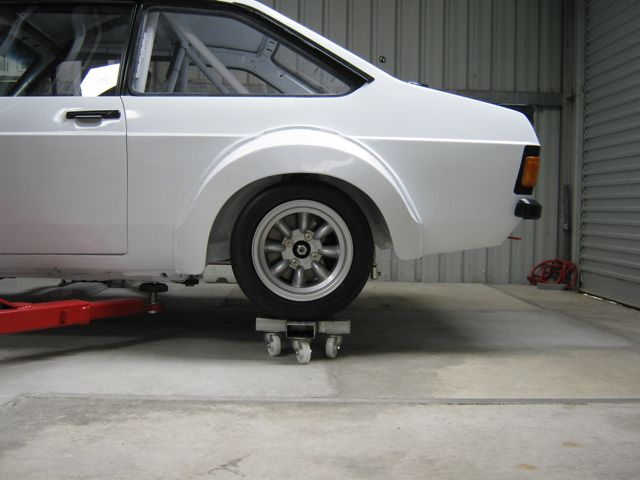
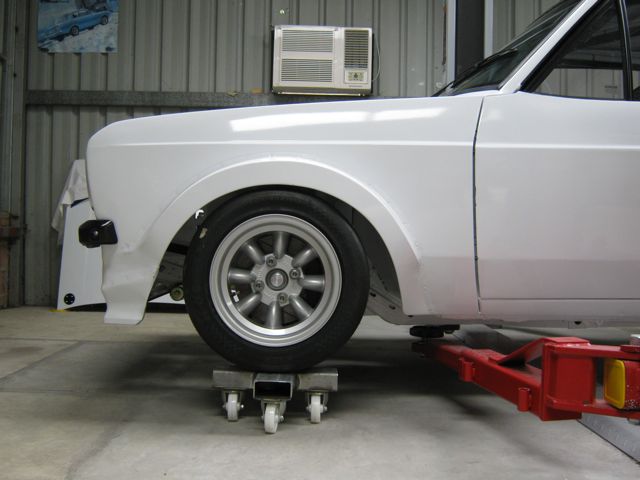
By this time I had had enough but John wanted to get the wheels on to take some photos so I pressed the GRP4 inserts into the wheels so they could be bolted on and then lowered the hoist as far as I could to take the photos. It can't be lowered right down because the hoist arms won't swing out, I have to make up blocks so the car sits a bit higher than floor level to allow the arms to come out.
The next update will be what was done on Sunday and Monday.
Looking good
Ride is looking sweet, compliments to you and your crew.
2 questions - The front screen is that lexan or glass ? see it has black trim around it.
Where did you get the rear spoiler from ?
Thanks
Superb work mate, good luck with the scrutineer on Wednesday!
http://escort.accelerator.org
1968 MK1 Escort 1300GT
1969 'Big Wing' MK1 Escort
1972 MK3 Cortina 1600XL
1984 Sierra XR4i
And other junk I don't like to talk about!
The front screen is laminated glass, I did try to get a lexan one but I didn't have a reply to my email and I didn't pursue it. The black trim is interesting. I like it because it matches the black trim I have done but it is probably a bit too modern for a normal Escort.
The spoiler is an alloy one from Ralloy.
Thanks, fingers crossed.
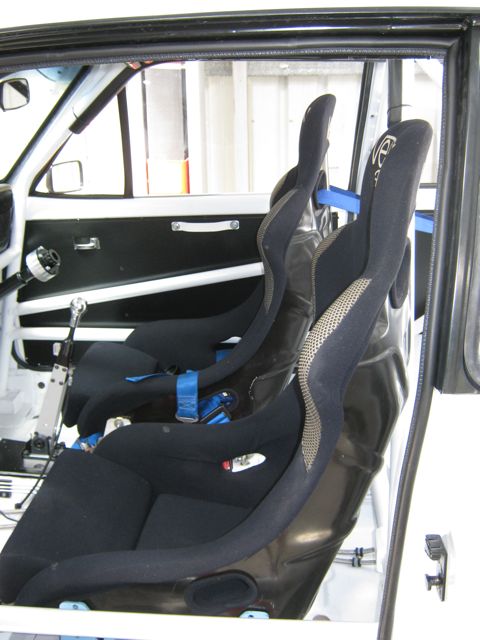
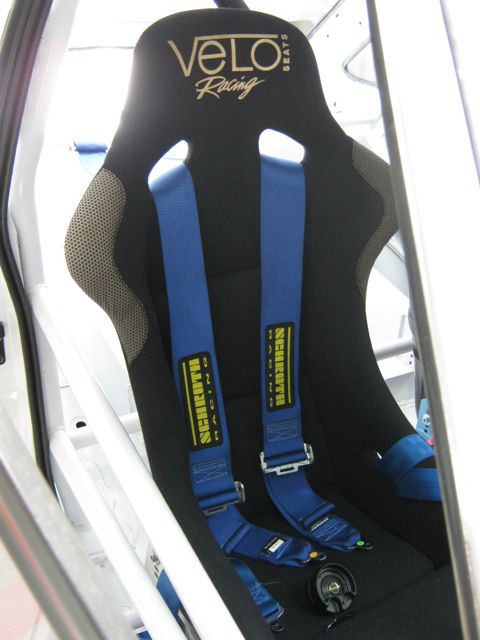
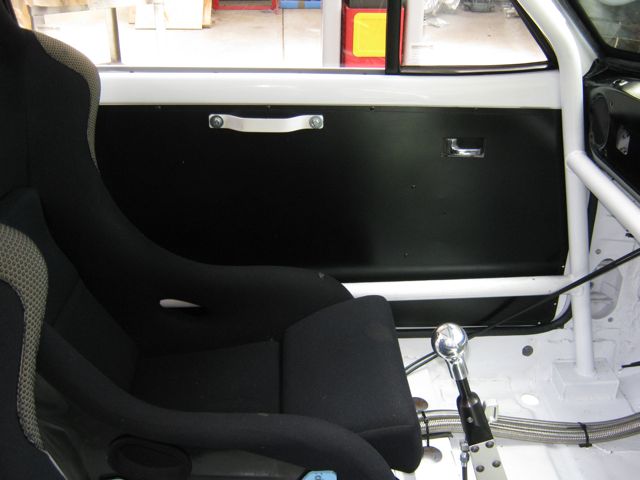
Forgot to mention the that we installed the seats,harness and door rubbers on Saturday.
I have 2 seats because the only category for logbooking I can comply with is "Closed Sports Car" which requires 2 identical dimension seats. So I have put the seats from my old car in but the new Recaro will go in later.
On Sunday fitted the door panels and then realised I needed some handles to be able to close the doors from inside.
I made these out of some plastic strips.
I pulled a wiper blade off my old Mitsubishi ute ( that's Australian for pickup) , its fits perfectly onto the wiper motor spindle but is about an inch too long and needs to be straight to work properly. I will modify it later on.
When I started this project I managed to get a very good condition dash pad off eBay so I got it out to fit it but off course there was a problem
It won't fit because the roll cage is in the wayNow it would fit if I was to cut 2in off one end ( or 1in off each end) which I am very reluctant to do because ones that are not cracked from exposure to our hot sun a very rare.
The reason I wanted to to put it on was to be able to fit an RS dash for now ( I have an electronic dash to fit later on). Fitting the RS dash is to make it look good for the photos for the logbook.
So I made a quick decision to repair a cracked pad I had with filler and give it a coat of paint. It doesn't look very good but again it will be Ok for now. When the electronic dash goes in I probably won't have the dash pad fitted.
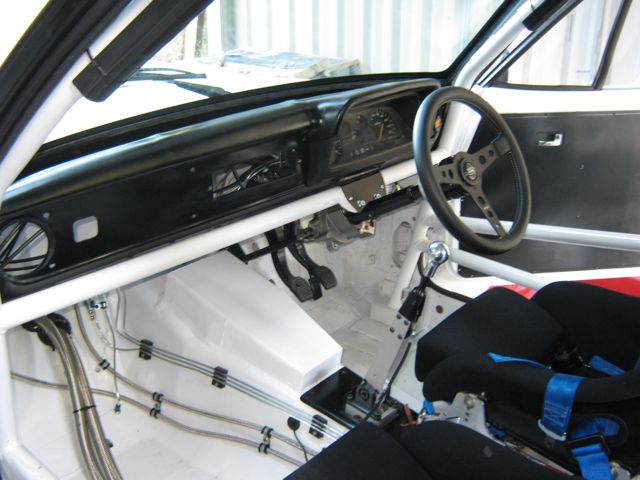
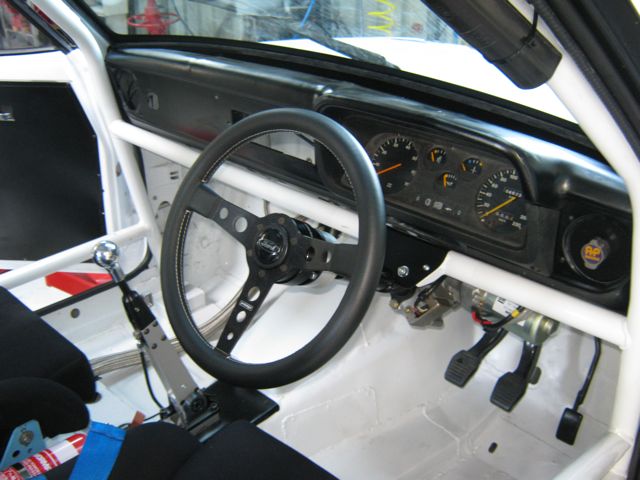
Dash pad, dash and quick release steering wheel on.
The rules require 2 mirrors so I screwed a Mk1 interior mirror where the interior light usually is and fitted this reproduction exterior mirror.
Also to comply with the rules I have fitted an external battery cut off switch and decal ( the "black box" will go on later on).
Then I checked my list of things to do to make everything had been crossed off and had a final check over the car and found a couple details to attend to then called it a day
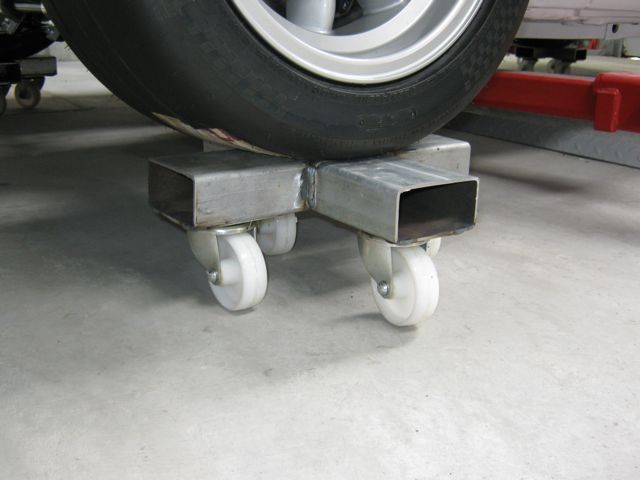
Today I constructed some homemade " go jacks" so I can sit the car on them to get it off the hoist and also move it around easily.
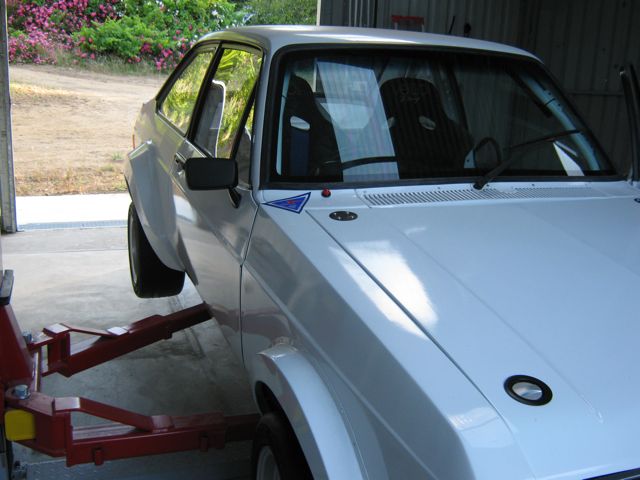
This also enabled me to sit the car at " floor level" to see what it would look like.
Hopefully all will go well tomorrow and it will be signed off to enable the logbook to be issued
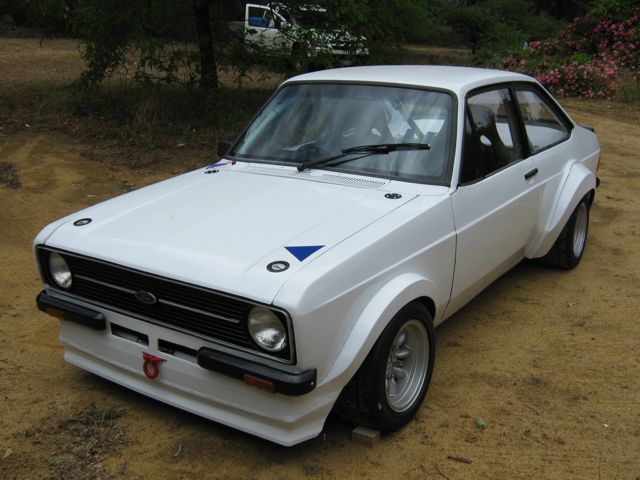
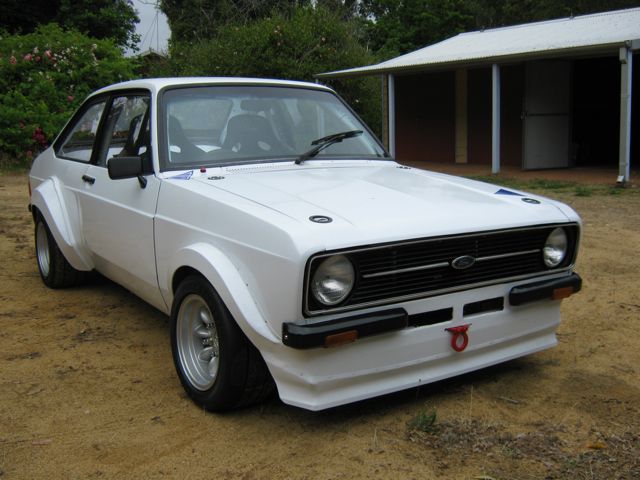
Well it passed with no problems
The scrutineer was very impressed with the build quality but I think he was a bit bemused that someone would spend so much money on an Escort. The engine caused some concern also. Apparently CAMS are not too happy about non production engines being used.
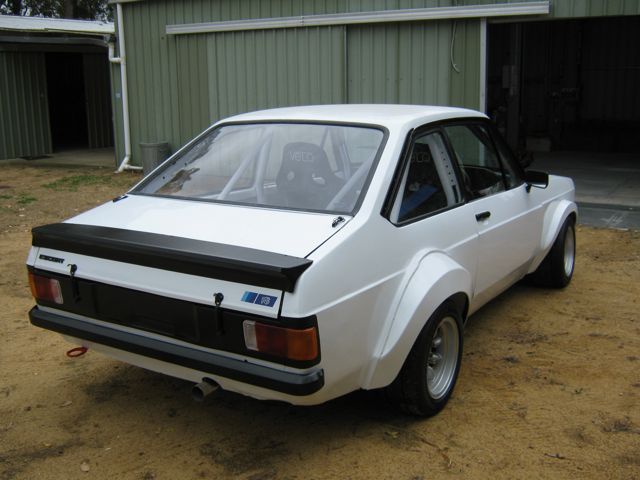
I had to get it out of the shed to take some clear photos for the logbook.
There are still plenty of things to do before it is finished but the pressure is off now
Fantastic car and build
It's turned out to be a really nice testament of your hard toil and efforts
67 TVR VIXEN V8
Well done Bevan.Now go have a nice cup of tea and a lay down. You deserve a rest!!
1970 Mk1 Escort Tarmac Rally Car
well deserved
Well done buddy, top marks for your hard work!
http://escort.accelerator.org
1968 MK1 Escort 1300GT
1969 'Big Wing' MK1 Escort
1972 MK3 Cortina 1600XL
1984 Sierra XR4i
And other junk I don't like to talk about!
Well done on getting through the test , great to hear all your hardwork paid off
Lovely build bud
 Posting Permissions
 Reply With Quote


Bookmarks