


Thanks "Matt75" "Cort500" " escortinadriver " and " xygtho "
for all the positive comments!
Few more updates
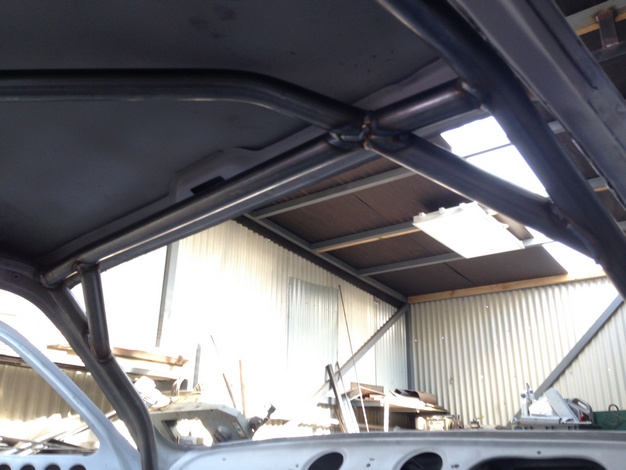
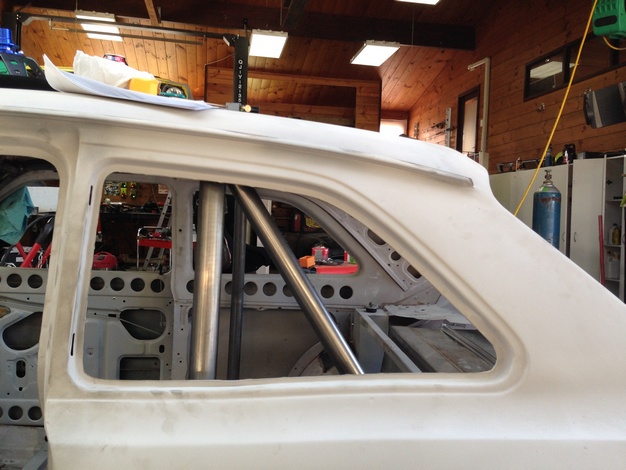
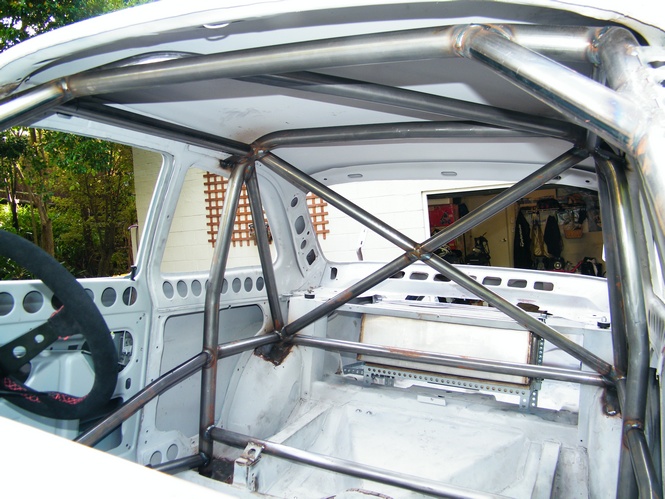
Rear Stays and bar in
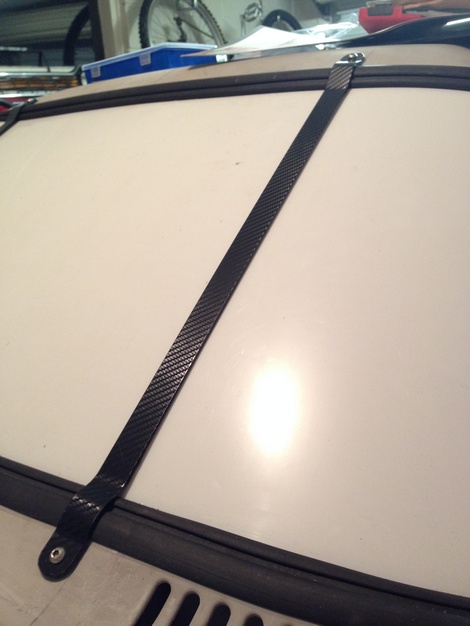
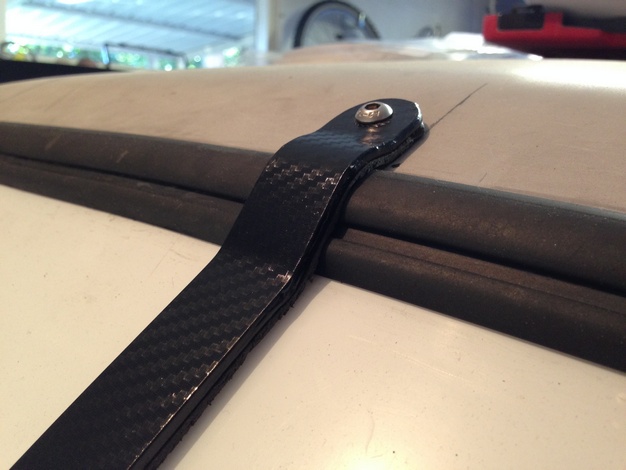
Roofbar in

Thanks "Matt75" "Cort500" " escortinadriver " and " xygtho "
Few more updates
Rear Stays and bar in
Roofbar in
Sorry bit late to the party ... but great build and thanks for sharing. Love reading these threads. just read the whole lot in one hit so didn't have to wait for updates
Getting there now mate so keep up the good work. You have some serious skills though. Wish I could do half of that by myself.
Project looks ace mate - can't wait to see the cage. Catch up at Leadfoot
Cheers AlexA glad you enjoyed my novel so far!Originally Posted by AlexA
I'll try get the updates going a little quicker now
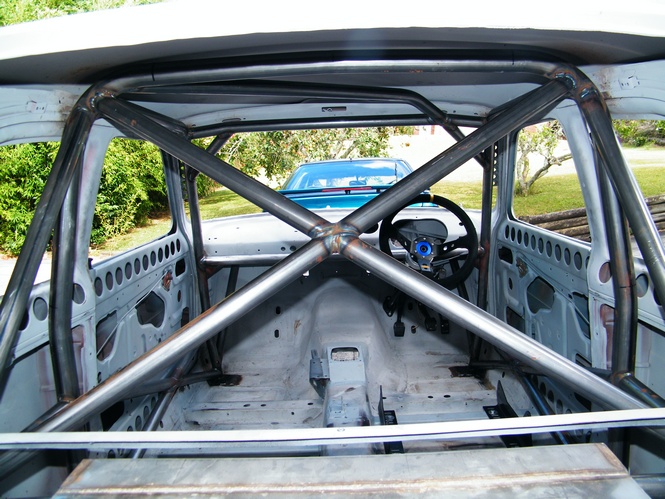
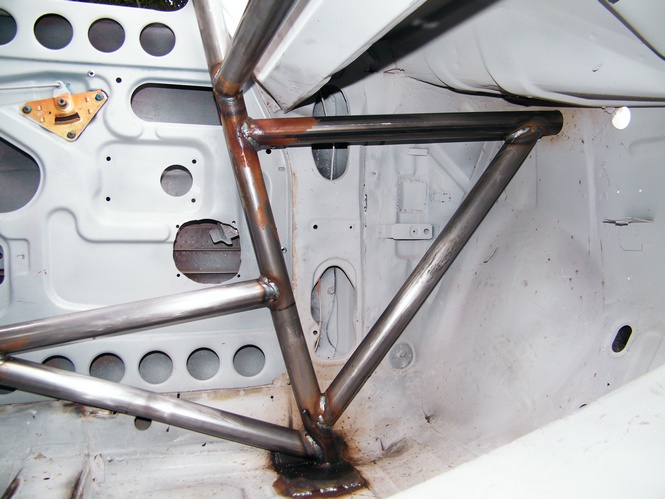
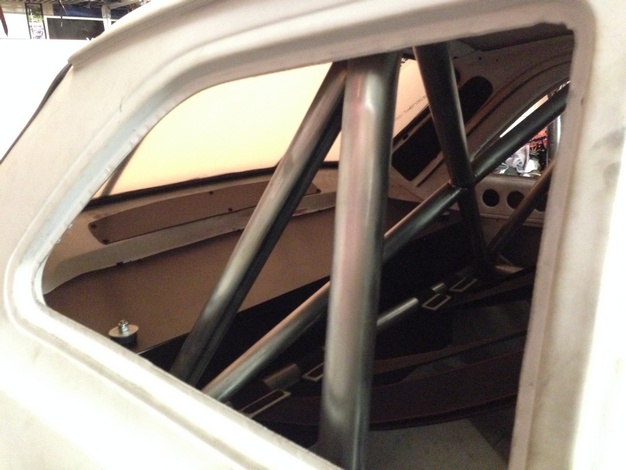
Cage is done
Side intrusion bars
Diagonals
Roofbar reinforcement
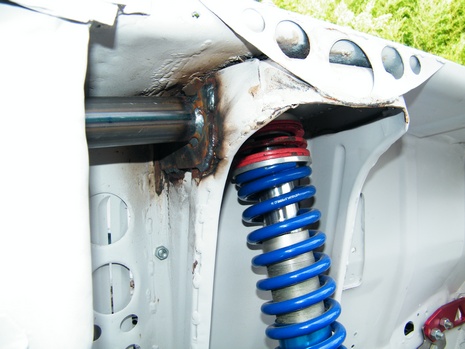
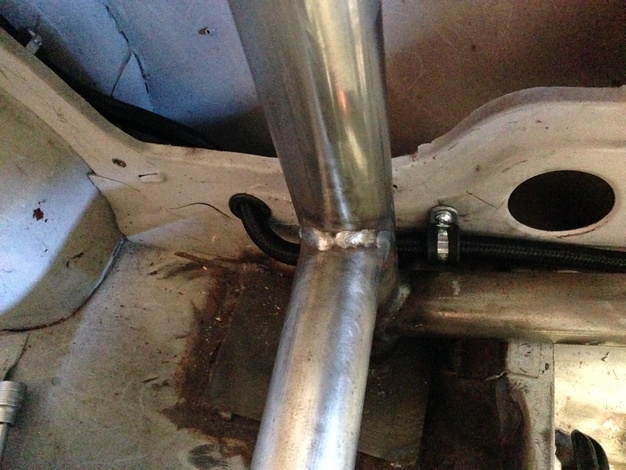
Forward extensions through the firewall
extensions onto strut towers
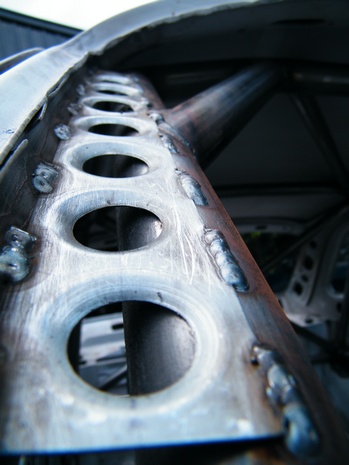
More holes ofcourse
Big Thanks to Duane @ Monster Engineering
Just waiting for the paperwork to return with my homologation number and my competition vehicle logbook
cars looking good, I think I actually stumbbled across it on instagram the other day. A bit off topic, but how do you find NZ for the classic car scene, getting parts etc? Me and my Mrs were thinking about moving over there, I know half of my hobbies are catered for (drifiting) but was just wondering about the classic car side of things.
Car is looking ace mate! Hurray up and get it painted
Hey Millar , whats your user name on instagram ? good question, classic car scene is surprisingly huge here. Lots of very rare motorsport vehicles , pristine classics and everything in between are hidden away and when there's car events on it never fails to amaze me how much stuff comes out of the wood work. Even when you get talking to locals theres a lot of them around, In a 1km radius of my place theres a mint Mk2 Escort RS2000 , A mk1 Escort Racecar been built , an immaculate bubble arched Mk1 escort Coupe almost done, a homebuilt carbon fibre zakspeed bodied Mk1 escort and the list goes on. Drifting is very big here too so you've got no worries there! Parts are readily available but at a higher cost than you are used to as we are a long way away but if you shop around there are lots of deals to be had and more and more local stuff is been made here to cater for us
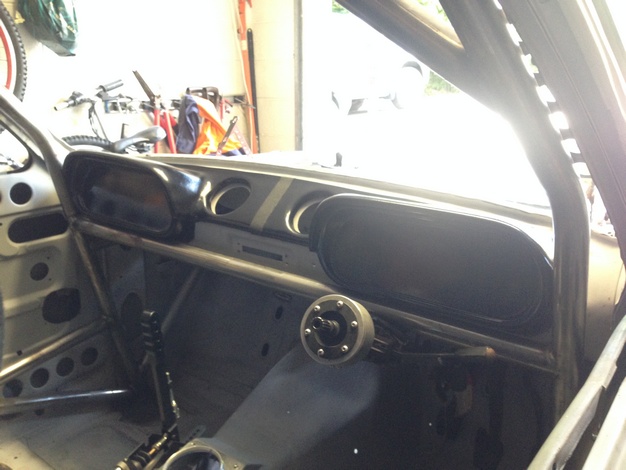
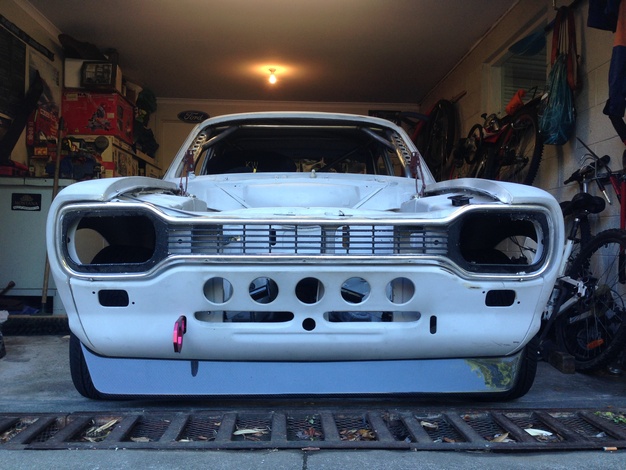
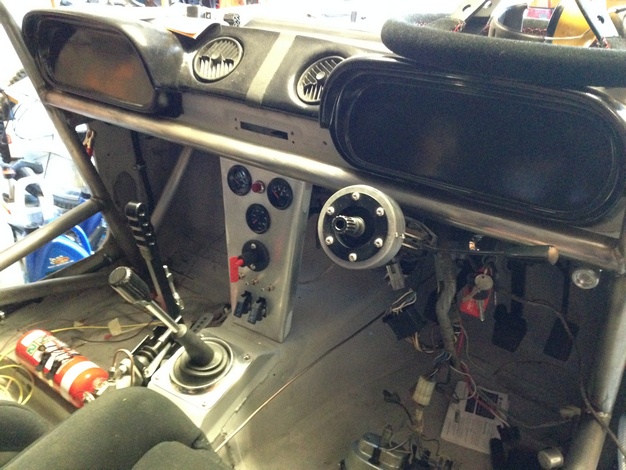
Unfortunatelymy twin cowl dash didn't fit around the rollcage
I had to trim the edges off and then re-fibreglass and paint it
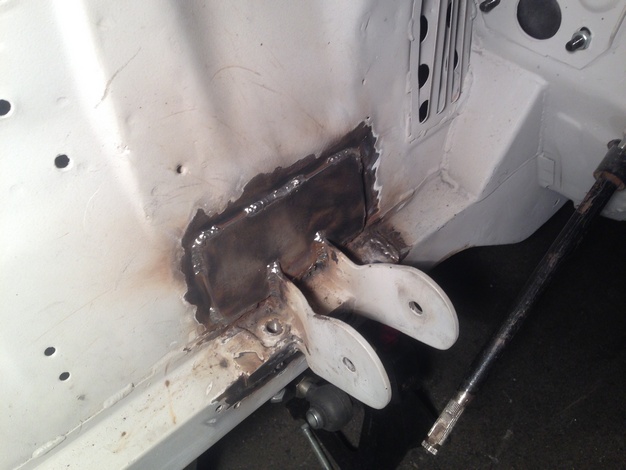
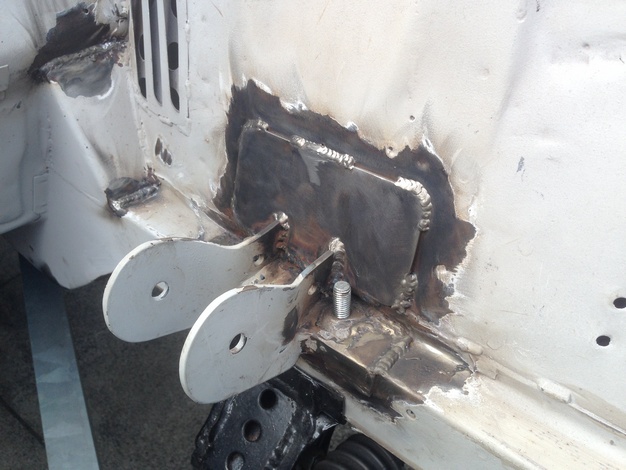
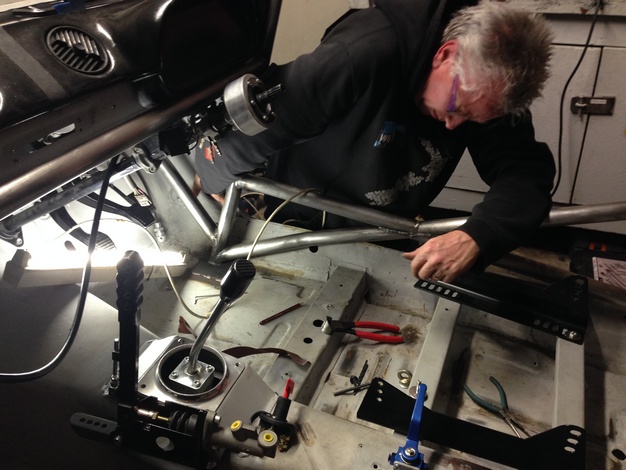
I was advised to put plates behind the engine mounts to spread the load
Some 3mm plate was added and stitched around the edges
I was playing around on the lathe with taper programs
and decided to knock up a new strut brace with spherical rod eyes on the ends
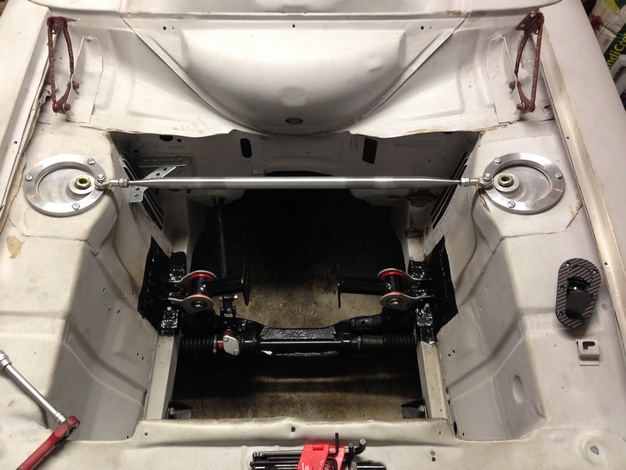
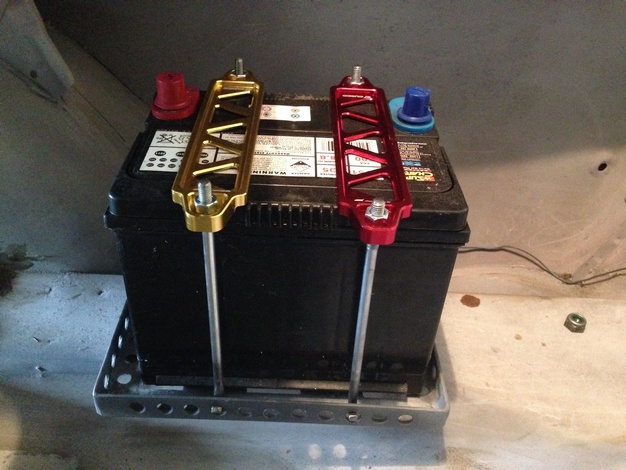
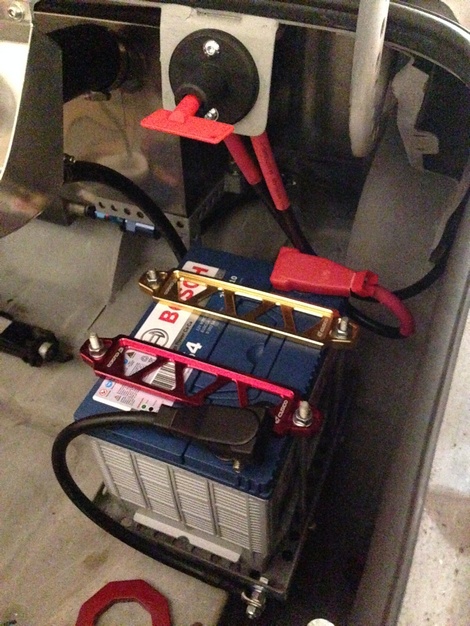
new battery clamps and supports to meet motorsport reg's
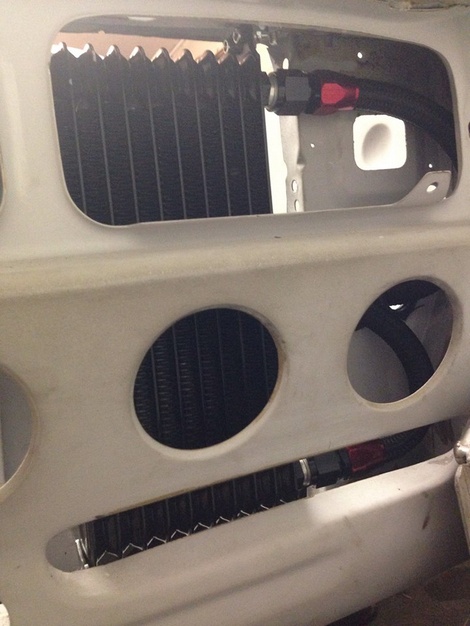
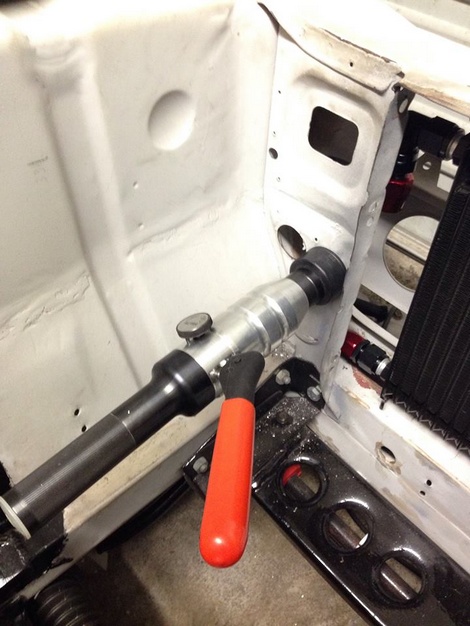
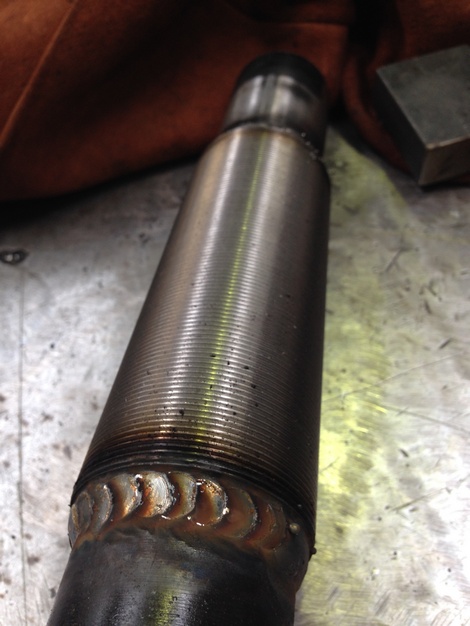
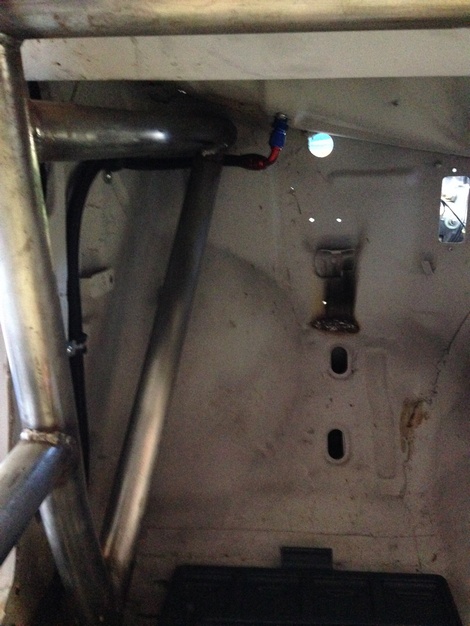
burrowed the chassis punch from work to make some
holes for my oil cooler lines to run through
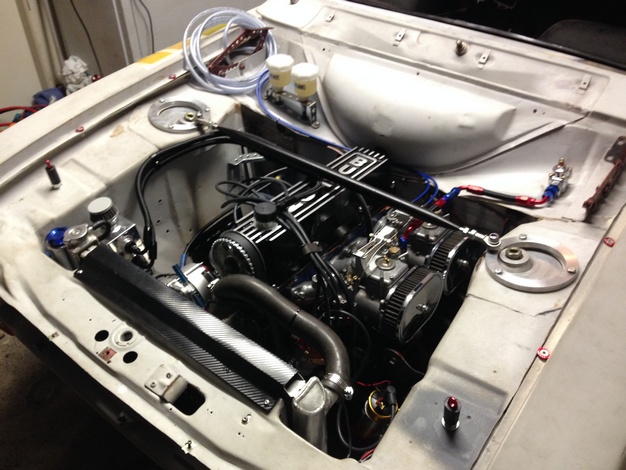
Decided to run the standard pinto to get the car up and running and setup
and then at a later date swap in the race engine
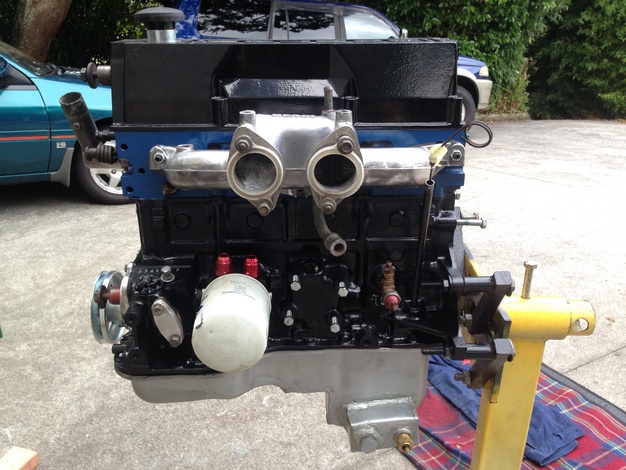
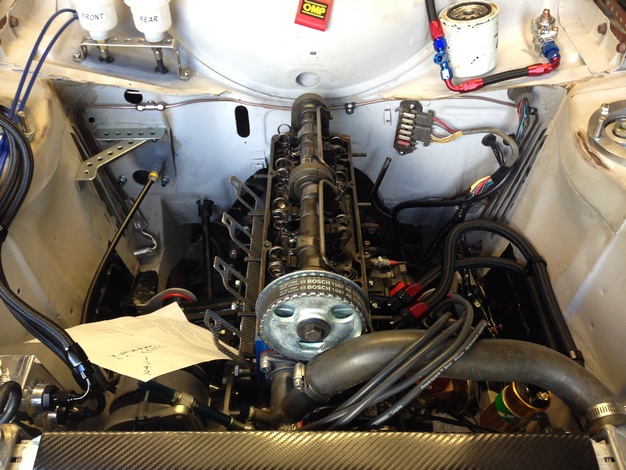
Cleaned up the motor
and ordered some new gaskets , seals and belts to freshen it up
My mate at Motorsport Composites made up a fibreglass splitter as a spare
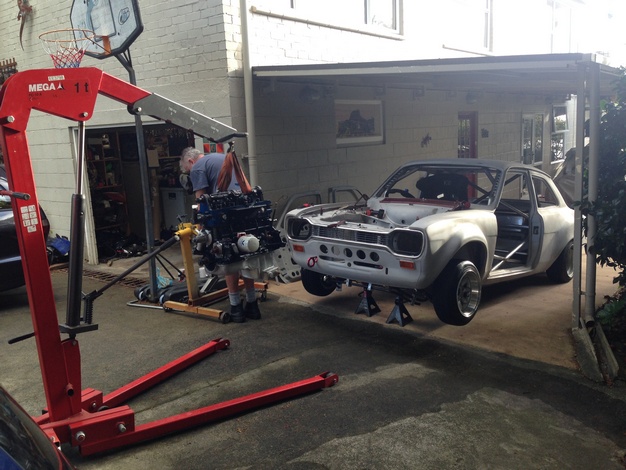
Engine going back in
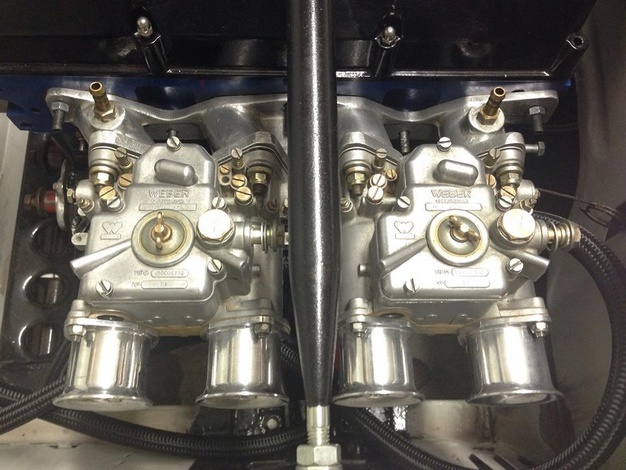
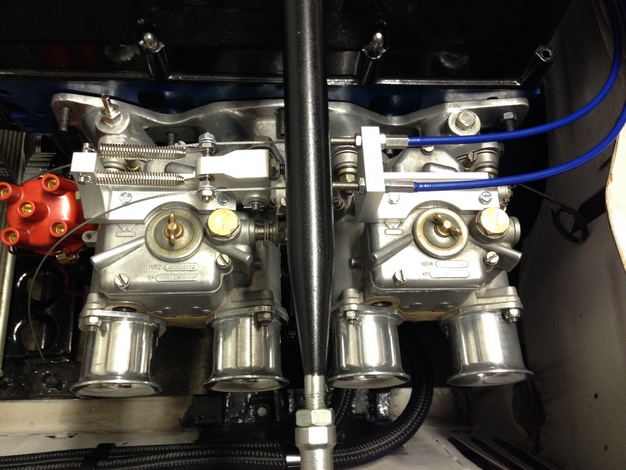
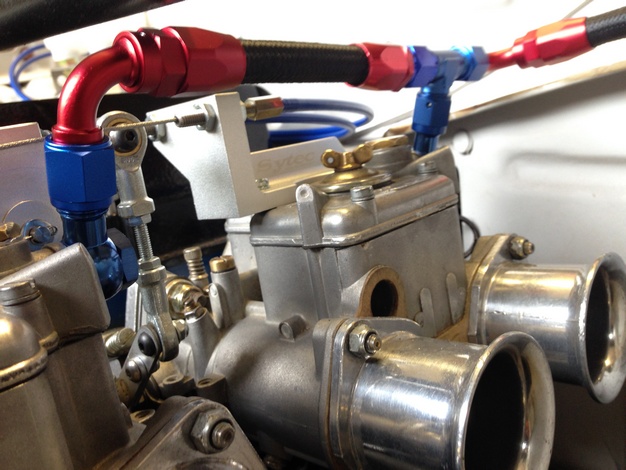
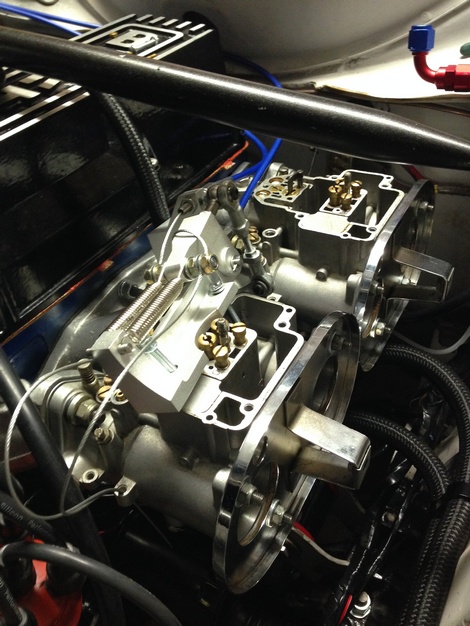
cleaned the carbs and pulled them apart to make a note of jet / choke sizes
and will seek some advise on them
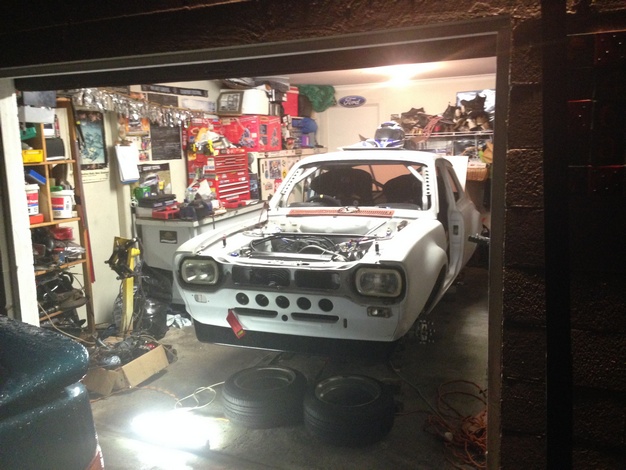
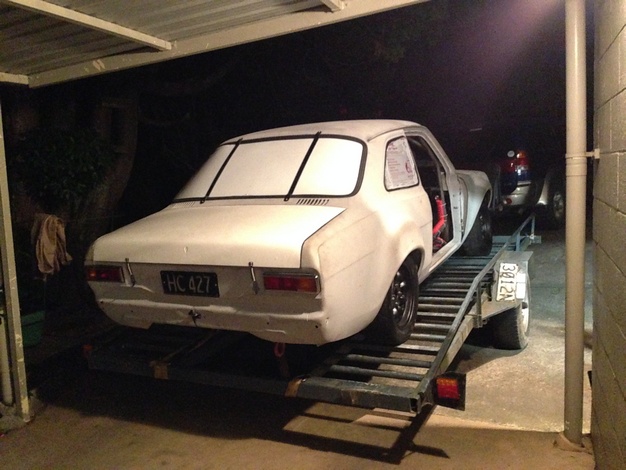
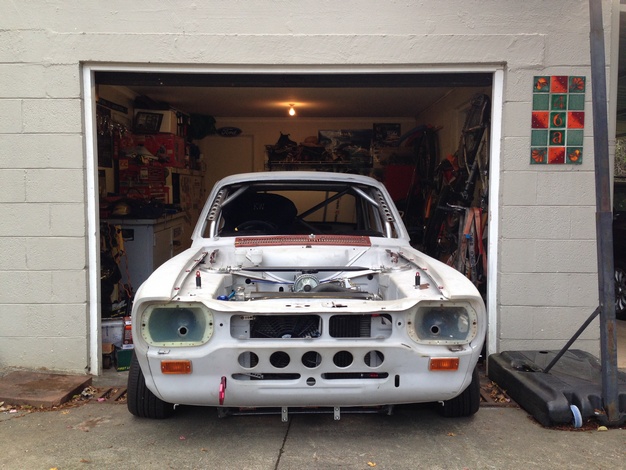
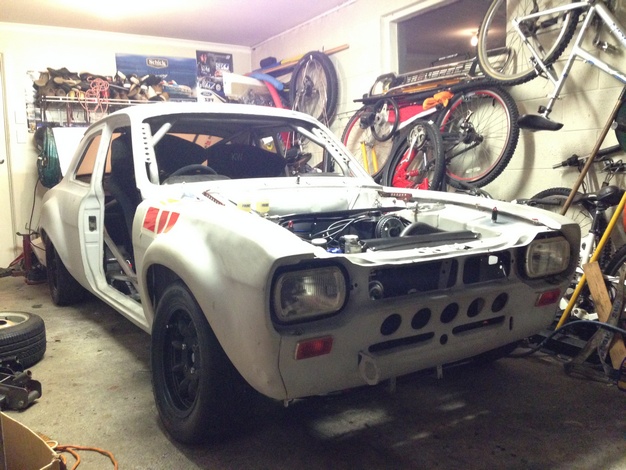
going back in the garage
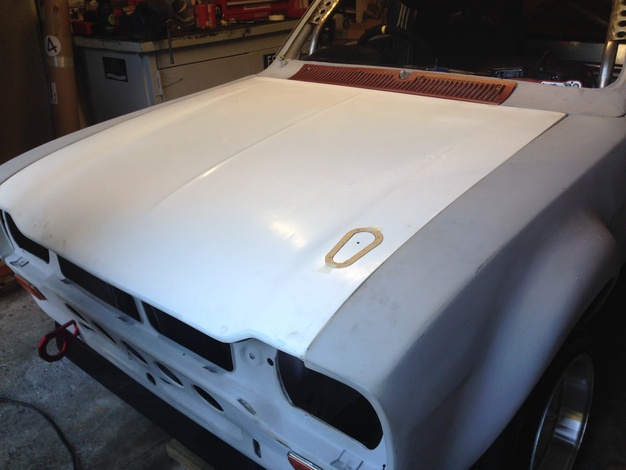
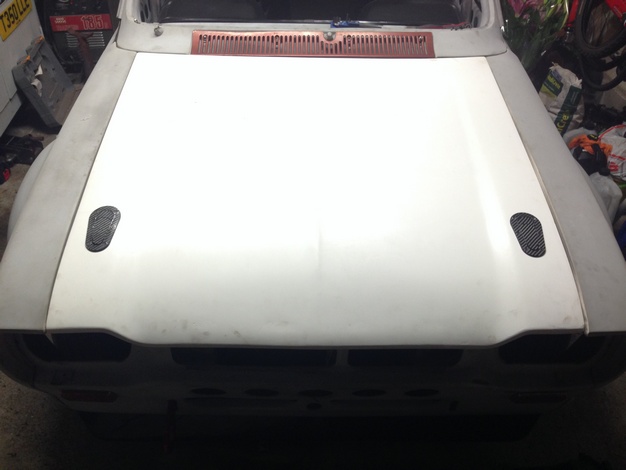
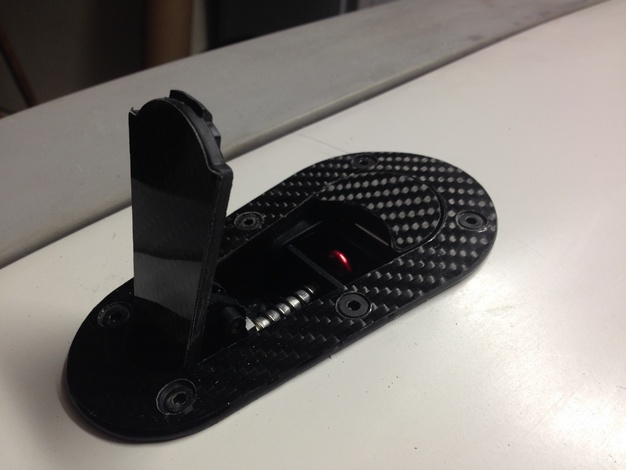
my fibreglass bonnet and boot from Mike Shaw Fibreglass arrived
made templates for my flush bonnet release pins
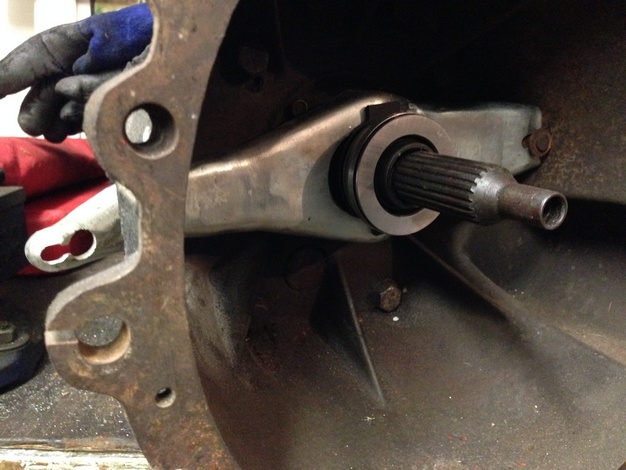
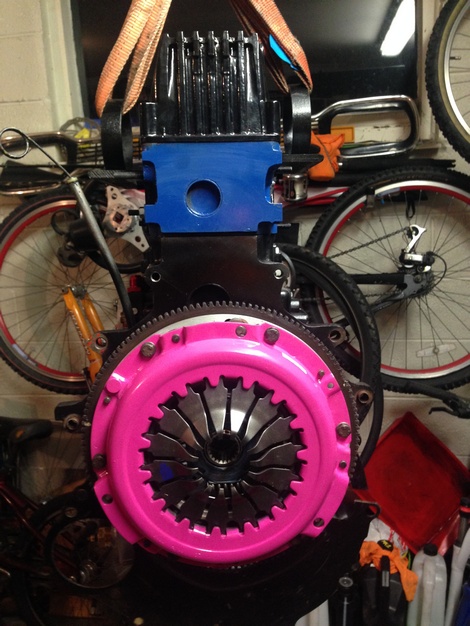
Modified the clutch release fork to suit the Toyota gearbox, finally found a bearing
that will work with my setup and just had to machine 0.5mm off the I.D
Uprated Exedy clutch and pressure plate should arrive this week
Refurbished the indicator mounts as the others had corroded
ticking off little jobs as there are lots of them
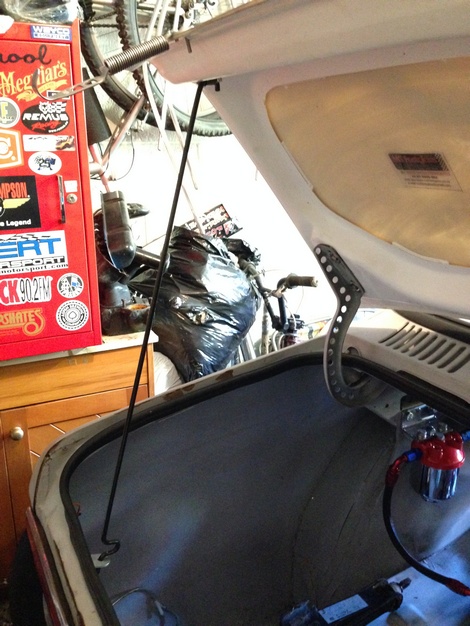
Fitted the fibreglass boot,
Boot locking springs arrived and fitted those,
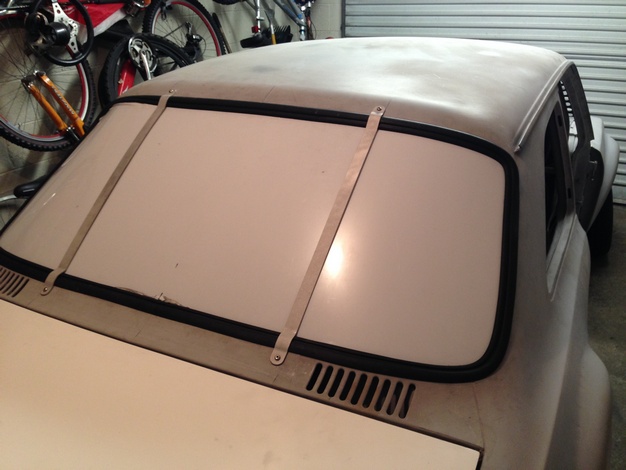
Also made a start on fitting the polycarb rear window but will need to trim and try it again
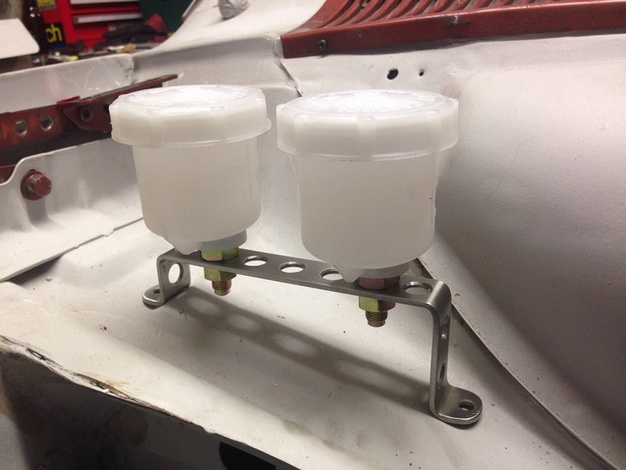
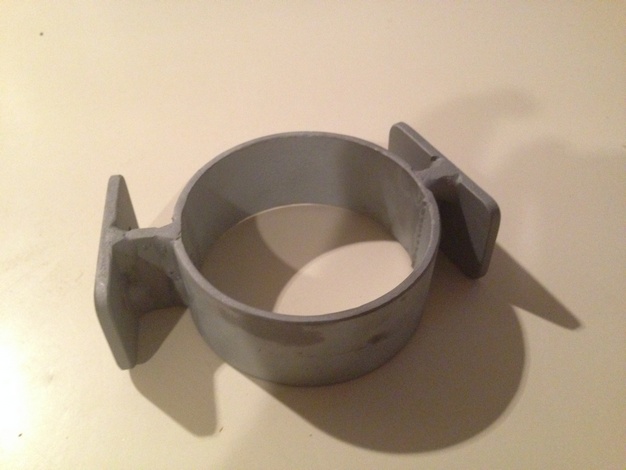
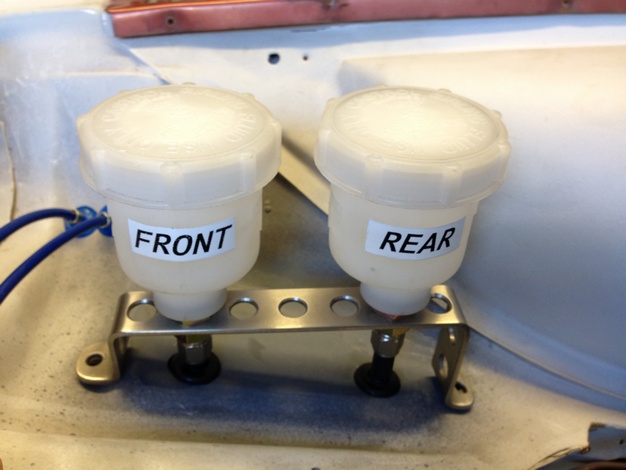
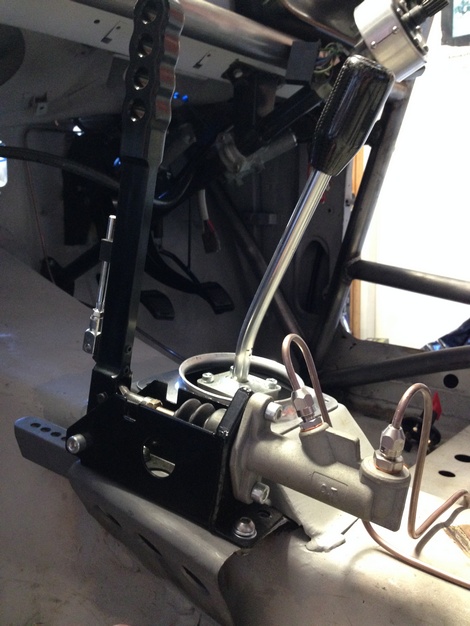
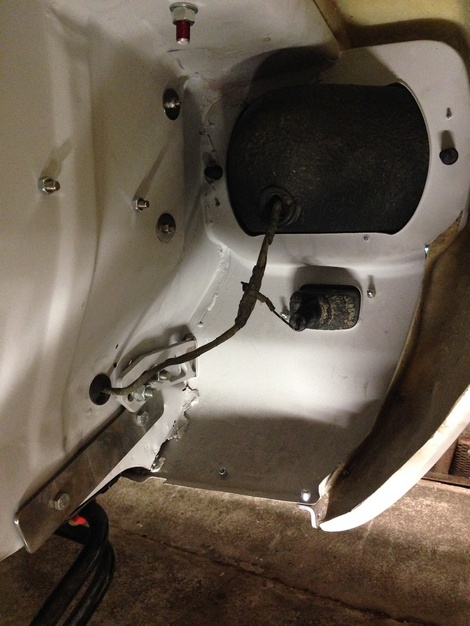
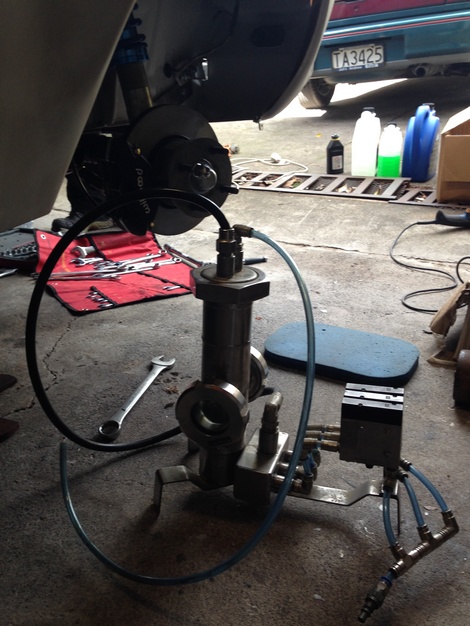
bought some brake fluid reservoirs
and dad made up this trick mount for them
complete with Race holes
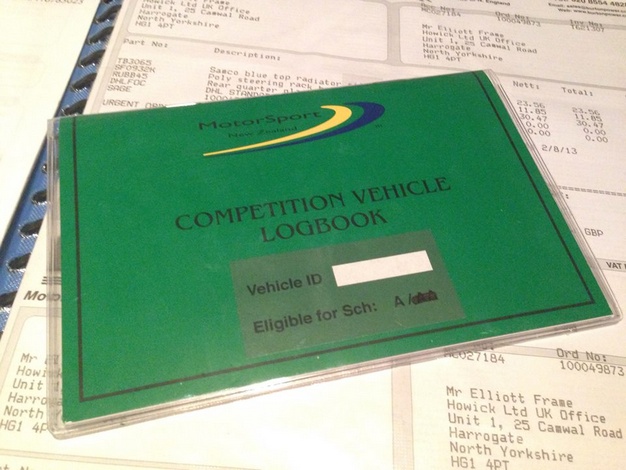
Logbook for the rollcage arrived
cage is homologated
bit off topic but certification rules are a bit different over here
in New Zealand and they don't like the wedged struts
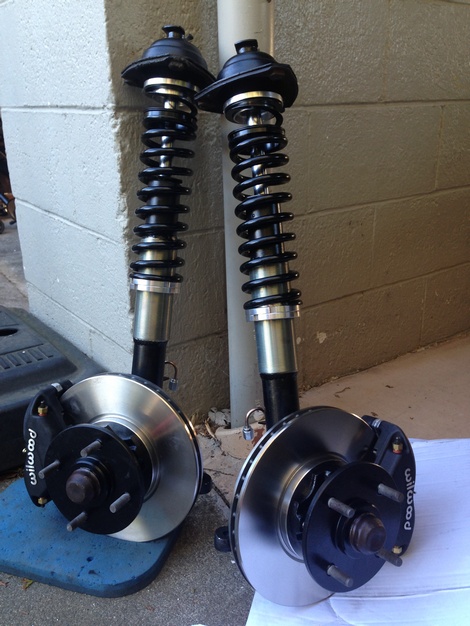
I've made up a spare set of adjustable coilovers without wedges
that I will use my road car for now and swap into the race car
if I come into any certification problems
Finished product
Mk2 Escort struts with adjustable platforms
300lb springs , keeper springs
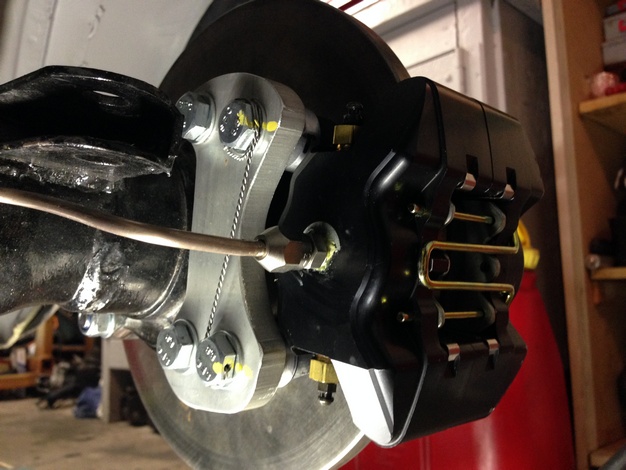
wilwood dynalites and capri vented discs
same setup as the racecar so the parts are interchangeable
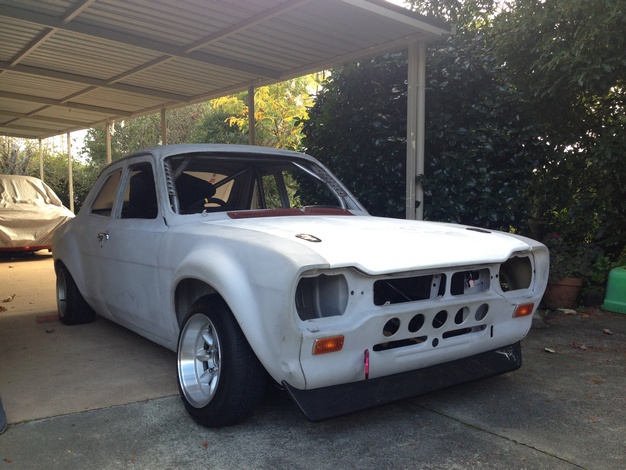
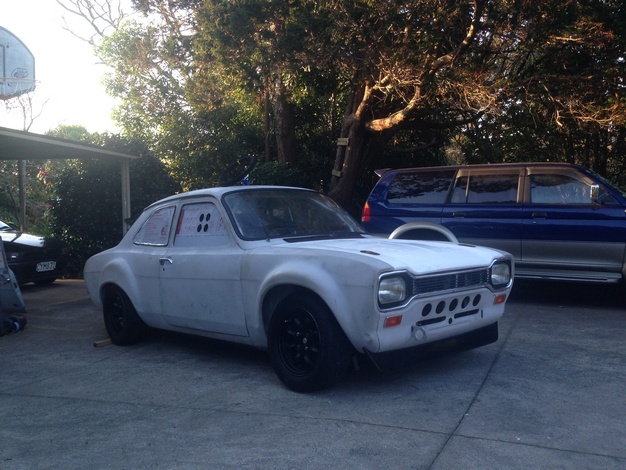
Four door sitting nice and low
I apologise for the Big updates
been a bit slack on the regular updates
Looking mint mate! Keep it up. Can't wait to see it with a lick of paint on it 👍
looking good mate, thanks for plugging MOTORSPORT COMPOSITES
It's about time you did an update. Almost there.
Thanks again for the help on Saturday.
Fancy looking stuff your making me feel lazy and I need to get moving on mine
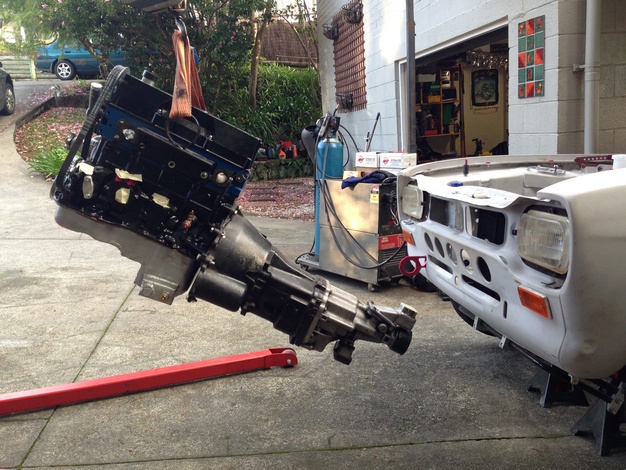
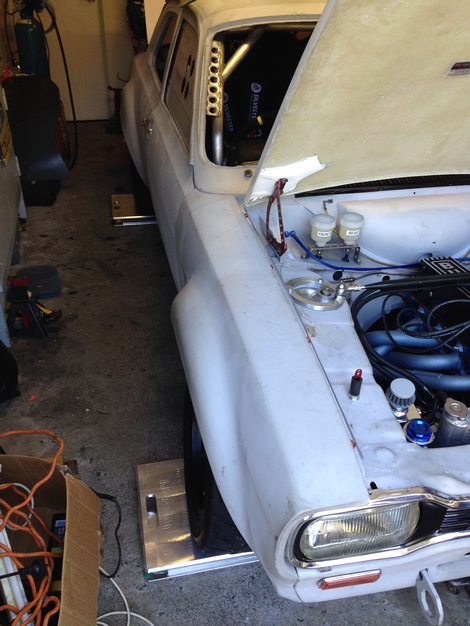
out of the garage again and time to fit the engine and gearbox
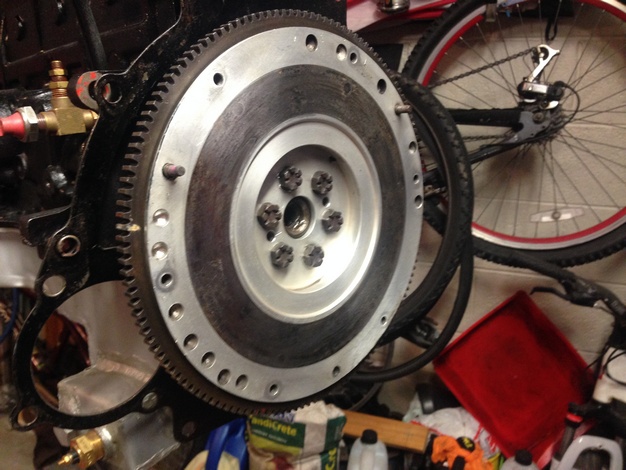
Aluminium Flywheel Fitted
Heavy Duty Exedy clutch and Pressure Plate , lovely colour
Ready to drop in
Have fitted new cambelt , waterpump , gaskets all round and a few seals
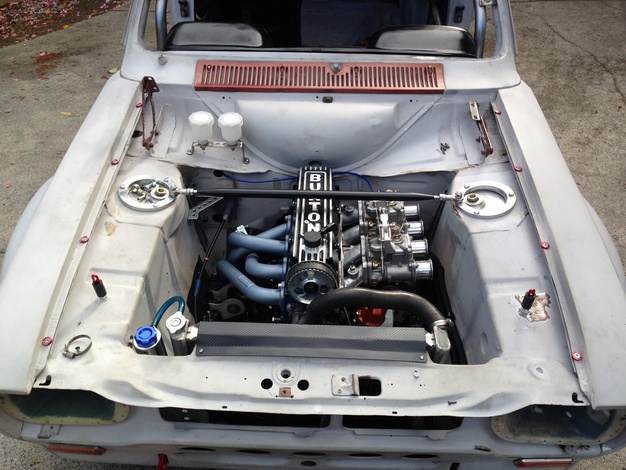
Engine bays getting more populated
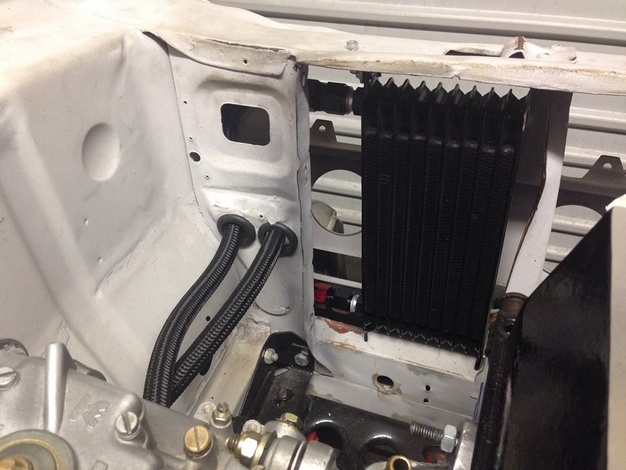
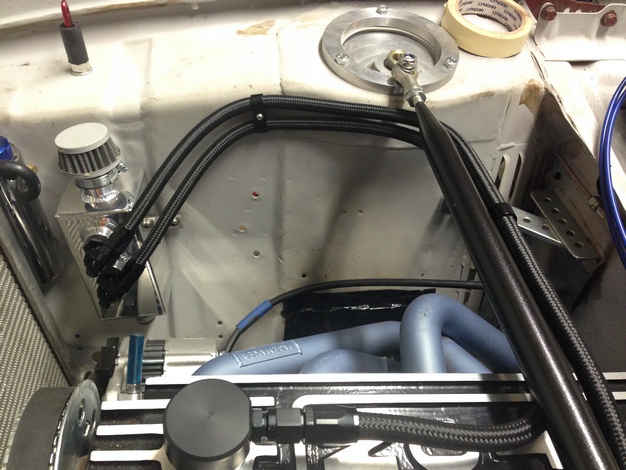
Radiator , fan and oil cooler and lines fitted , radiator overflow tank
Have welded a bulkhead guide for the clutch cable to run through
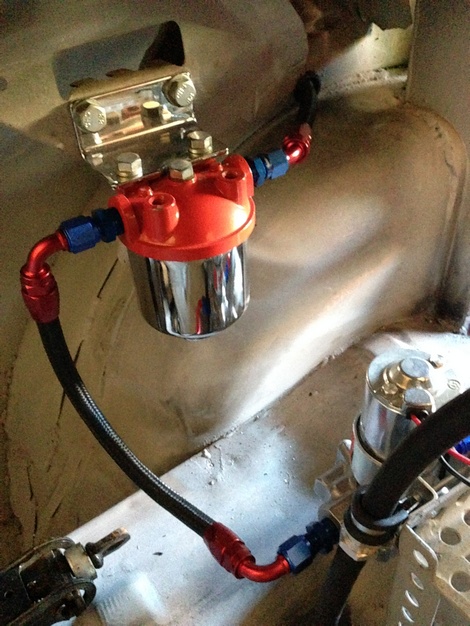
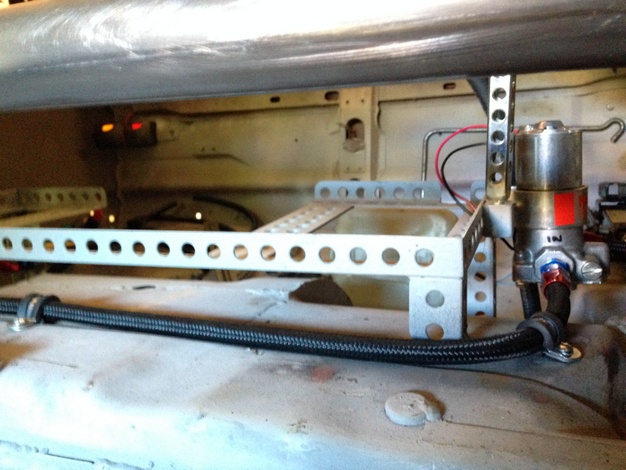
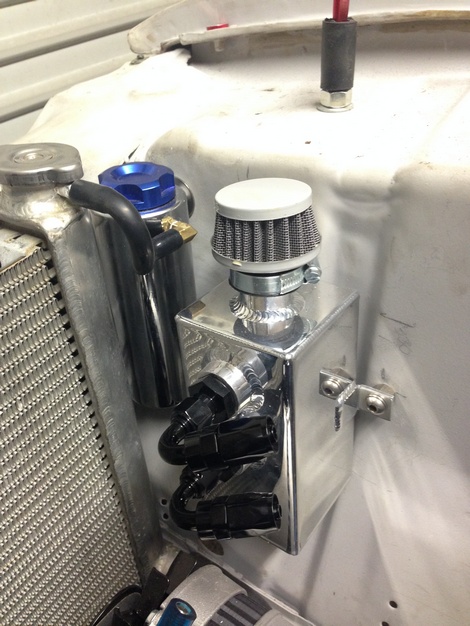
Oil catch tank and fuel lines / fittings are on there way and will be fitted next.
Been waiting a while for this linkage but worth the wait as it looks great
Back into the garage
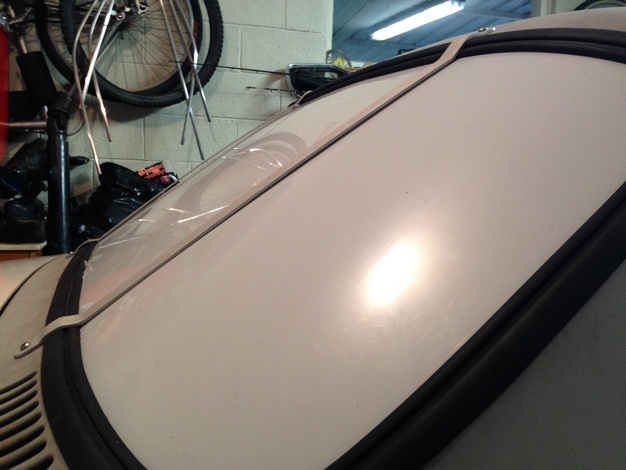
Fitted the polycarb window with great difficultyand made up some supports with dad as per the motorsport regulations
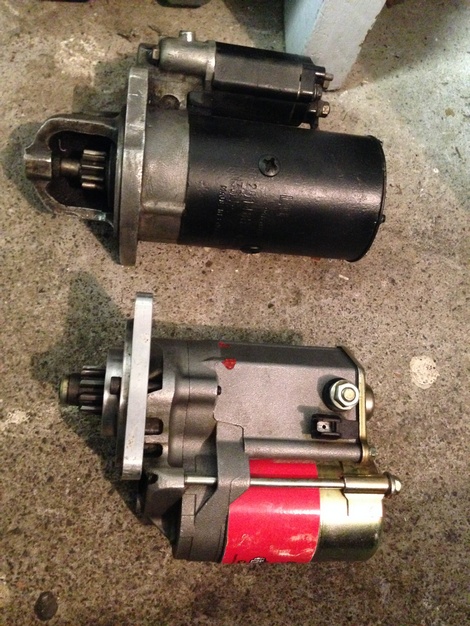
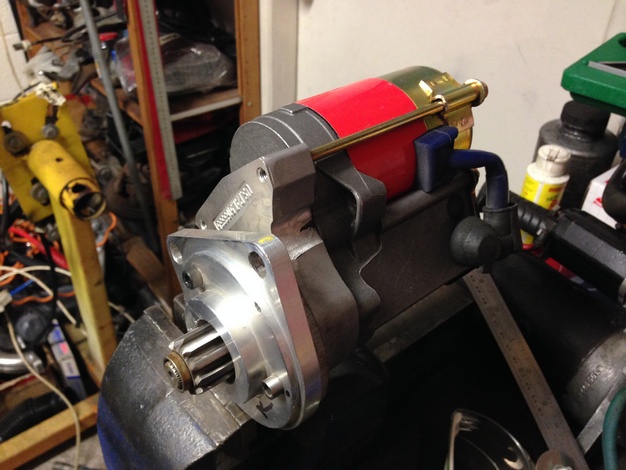
Burrowed this high performance starter from a friend and it fits nicely so will order one when Ive got the extra cash
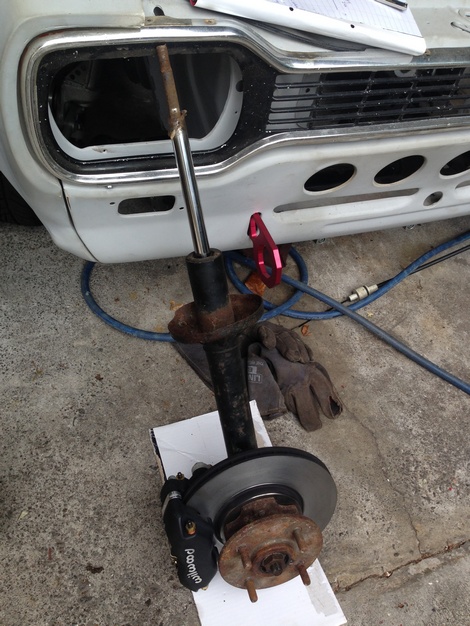
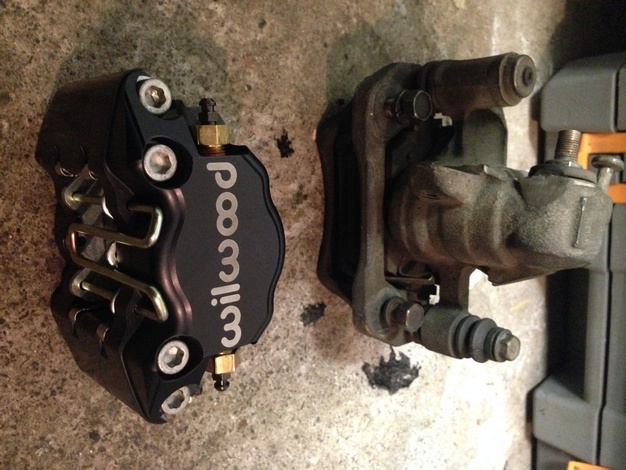
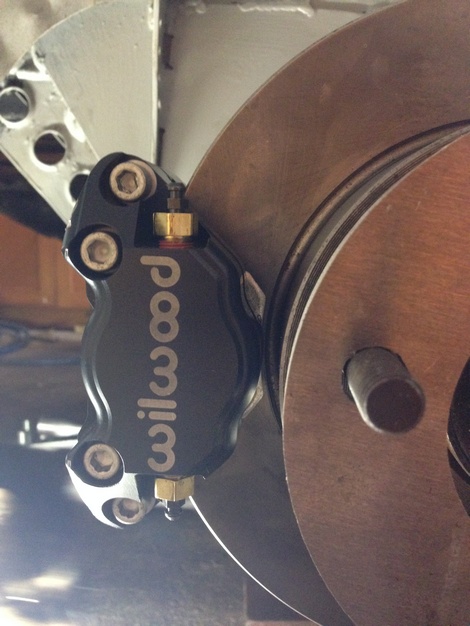
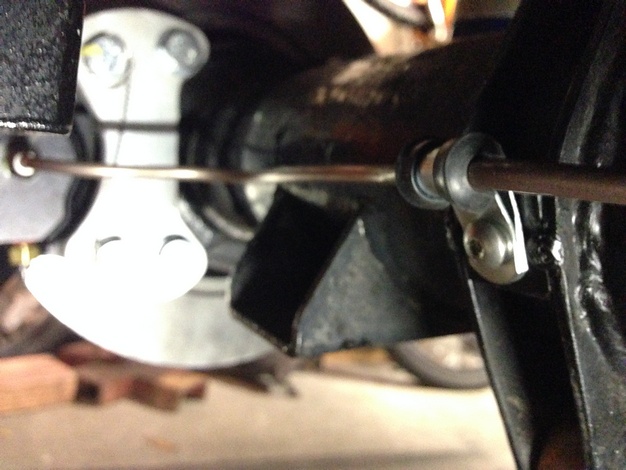
Decided to ditch the old calliper setup which were single pot Nissan primera items
now running wildwood 2 pots , just in the process of making brackets and spacers
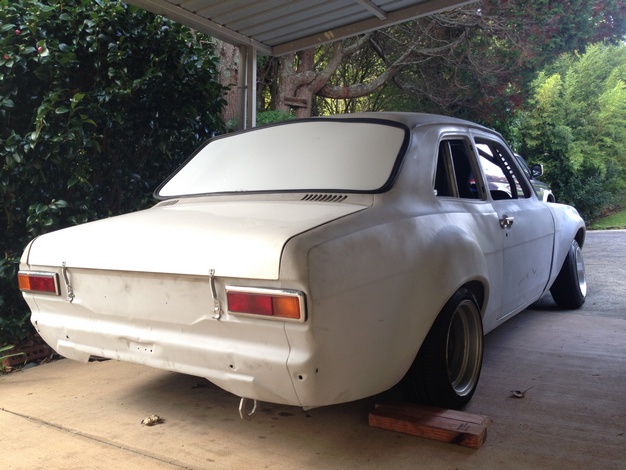
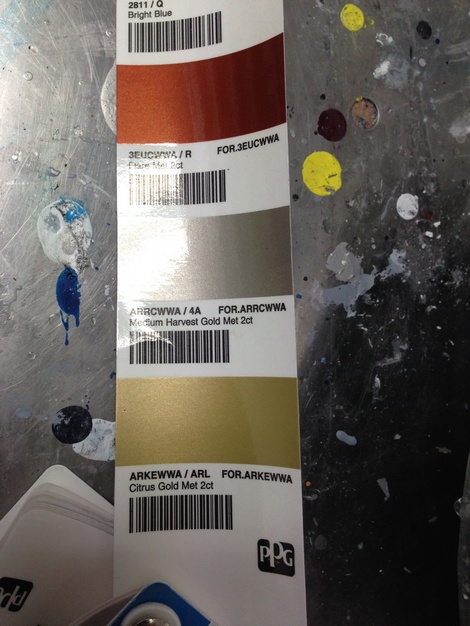
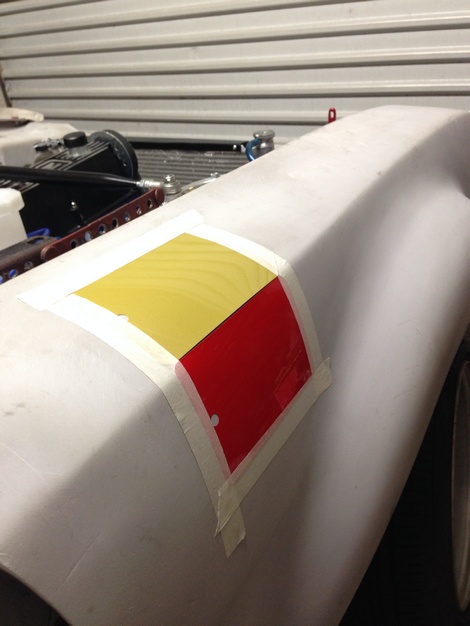
Its a little bit away yet but no harm in been prepared for paint time
been testing a few colours with a friend at a paint shop
not too far off what I had in mind
Gold = Ford Citrus Gold
Red = PPG 717 Bright Red
If any one else has got any colour codes to try , please share
Looking very good, you're doing a great job
With the coilovers does the welding have to be done by a ticketed welder for certification purposes or can they be done by anyone?
Last edited by Pikey15; 22-06-2015 at 02:10.
That's the process Im about to go through in August with the cert guy so i'll keep you posted. As far as Im aware you don't have to be ticketed but welds need to be of a good standard and may be subject to testing. I do hope its not too much of a drama !
Cool thanks for that hope it goes well for you.
Really great work you put in to this car!
I have one question though. The tubes in the rollcage isn´t seamless. How could the cage be homolagated with those tubes?
Here in sweden you need All FIA spec on everything to get it OK and seamed tubes are banned.
Last edited by mride; 22-06-2015 at 07:17.
Looking awesome mate! Nice colours. Now hurry up and finish it
CheeRS 'mride' good spotting, I had a read on it and like you mentioned the FIA spec is "Cold Drawn Seamless Carbon Steel tube" But The Motorsport New Zealand spec is NZTM-Q29 which is a Hot Rolled, Pickled, Oiled and Electric Resistance Welded tube. We use 44.50mm Diameter x 2.60 for main hoop and 38.10mm Diameter x 2.60 for all other bars. How does that compare to your cage sizes ?
CheeRS Allantrying hard to keep the progress ball rolling

I have 45x3mm in the main hoop and 40x2 in the rest.
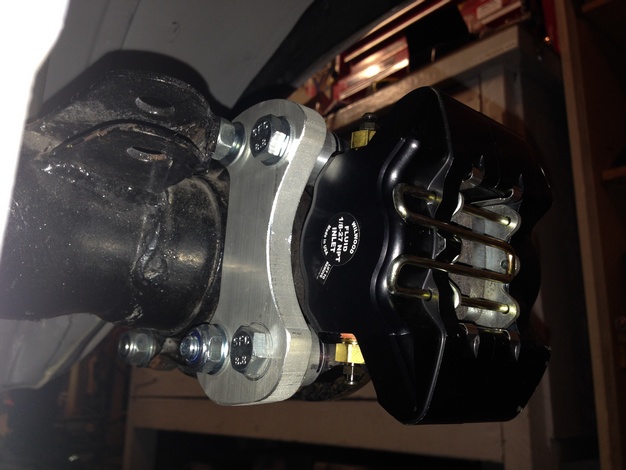
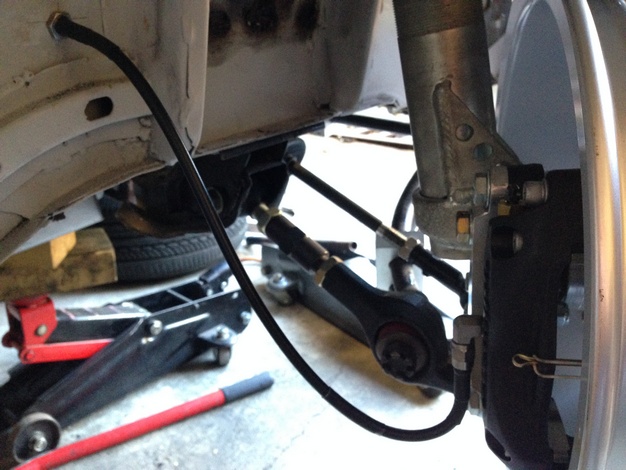
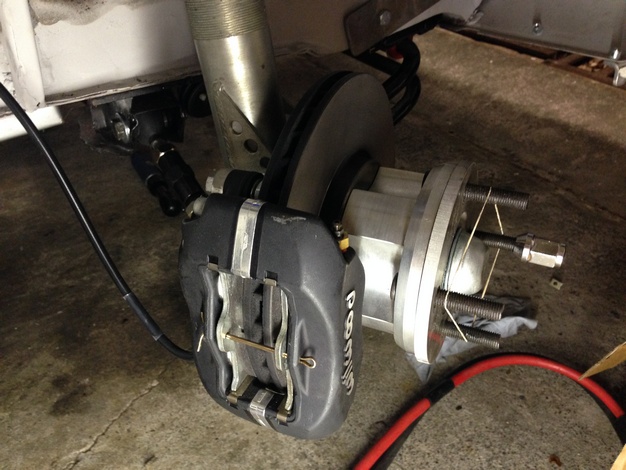
Rear Wilwood brakes fitted
Allan did a top job on cutting me some adapters
Cheers Mate
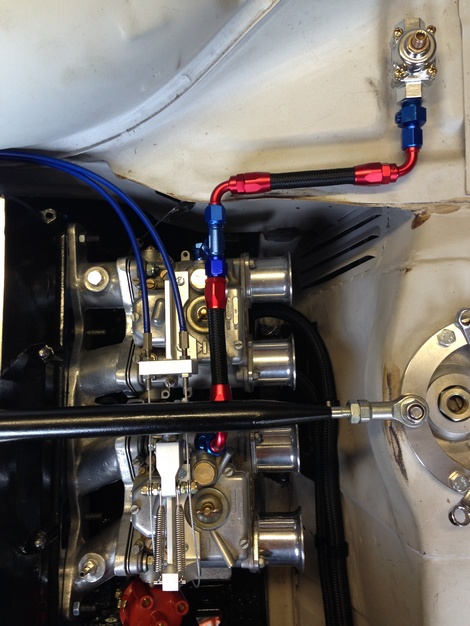
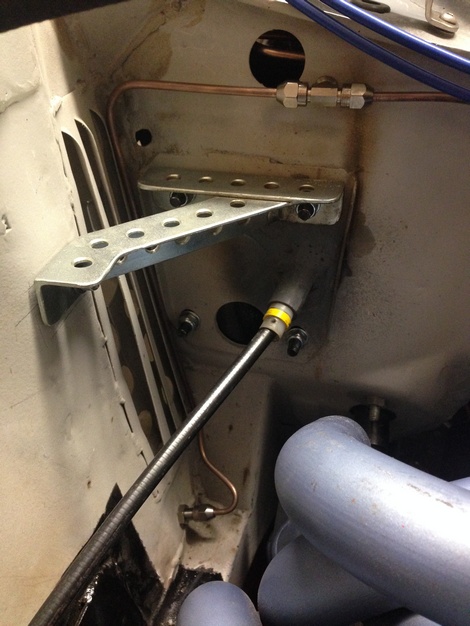
Fitted the fuel lines
Carbon wrapped the rear window supports
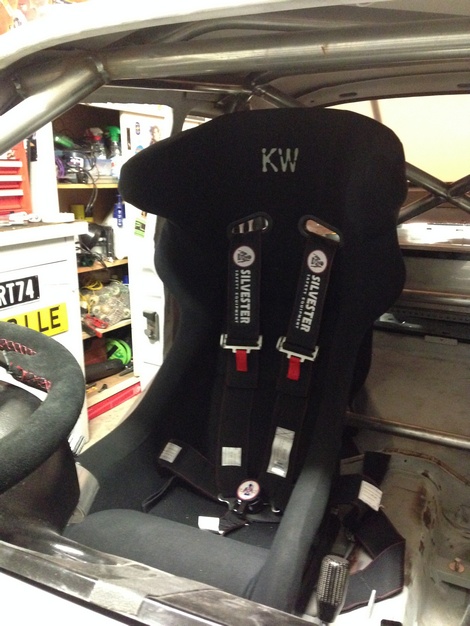
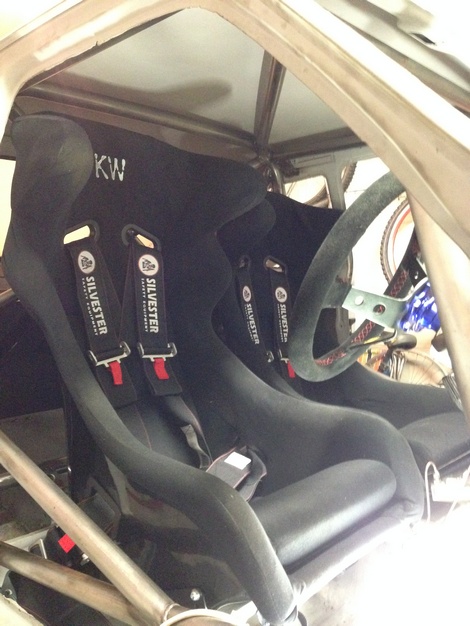
bought some 5 point silvester harnesses
Made up a stay for the fibreglass boot
Oil catch tank and overflow tank fitted
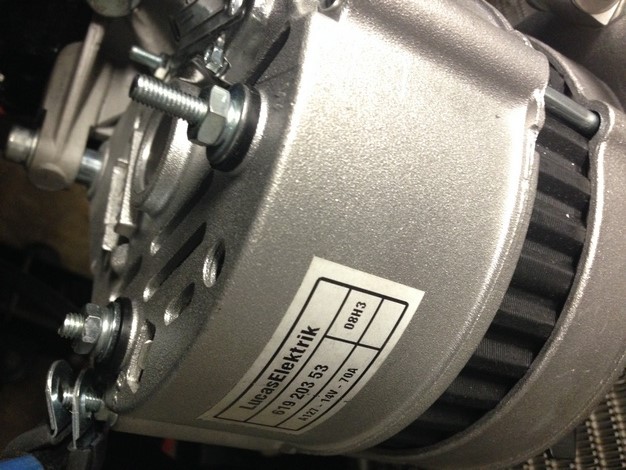
Bought a new alternator , LUCAs 70amp
alternator fitted and made a tensioner
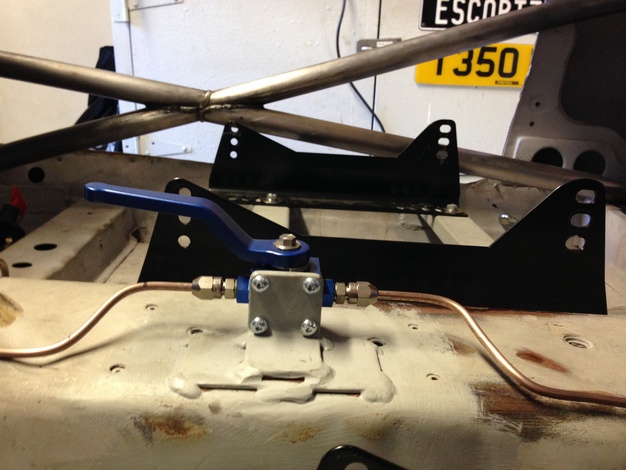
Brake lines are getting fitted next week
and new Driveshaft should be ready to pick up too
Just read through from the start - a cracking read and some top notch work going on here fella
Somewhere along the way I had a question, but it escapes me for the moment. It'll come back to me at some point

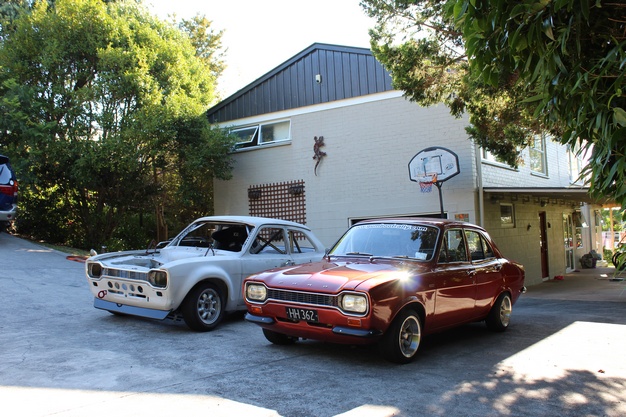
Out for a drive on a sunny spring day reminds me why I got this car
Let me know if you remember your question, I should be on here a bit more often
Looking fantastic. Not long to go now and you'll be driving it 👍
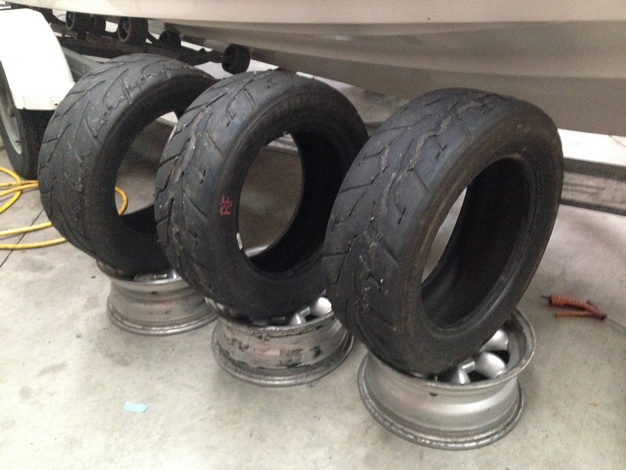
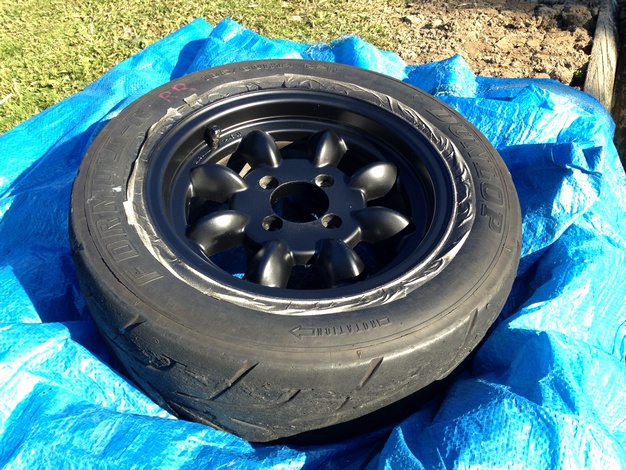
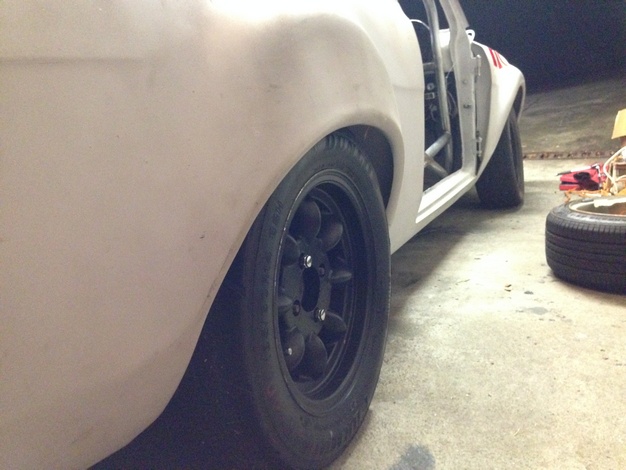
Burrowed some second hand 14" semi slicks and put them on some old superlights
to get me going for my first track day
Gave them a spray with some plastic paint
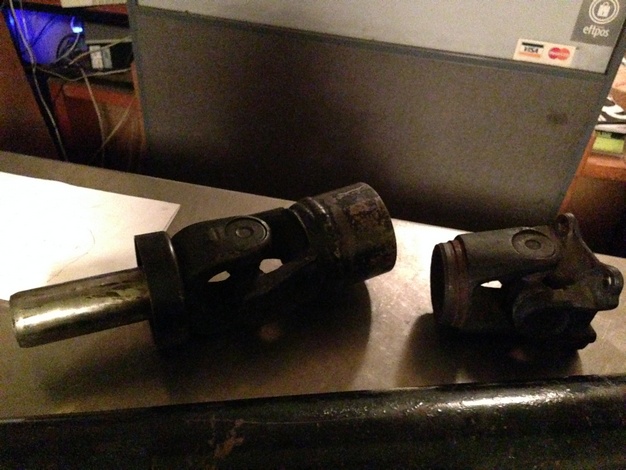
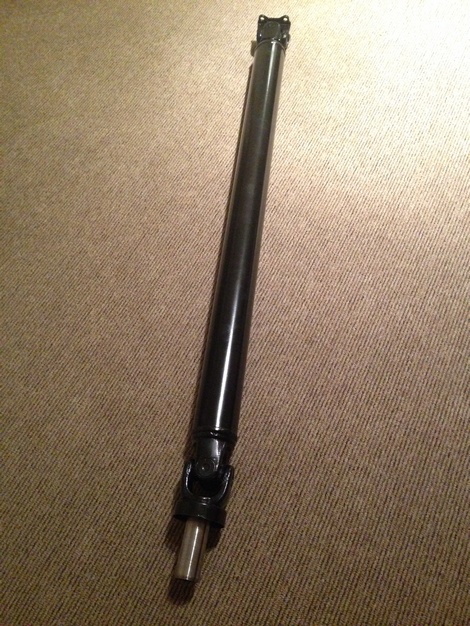
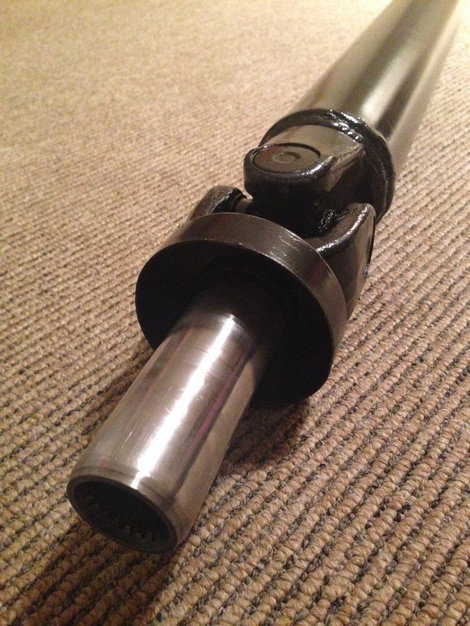
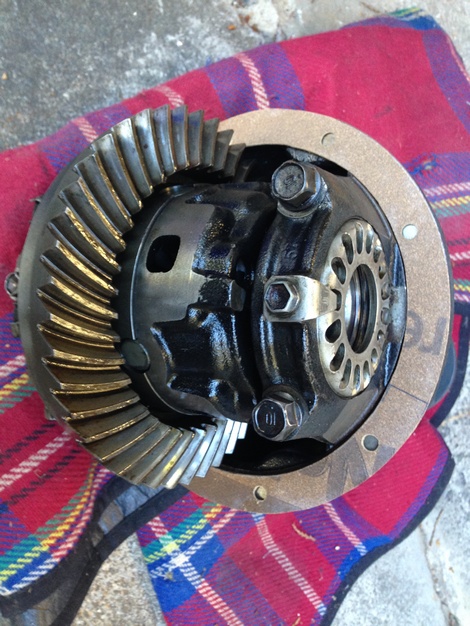
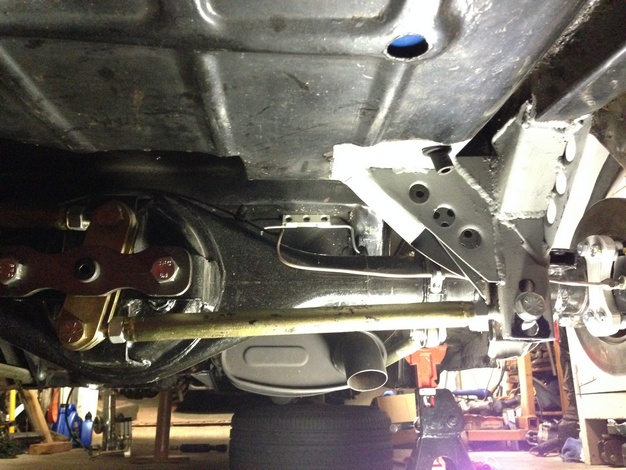
Sourced a hilux diff flange and a supra sliding yoke to make up a new driveshaft
New driveshaft
Oil breather lines
Made a diff flange and installed the diff head
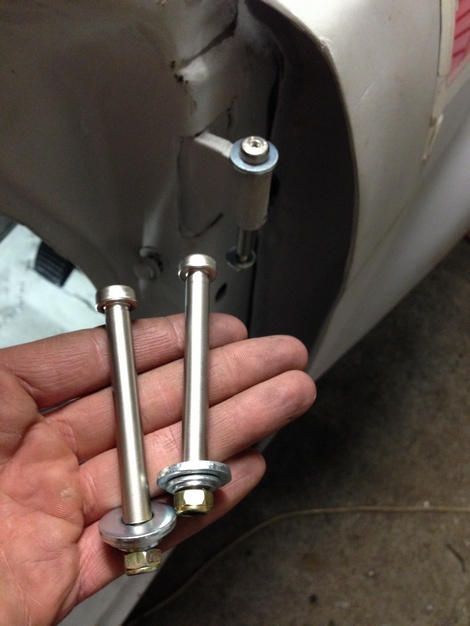
Nickeled shoulder bolts for door hinges
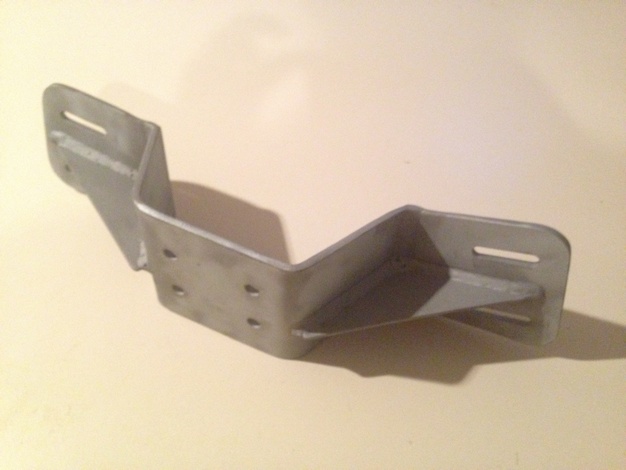
Added some gussets to the gearbox crossmember
Also made up a driveshaft safety loop
Brake line installation
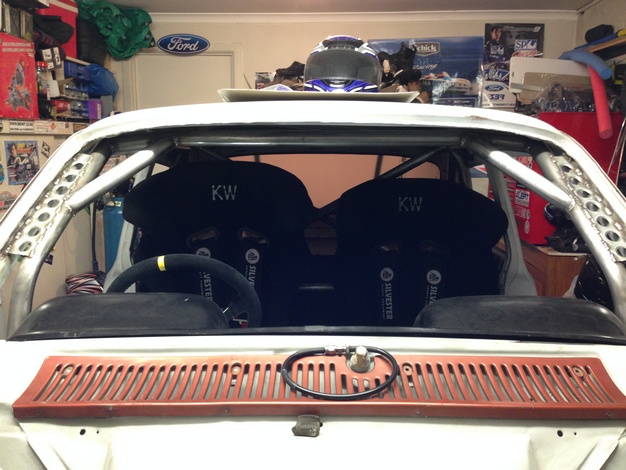
Both seats and harness' in
rear panels in
Dad starting to pull wires through the inner seals
Next job is the wiring
It's really cracking on now, won't be long at all
Love all the attention to detail.
Cant wait to see it in paint.
Shaun
Fantastic build Escort74!!
Its great to see this quality build here in NZ!
I do have a question. Where did you get the bolts four the doors? i was thinking of doing a similar converse to my mk1.
"Nickeled shoulder bolts for door hinges"
Thanks
Nick
Thank you very much Nick , Pikey15 and escortinadriver
The shoulder bolts are 8mm diameter , 65mm long and have a M6 thread on the end. They fit really nicely , beats knocking out roll pins every time. They are from Atom fasteners http://www.atom.co.nz/
Big Exciting updates this month
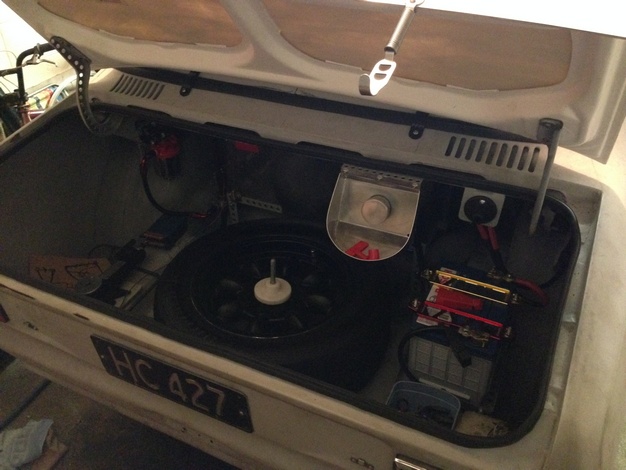
Finished running the thick battery cabling through the car and to all the kill switches
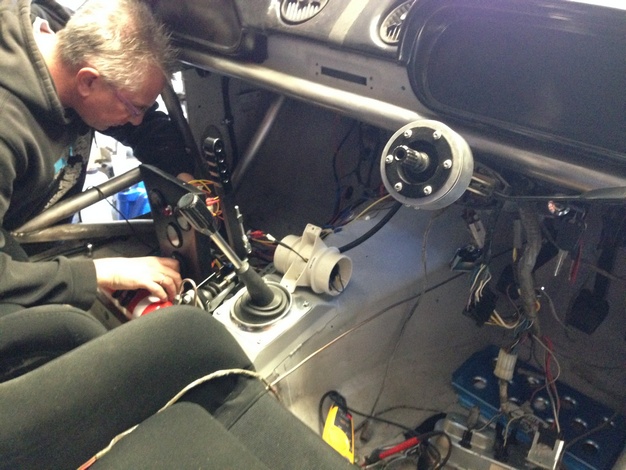
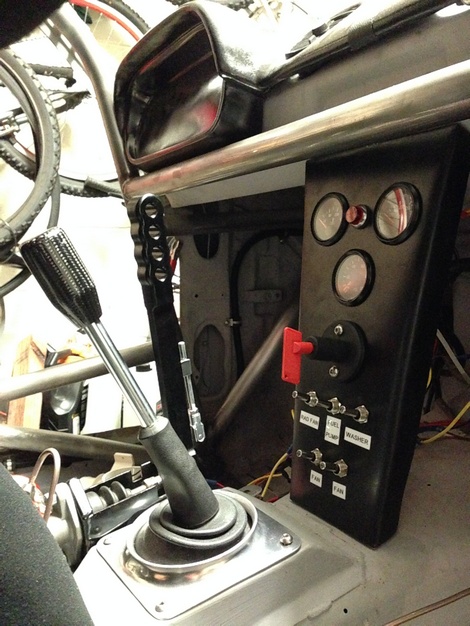
Made a temporary centre console
My plan is to put a few essential gauges in there and save up and buy the rest of the
set when I have more money and then I will fill up the twin cowl dash. In the meantime
this will get me going.
Dad getting stuck into more wiring
Centre console in
I've got a VDO electrical water temp gauge , electrical oil temp and mechanical oil pressure ,
a low oil warning light , kill switch , and switches for radiator fan , inside fans , fuel pump and
the washer bottle
More wiring in the boot for the lights , indicators , brake lights , fuel pump and washer bottle
Headlights and indicators in and working
Going through and tightening all the brake lines , lock wiring bolts and fitting brake pads
Burrowed this vacuum unit that plugs into the compressor to pull brake fluid through the lines
Setup the rear end and fitted the driveshaft
filled up the G/box and Diff
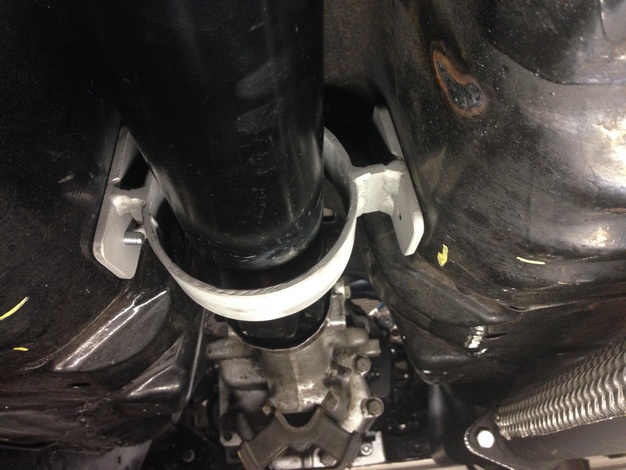
Fitted the exhaust
Set the tappets and static timing
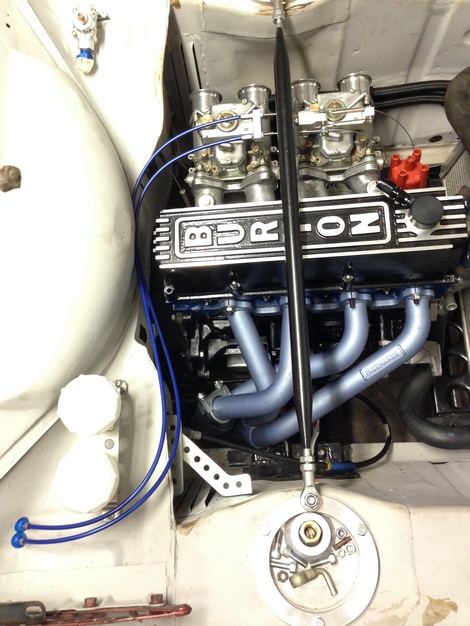
fitted gaskets and bolted on carbs and exhaust manifold
filled it up with oil , water and fuel
Put the semi slicks on and put it on the ground ready to try fire up
unfortunately it didn't start first time
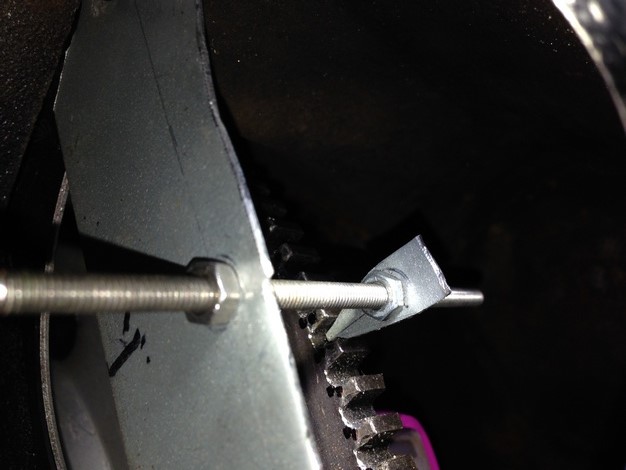
after a whole day of fault finding we found the cause -
Lack of clearance between the ring gear on the flywheel to the starter motor causing it to bind
A homemade jig confirmed this problem
Nothing a bit of home engineering couldn't fix
Time to try again
No fuel coming through one of the carbs
Had it apart and cleared out most of the jets and pumps to discover the problem
The pump rod and spring assembly had come apart which was stopping the
supply to the pump jets
All back together and BOOM it fired up for the first time in 5 years
Awesome stuff.
Really glad to hear you got it going.
Well done.
Matt
great project love it....noticed the louvres on the inner/wing in engine bay..do they remove heat or am i missing something...cheers mark
CheeRS
Matt and Mark
very relieved to hear it run at last !
Thats the idea Mark , another guy who campaigns a very fast escort here uses the louvres in the engine bay and recommended to install them to let the air flow through more freely and hopefully remove some heat on the way
I had similar trouble with clearance on my reduction starter.
Looking great.
Shaun
CheeRS Shaun , what reduction starter were you using ?
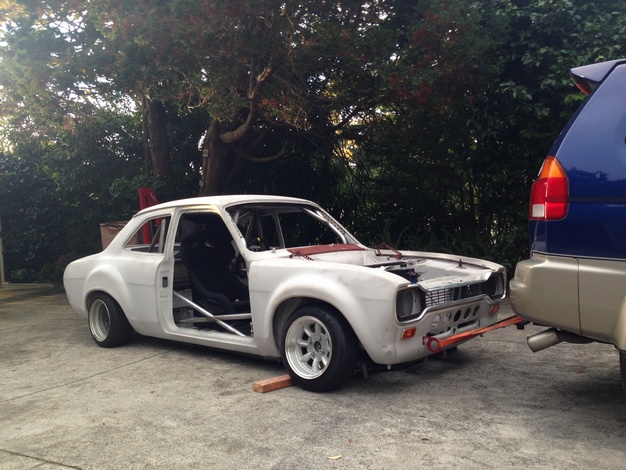
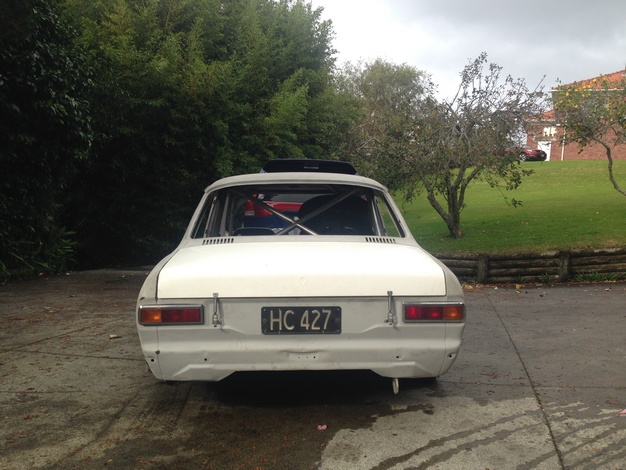
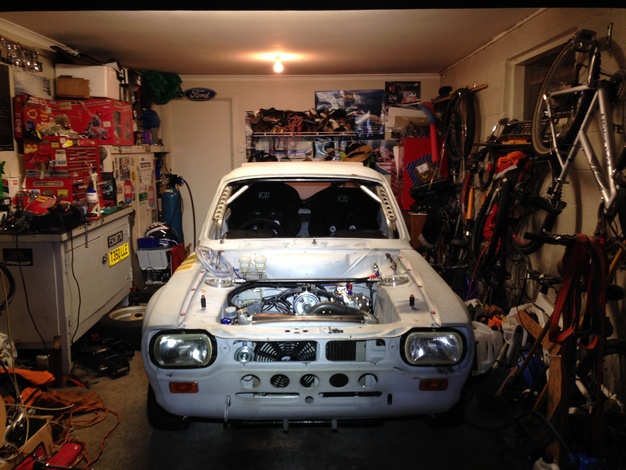
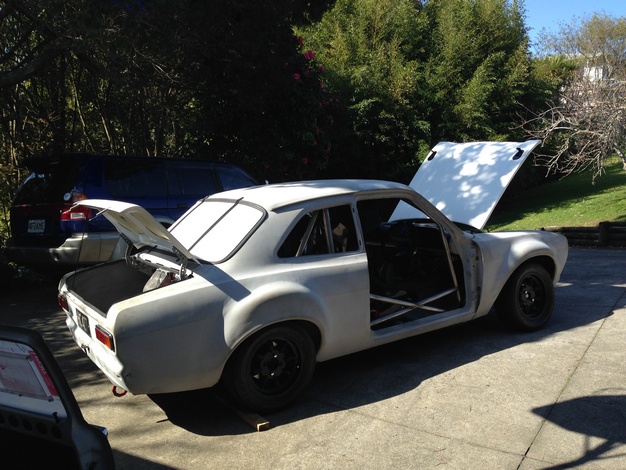
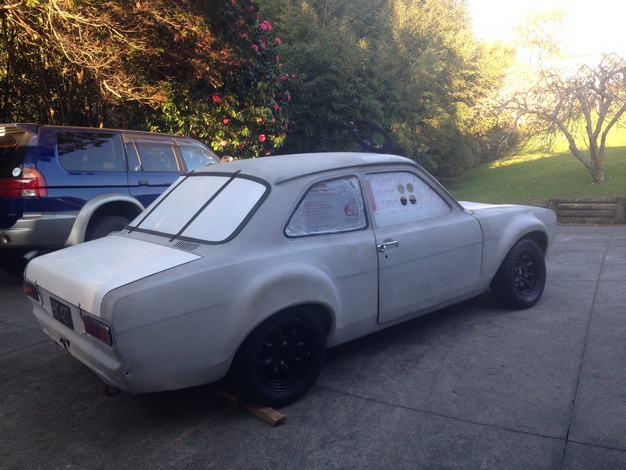
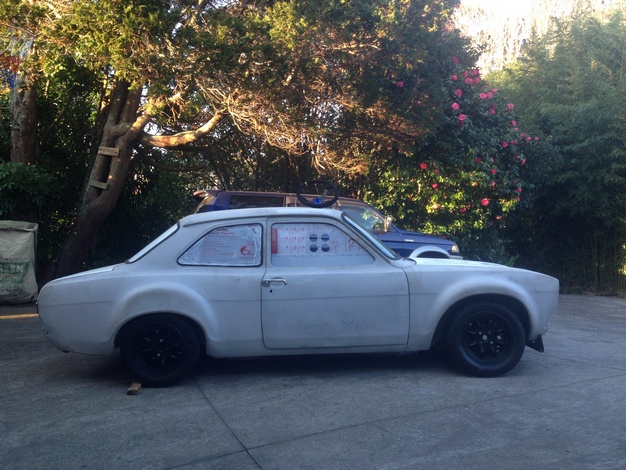
Finally a sunny day on sunday so I could get the car out of the garage
and put the panels on ready for the weigh in
All panels on
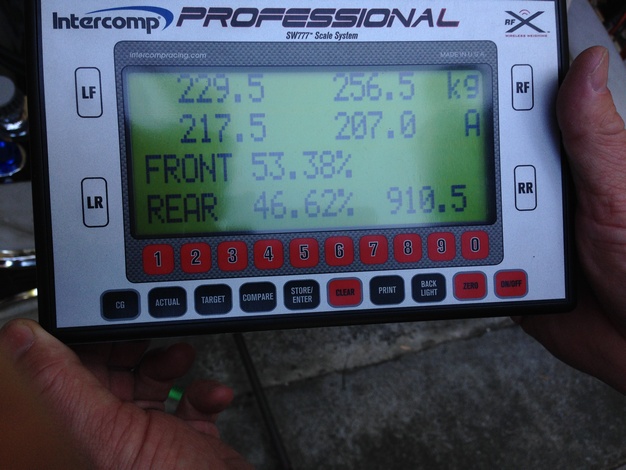
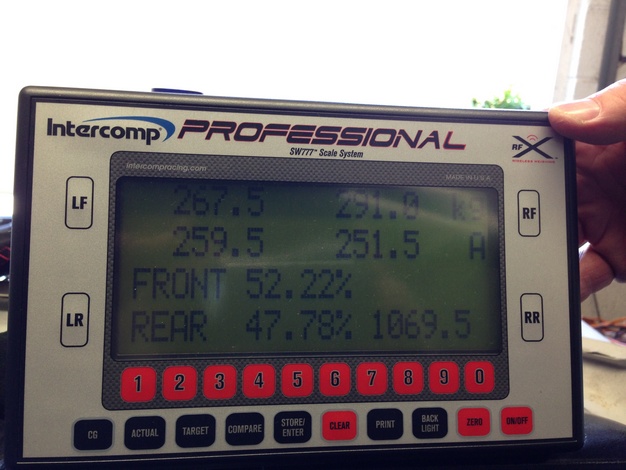
On the scales
20L of fuel in the car , spare wheel in the boot and a jack
weight without passengers
weight with me and dad inside
Off to the garage for the LVVTA certification inspection so I can get the car road legal.
All the best with the cert inspection, hope it goes well for you
 Posting Permissions
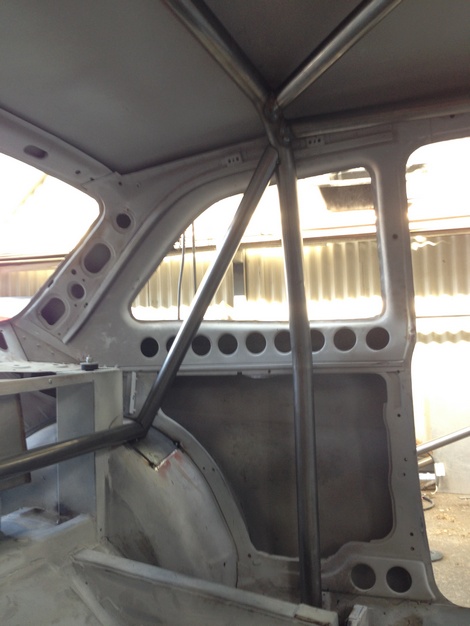

 Reply With Quote


Bookmarks