Lower Bulkhead Position MK2
Attachment 84821
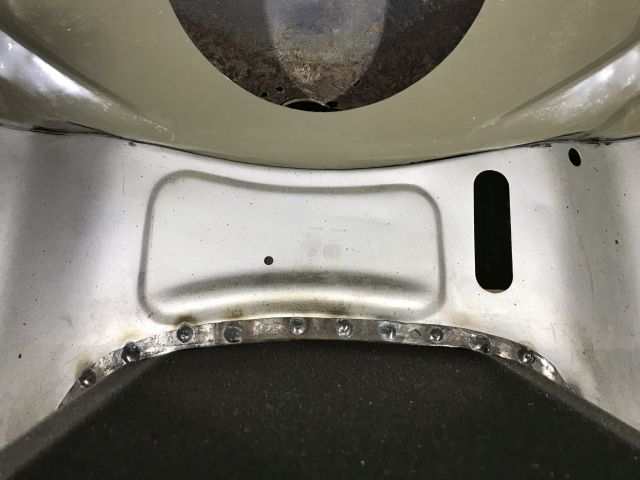
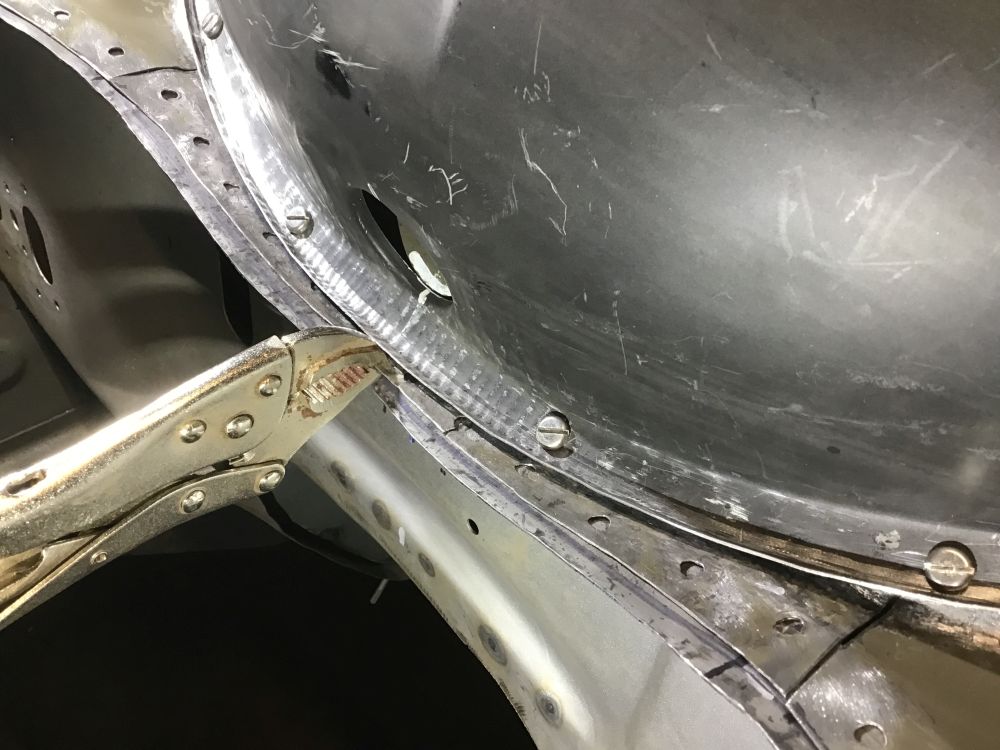
Could someone measure this dimension.
From the small indent face where slot in front panel to immediately under the lower bulkhead lip. I hope about 735mm?
Last edited by Ralyaly; 18-11-2019 at 23:14. Reason: Picture size
-
Re: Lower Bulkhead Position MK2
735mm what I have.
Just measured it.
My front end is all new from the bulkhead forward, I built it against a fairly well thought out jig and a lot of measurements from the original. So I’m happy to see at least one other car measures up the same of mine. 
-
Re: Lower Bulkhead Position MK2
Thanks for reply.
Out of the thousands of Escort Mk2 owners without the engine in the bay. I was hoping for quite a lot of replies.
Now I have your attention. As you can see from photo. I don't yet have the upper bulkhead panel fitted which is actually why I asked the first question.
Cut original upper off and expected new one (think one of the Rainspeed sourced panels, bought from Motorsport Tools) to fit without too much work but I am not happy with the lip join and heater bubble fit at the low part of bubble.
Was hoping you or ANYBODY else could send a few close up pictures at different angles of the top to bottom lap joint where the bubble heater vent pipe hole is, preferably from an original shell.
If your upper panel is fitted and you are happy with it then I would appreciate any photos you have, thanks again.
-
-
-
-
-
-
-
Re: Lower Bulkhead Position MK2
Ok see what your issue is. Your original looks like it was a bit bodged so tricky for you to refit correctly.
The upper bulkhead panel flange should sit at 90* to the lower bulkhead panel.
Personally I would get the upper and lower bulkheads attached, the reason being that once they are fitted and welded you’ll find it easier to make any adjustments with hammer and dolly as you take the flax out of the panel.
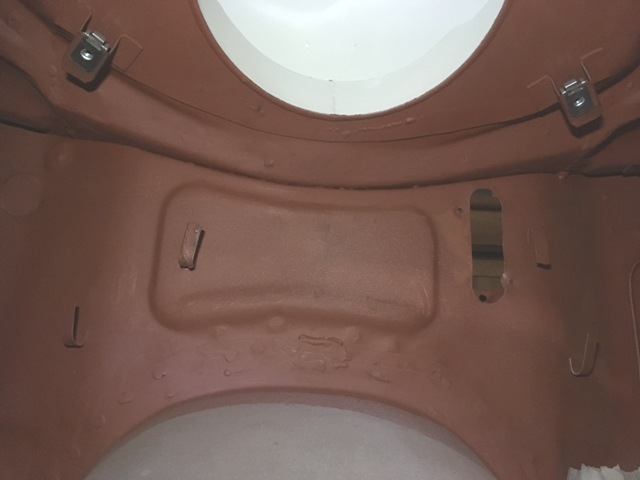
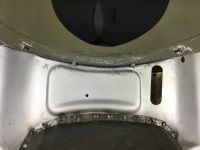
The heater bubble flange sits at approximately 45* (that’s very approx it maybe as much as 60*) and at the lowest point will be, again very rough approximation, 15mm back from the edge off the upper/lower bulkhead flange. In your second close up pic above I’d say the bubble is a little too far forward. You should be able to see the upper/lower flange spot welds. You should be able to see on your upper bulkhead panel a flat face that is the same profile as your bubbles flange.
As I mentioned, expect to need to clamp the bubble to get contact all the way around along with a little adjustment with a panel hammer. The panels need a bit of tension in them to create the rigidity in the shell.
Keep in mind the upper part of the bubble is probably most important for refitting the scuttle panel, so don’t loose sleep if you can’t get the bottom as per original, especially if using pattern parts.
And remember, it’s a 1970 ford, you’ll only be improving on the original. some of the manufacture tolerances on mine where shocking. Don’t let it get you down. ��
-
Re: Lower Bulkhead Position MK2
Ok see what your issue is. Your original looks like it was a bit bodged so tricky for you to refit correctly.The upper bulkhead panel flange should sit at 90* to the lower bulkhead panel. Personally I would get the upper and lower bulkheads attached, the reason being that once they are fitted and welded youll find it easier to make any adjustments with hammer and dolly as you take the flax out of the panel. The heater bubble flange sits at approximately 45* (thats very approx it maybe as much as 60*) and at the lowest point will be, again very rough approximation, 15mm back from the edge off the upper/lower bulkhead flange. In your second close up pic above Id say the bubble is a little too far forward. You should be able to see the upper/lower flange spot welds. You should be able to see on your upper bulkhead panel a flat face that is the same profile as your bubbles flange. As I mentioned, expect to need to clamp the bubble to get contact all the way around along with a little adjustment with a panel hammer. The panels need a bit of tension in them to create the rigidity in the shell.Keep in mind the upper part of the bubble is probably most important for refitting the scuttle panel, so dont loose sleep if you cant get the bottom as per original, especially if using pattern parts. And remember, its a 1970 ford, youll only be improving on the original. some of the manufacture tolerances on mine where shocking. Dont let it get you down.
Last edited by Zakspak; 26-11-2019 at 19:07. Reason: Duplication
-
Re: Lower Bulkhead Position MK2
Hi Zakspak,
Thanks for help and comments. I never give up but just trying to achieve the correct fitting.
Noticed your Restoration thread and have actually been following it now and then.
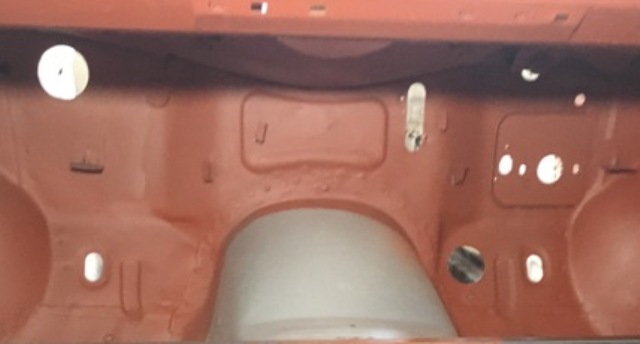
One last favour, could you take a picture of your inner bulkhead join above gearbox tunnel same as this close up and then will let you get on with your car.
Thanks
-
Re: Lower Bulkhead Position MK2
No worries, is this any good, it's from a previous pic I had saved.
If not I'll sort out taking the same angle as you've posted above, but they maybe a couple of days wait.
-
Re: Lower Bulkhead Position MK2
Maybe a better angle for you
-
Re: Lower Bulkhead Position MK2
Think this will have to do

-
Re: Lower Bulkhead Position MK2
Bigger images

-
Re: Lower Bulkhead Position MK2
Really don't think there's too much wrong there. It's miles better than what you started with.
And as an example of factory finish, my original tunnel was misaligned and on the RH side only touched the floor panel at the spot welds for about 3 inches, and they hadn't managed to fill the gap with sealant, which is why the RH side of the car had so much more corrosion.
You need to pat yourself on the back
Look forward to seeing more progress pics as you go
-
Re: Lower Bulkhead Position MK2
Thanks Zakspak,
virtually rebuilt the whole shell now so would be an awful lot of photos to post.
-
 Posting Permissions
- You may not post new threads
- You may not post replies
- You may not post attachments
- You may not edit your posts
Forum Rules


 Reply With Quote
Bookmarks