


Cool ..i will be watching...cheers markOriginally Posted by Matt75

Cool ..i will be watching...cheers mark
Thanks shaun....and yes your correct..the downdraught engine is going in this project...long way to go....cheers mark
Some amazing work going on here mate, well done!
Thanks ...i see your almost done on yours...wish mine was at that stage...looks good...cheers mark
The Fabrication works really impressive, proper skill there bud!
My ones nearly there but lack of funds are really dragging it out just now! I could finish it in a few days if I had the time and money!
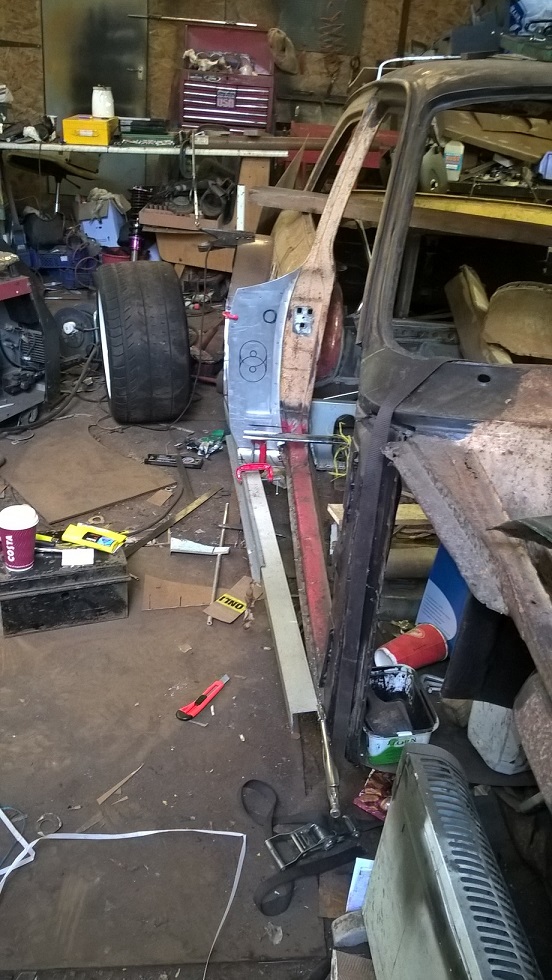
Little bit more done....
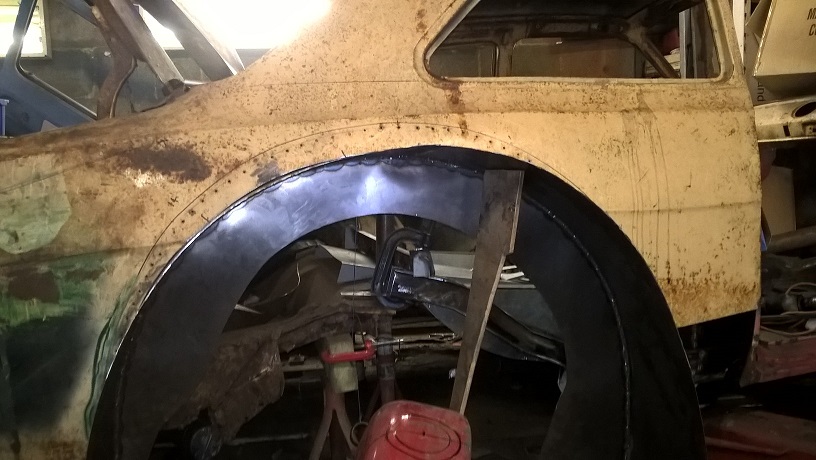
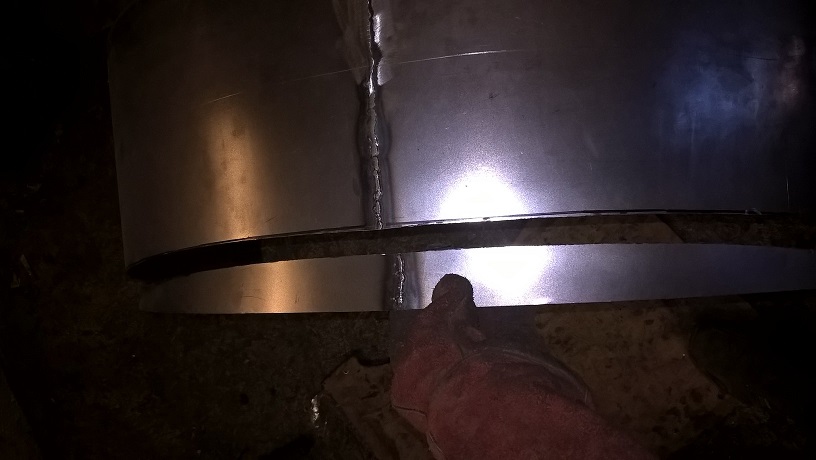
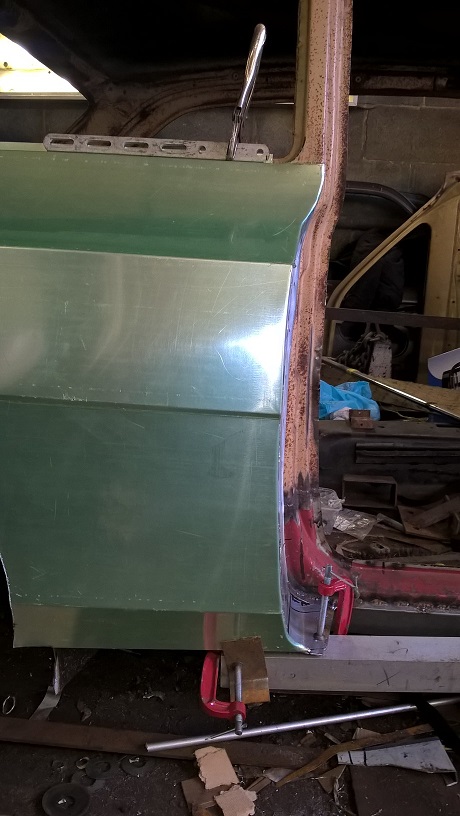
Welded the new tub to the shell..this is an inner tub. the body will eventually stretch to cover it..
Then trimmed to the body profile...but 50mm lower
Started to trim the new/old mk2 inner wheel well...
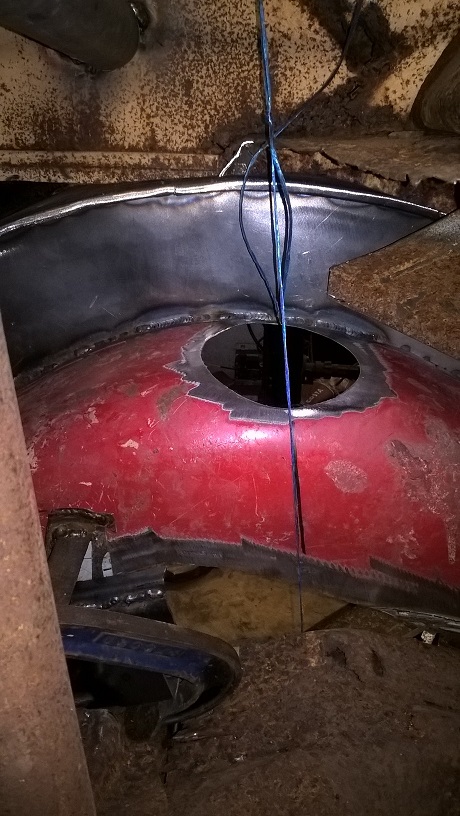
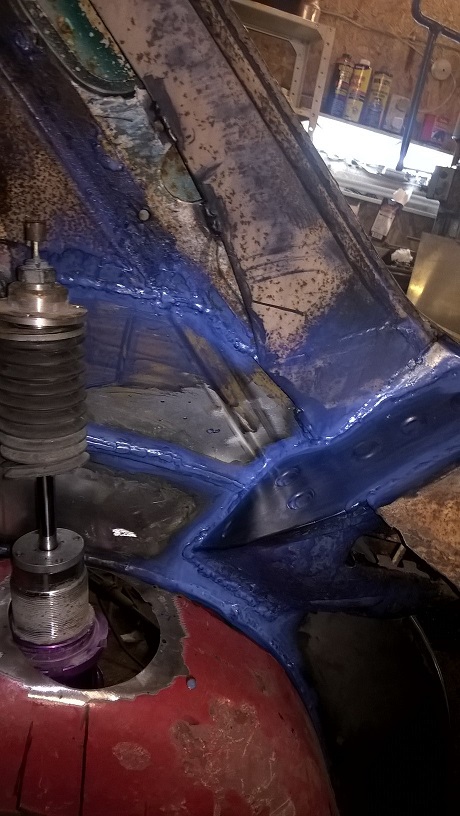
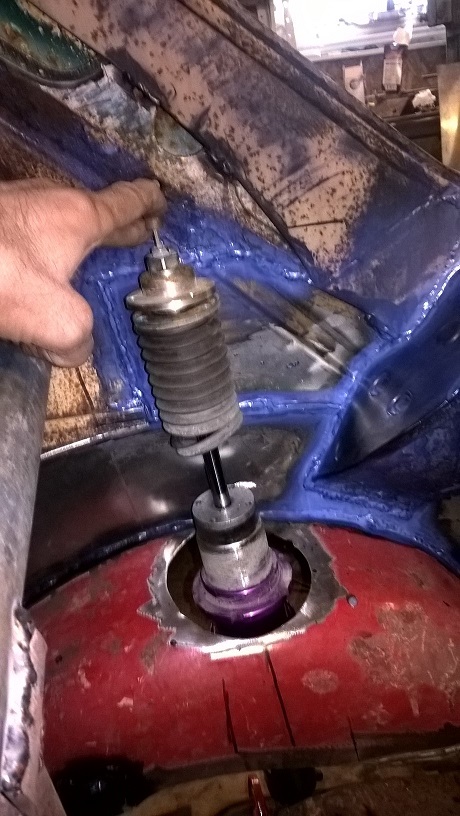
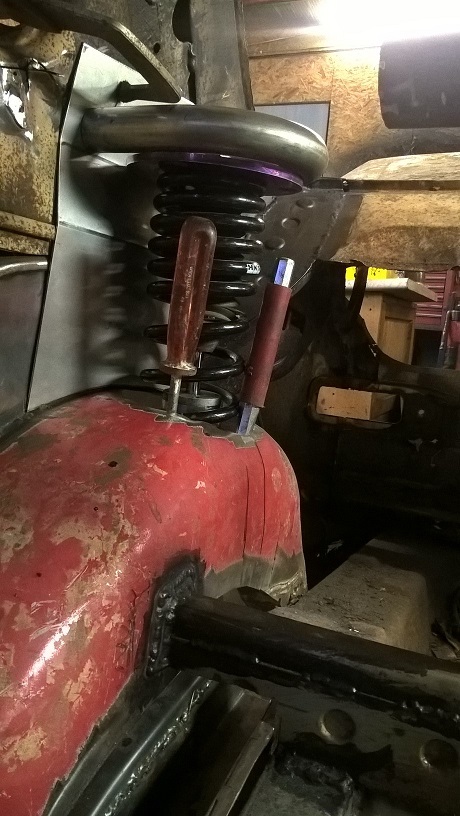
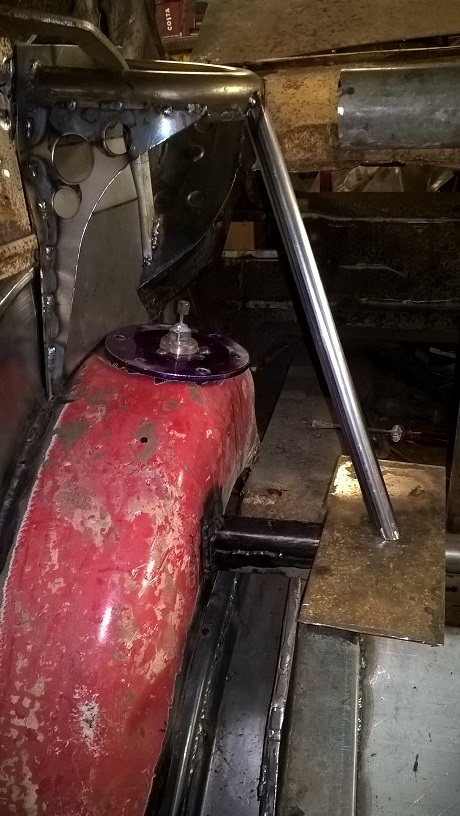
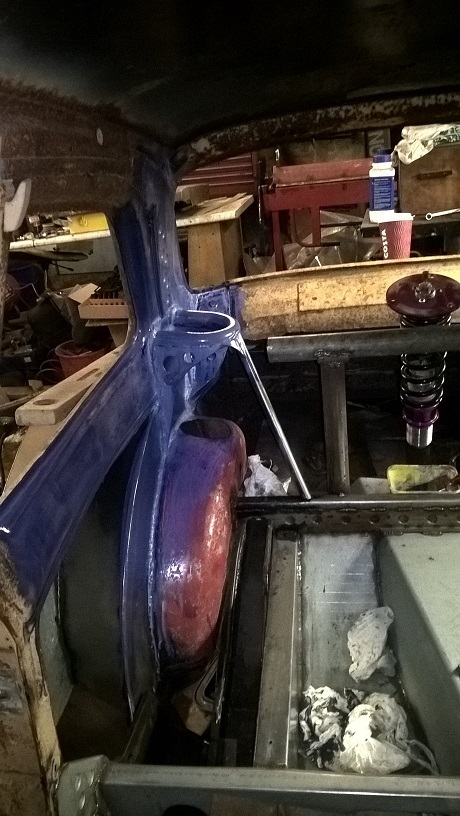
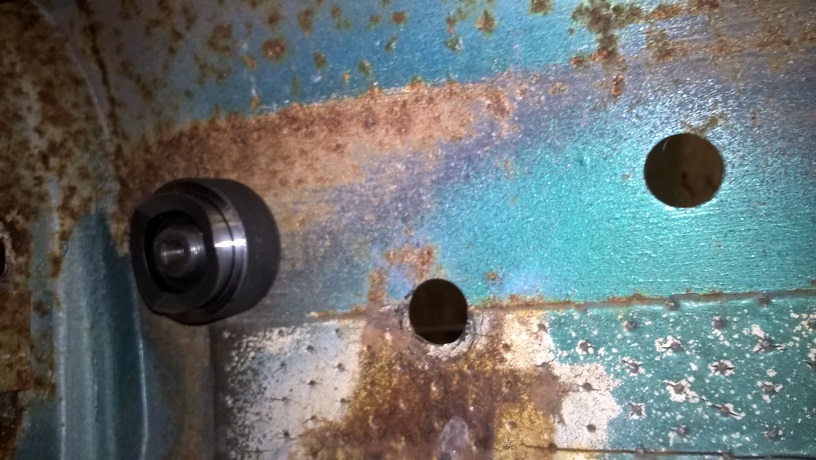
then worked out my coilover position ..using a bit of spring...
i am going to use hks evo6 rear coilovers (because i had them on the shelf)
The plan is to make a tubed turret top mount and have the coilover on full view..from inside...
with the coilover position marked...i transfered to inner arch..and cut a 100mm hole with the 4"grinder..
The coil over will pass through the hole...and the top mount will be nade from tube and will also double up as the firewall frame and will be a suspension brace aswell,,
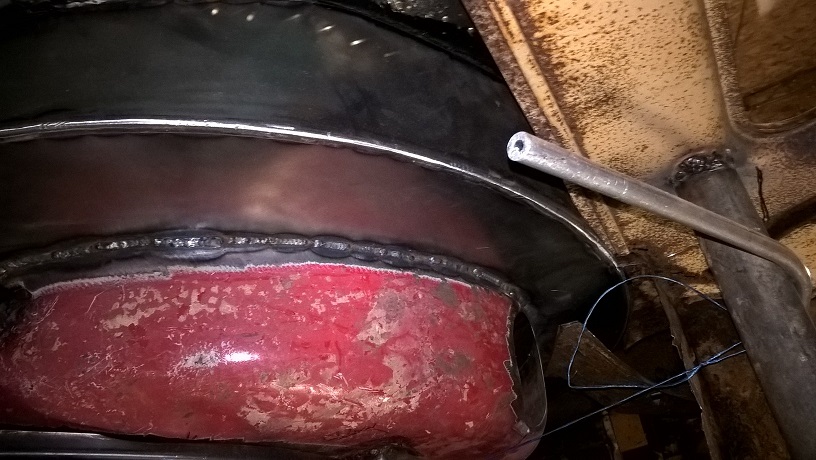
all happy.. so welded the inner tub to the outer tub
With every thing welded up.. i quickly checked the bubble arch for fitment...they will be recessed on the body to create a flush fit after riviting.....so need to fit exactly inside the tub by 3mm..
good enough fit for now..when the ally body work is made and recessed i will fine tune the fit...
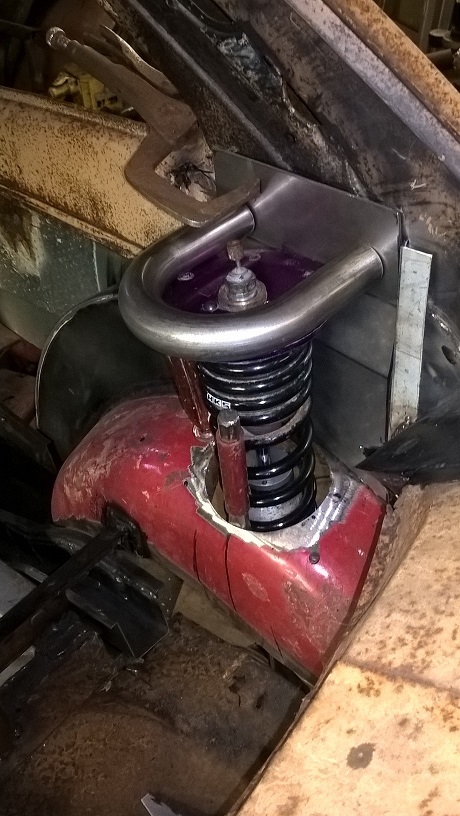
moved on to the inside...the rear coilover turret top mount is deliberatly high..worked out the position..
then marked where its position and removed some more rust...black lines...
i removed 90% of the rear parcel shelf/fire wall ready for the new...
All for now cheers mark
Fabulous work as always. How much time do you take thinking about what you are going to do Vs actually doing it. I would think that the planning takes ages
Regards
Tom
To finish first, you must first finish
Yes your right.. lol....one week planning for 6 hours work...and if i havnt come up with a solution for a problem..i will leave it and move on to another part untill an answer pops up...
when your doing a project i think we all think about it all the time...and eventually an idea will pop up....
cheers mark
Looking good! Lots of work going into this one! I'm interested to see the ally wide body! How are you planning on making it?
regards
James
In my mind.. and on small practice parts...wooden formers ...hammer dollys ...hammer....
...The rear quaters will be made in two parts front centre of arch and rear centre of arch..it will be semi formed(scafold pole roller wooden buck form) then "stretched" over ribs at the swage lines and hidden rivited on all four edges....the only joint seen will be where the two halves meet...on the top concave curve...im working on a solution for this problem...the doors will follow the rear quater shape template..and again a skin on a frame...
The front wings will be 2" wider on the top and the bubble arch will be carbon fibre...and i have no idea how im going to achieve the front curves and bend line....i could cut and get it welded as a last resort...boot looks simple....front panel will be ok....bonnet looks very hard..but i might have to redesign the shape anyway to clear the engines velocity stacks,,,,thats the plan so far anyway...cheers mark
Sounds like a huge amount of work. It would nearly be easier to cut the car in half lengthwise and weld in a spacer the length of the car including spacing the tunnel, bulkhead, front panel and rear panel, boot floor
To finish first, you must first finish
Only problem with previous idea is a wider windscreen and rear window.
To finish first, you must first finish
...the other problem is im building it around motor sport regs..so roof..door surounds.inner arches.floor rearward of front axle and forward of rear axle all unchanged except for suspension ect.... but i did consider it...
cheers mark
"floor rearward of front axle and forward of rear axle all unchanged"
Does that mean that you're not allowed to four link it then? (since the floor physically need to be cut for the boxes)
Fascinating build. Great stuff.
4 link comes under suspension...so you can modify...they really mean " no flat floors".... cheers mark
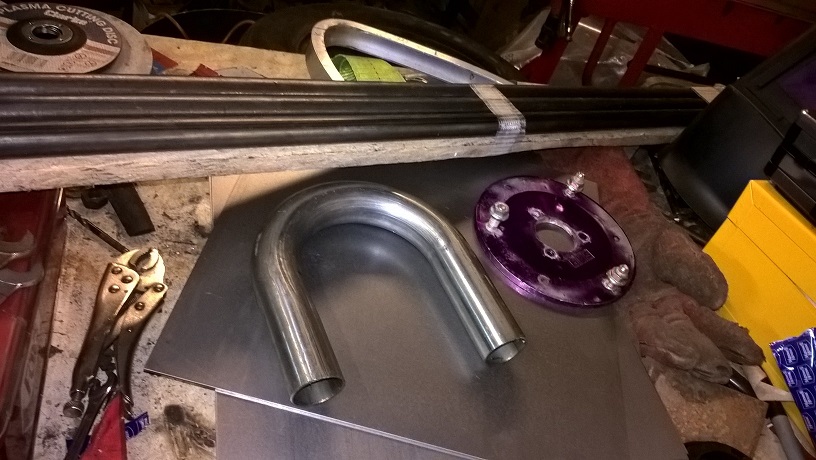
My Rear turret kit of parts arrived....
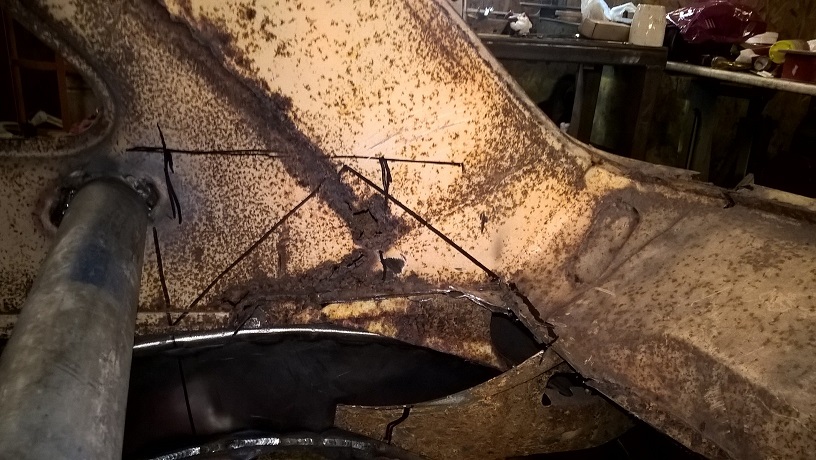
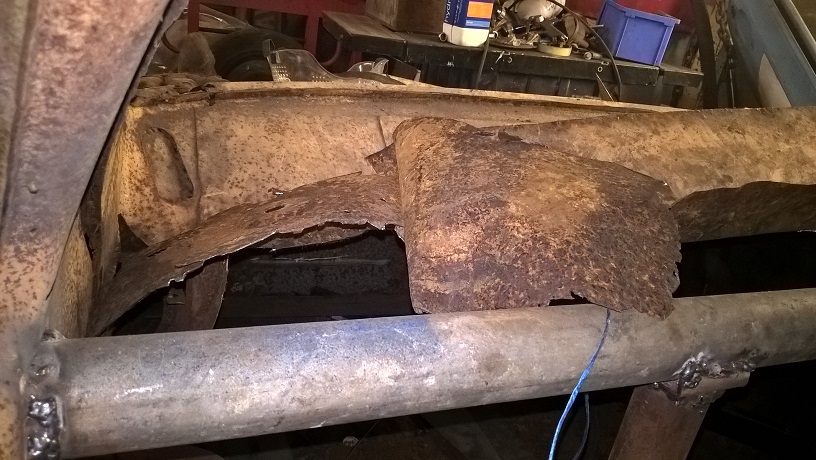
But before i can fabricate and fit i need to replace the rustedout parts..where the turret mount will fit...
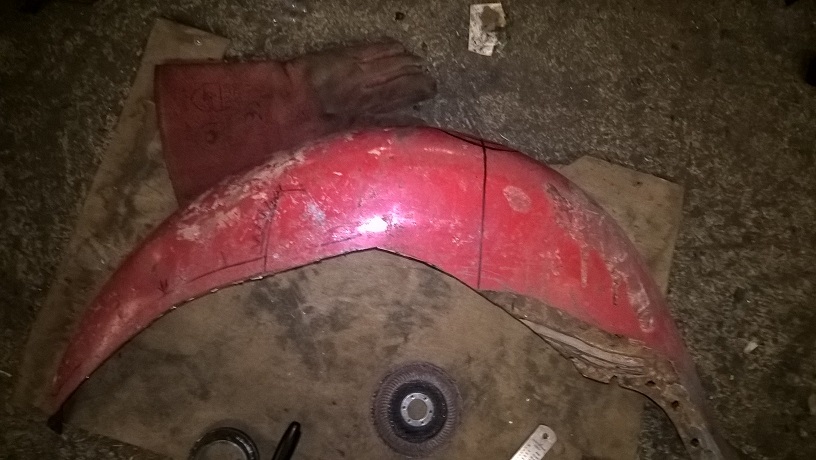
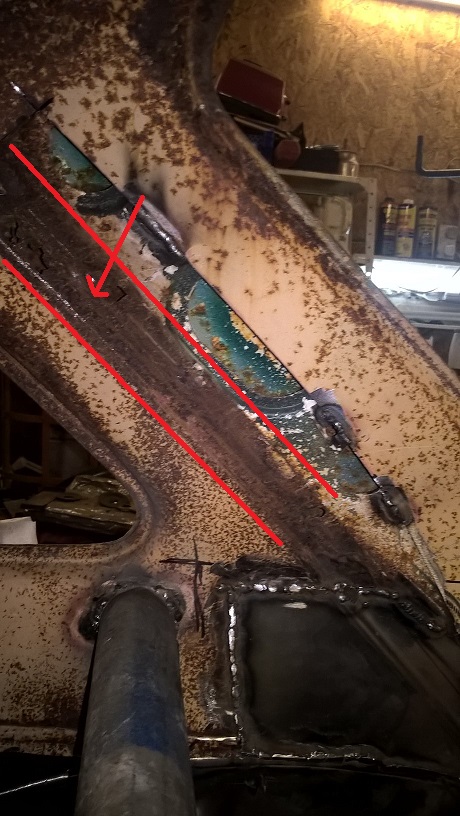
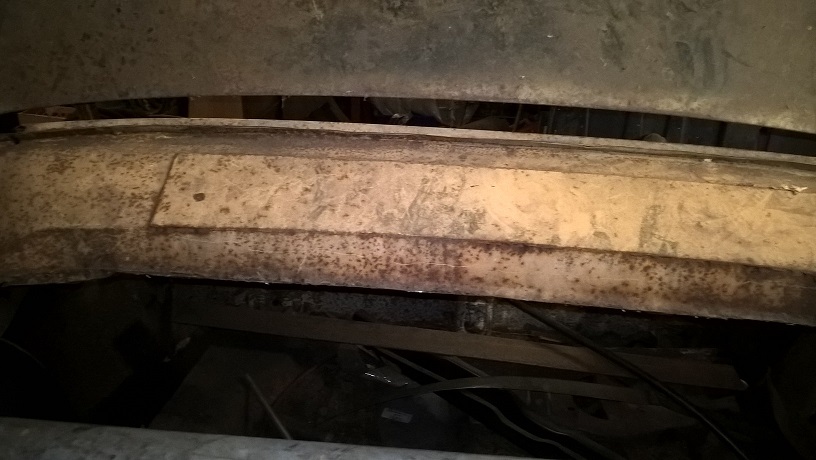
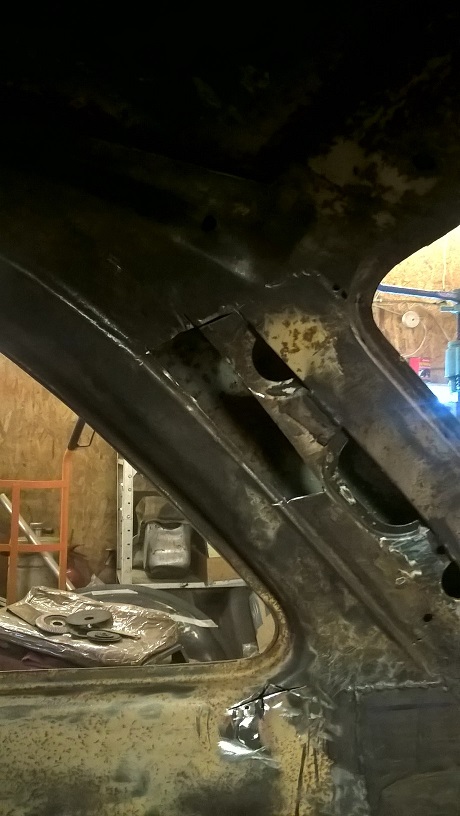
A previouse owner had boxed the rear inner roof quaters...and although this metal was ok..i needed to check what was lurking beneath...so a surgical cut down the centre ..to have a look...
surprisingly solid
but the edge near the window where the c trim was..needs replacing...i will do this part later...(between the red lines)
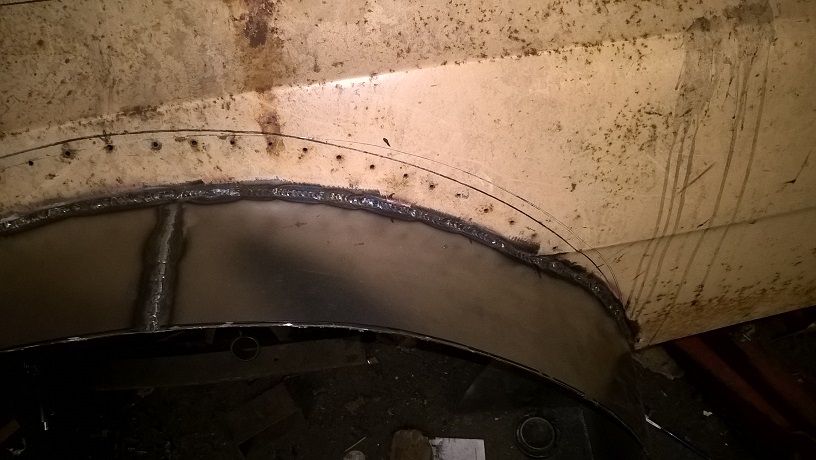
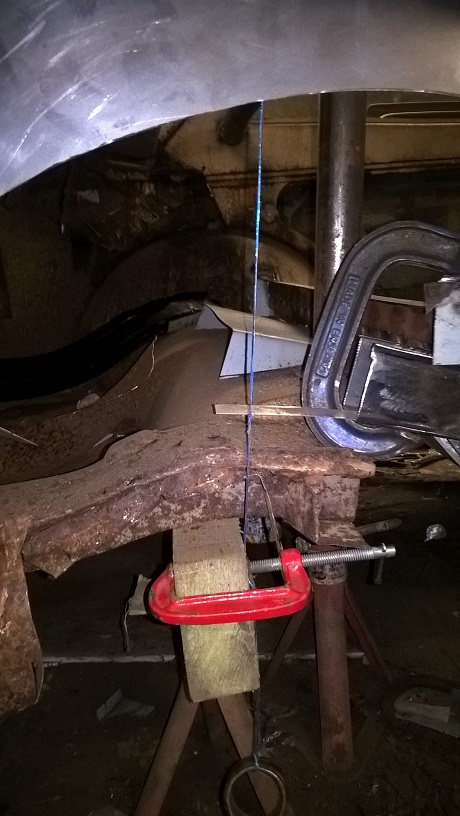
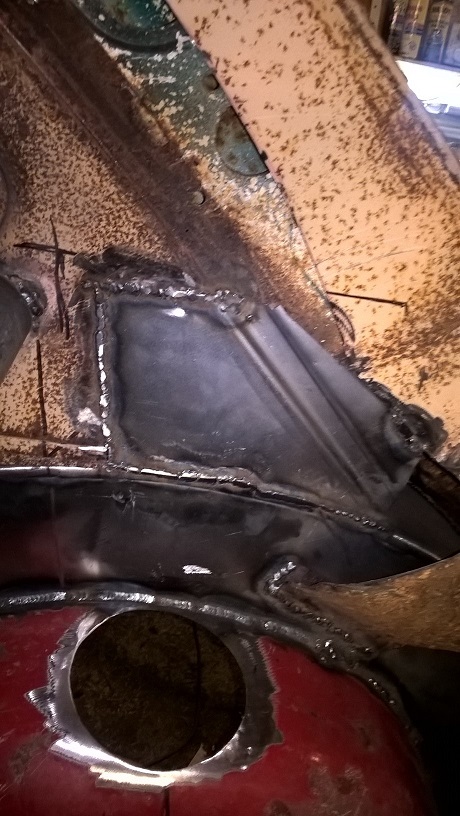
First i joined the inner arch to the lower cross brace to maintain its position....
Back up to the top area..i removed all the rust and made a repair piece with a channel for a bit of rigidity...then welded this in...this joins the arch /inner roof quater and upper parcel shelf...i wanted a good weld...but as its all going to be covered didnt need a pretty one ...
i also boxed the rear scuttle support /window surround brace....this will tie all the corners together...but again it wont be seen as it will be covered
treated the welds to a coat of rust primer...
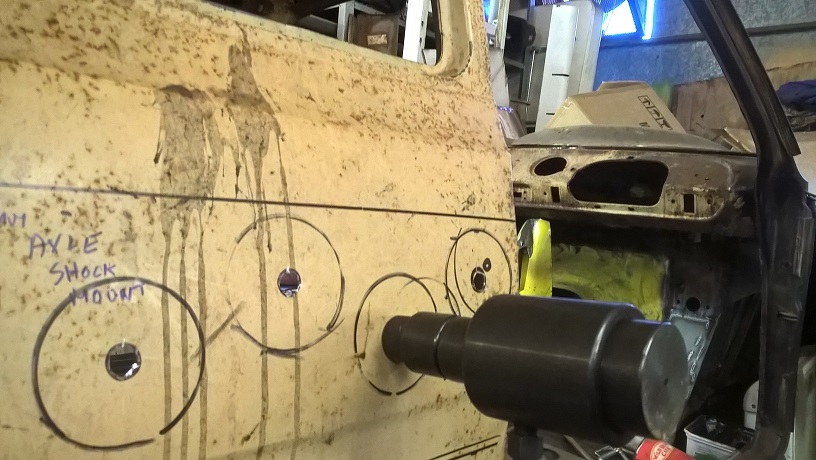
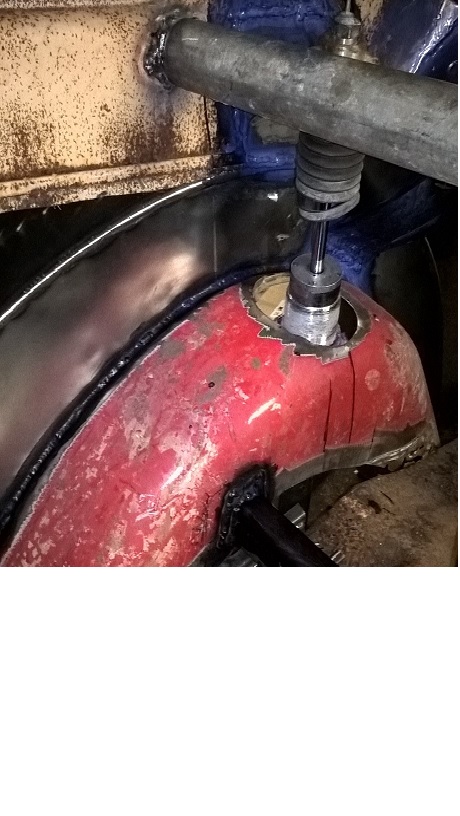
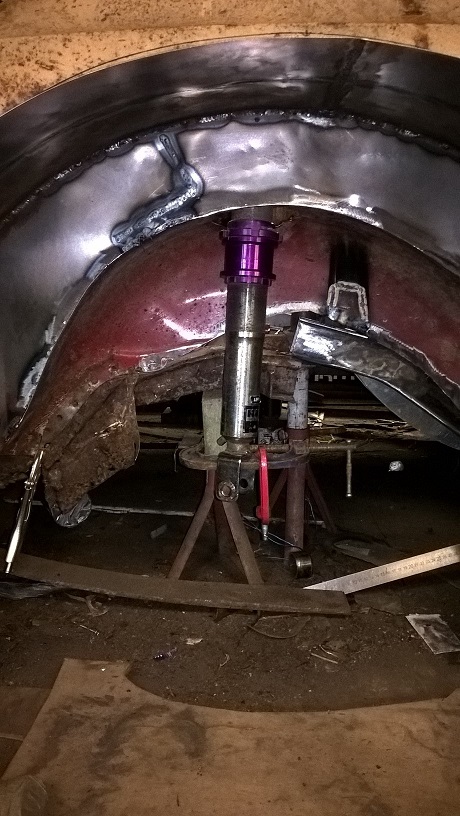
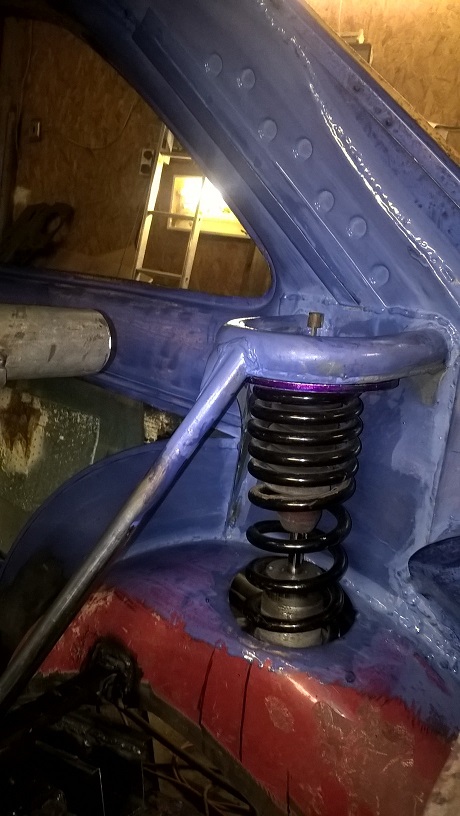
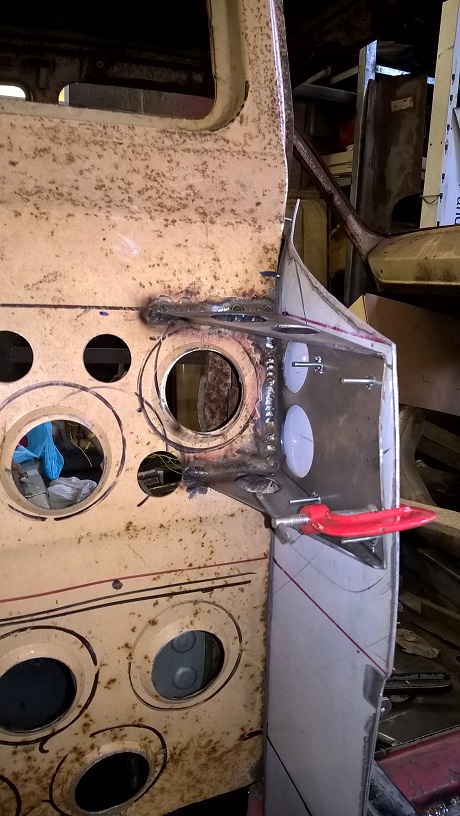
positioned my rear coilover to its finished position...for measurements to start cutting and fabricating the turret mounts...
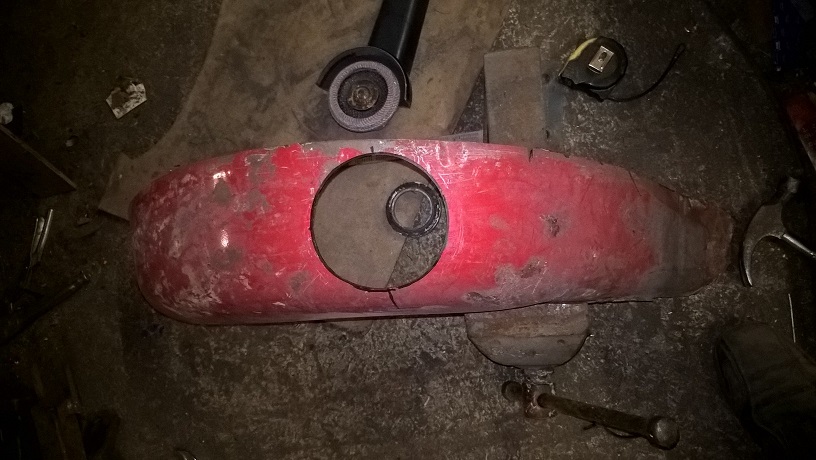
rear fire wall removed and rear "speaker shelf" i am going to keep this much of the original...
removed the top plate of my coil overs ..to start measuring for the strut tower top...
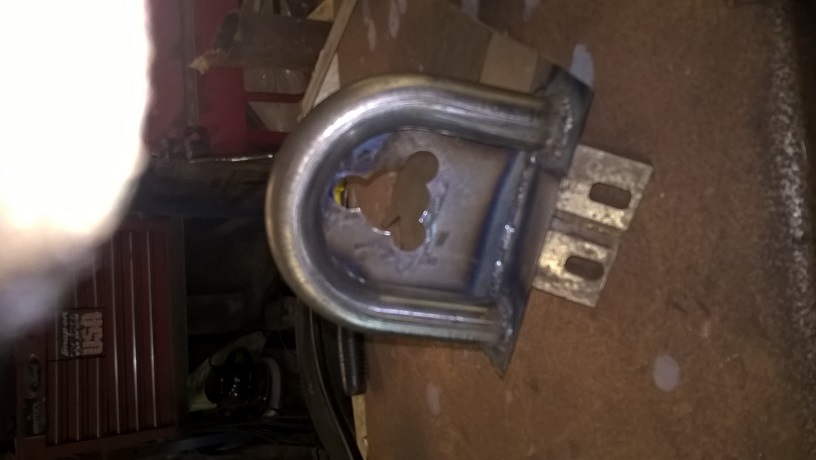
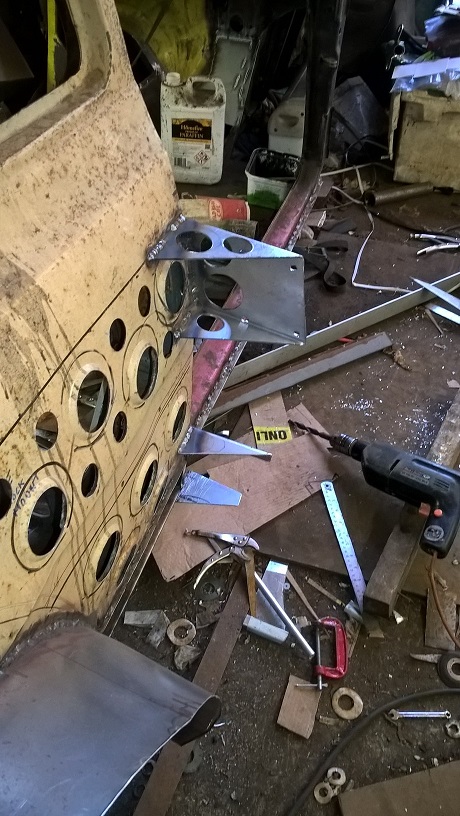
having worked out the angle and height of the top mount..i could begin to start cutting and fabbing the parts..
then ran out of time....
more next week...cheers mark
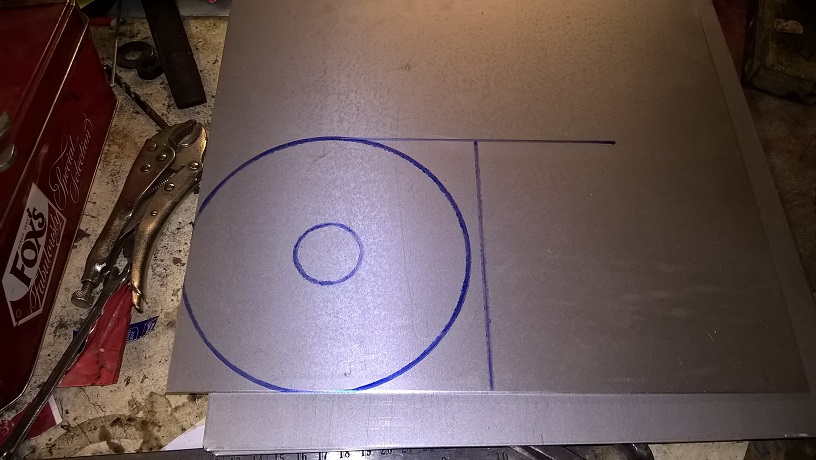
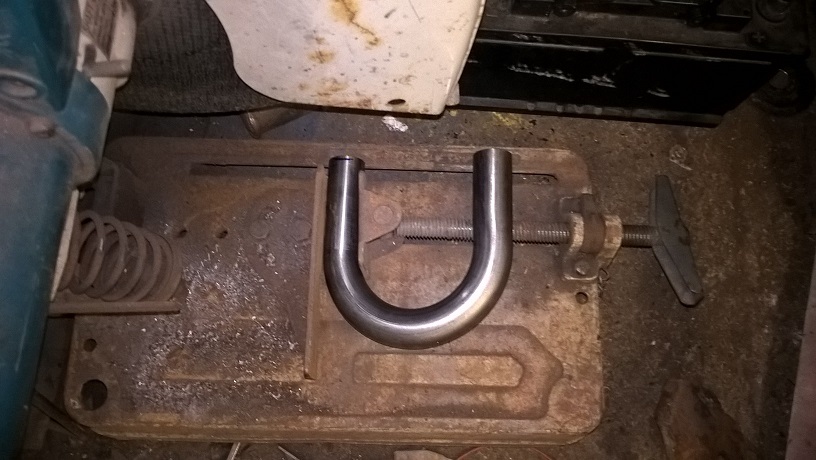
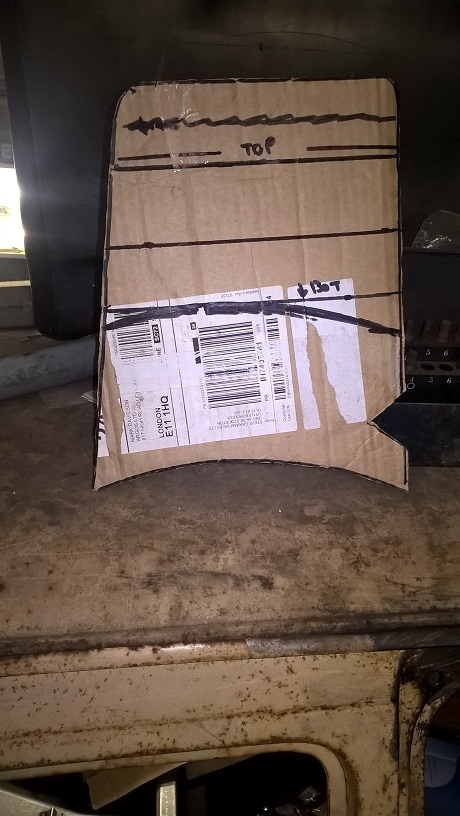
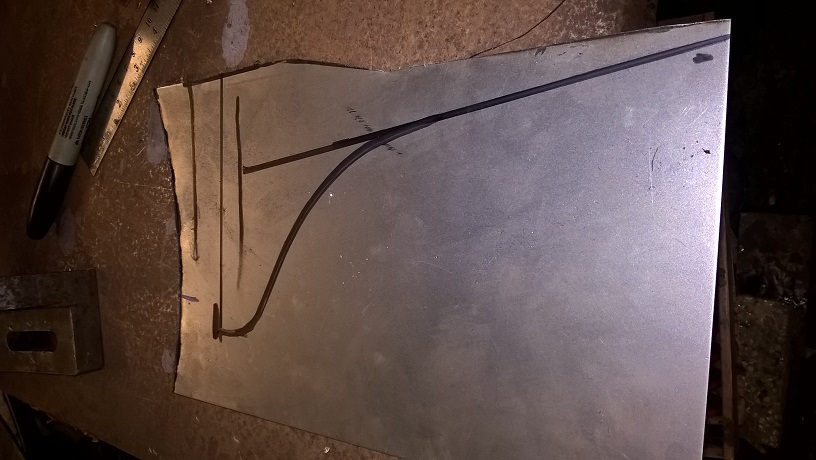
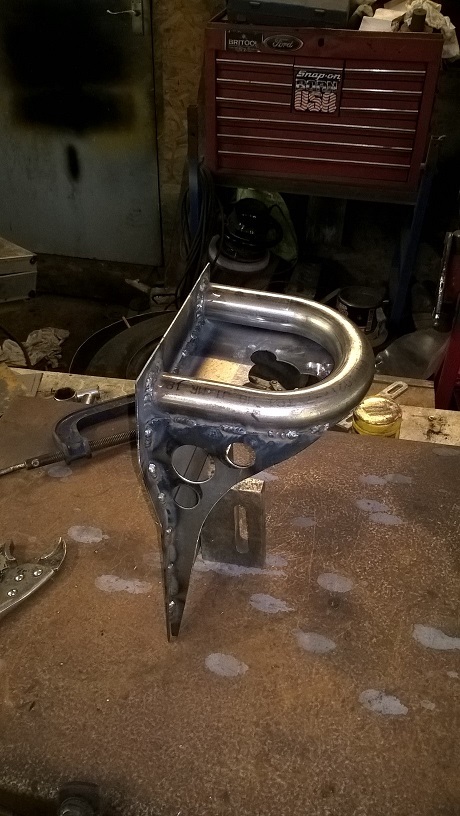
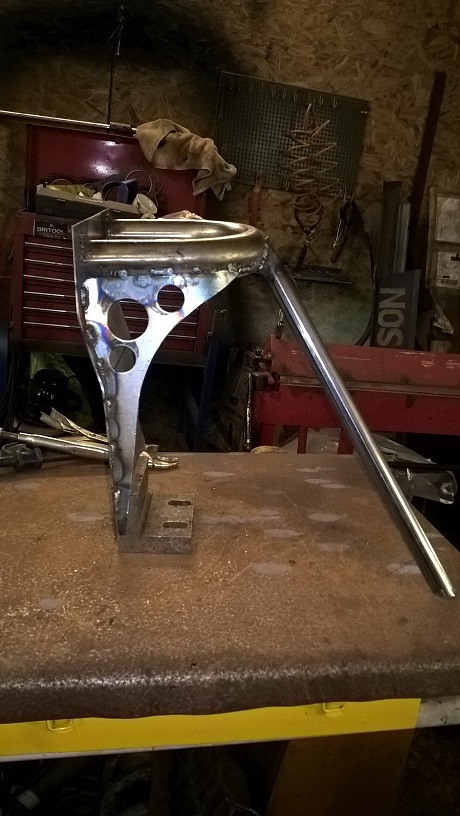
made a cardboard template for the rear struttower frame support..
cut and bent to shape
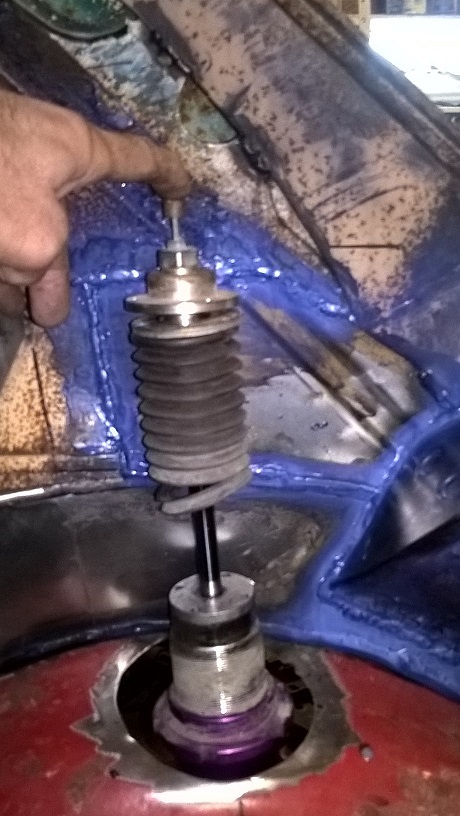
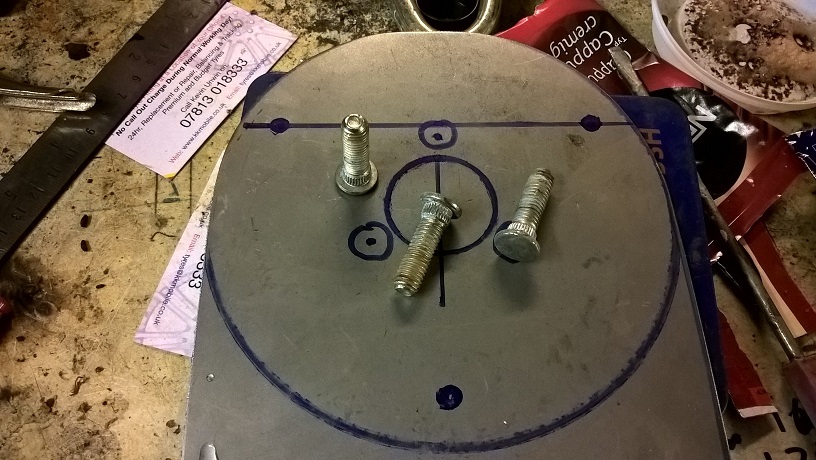
removed the fixing bolts from the strut top hat...(will reposition 2 off later)
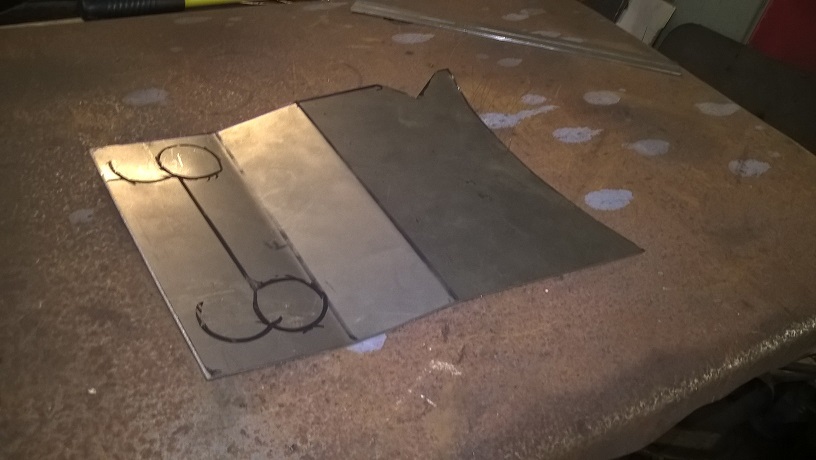
marked and cut and punched the top plate (with my chinese hydrolic punch)
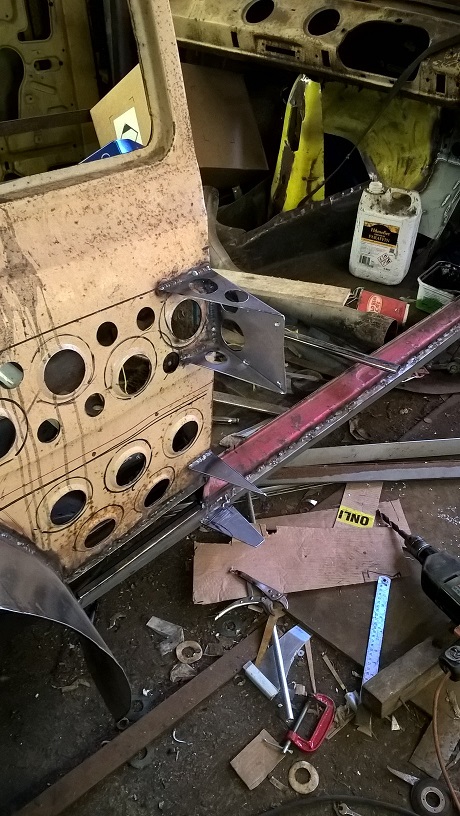
test fitting for correct position before welding together
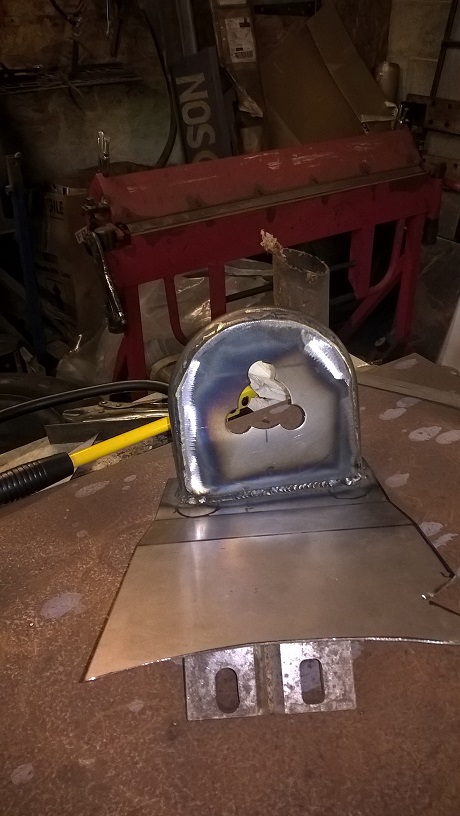
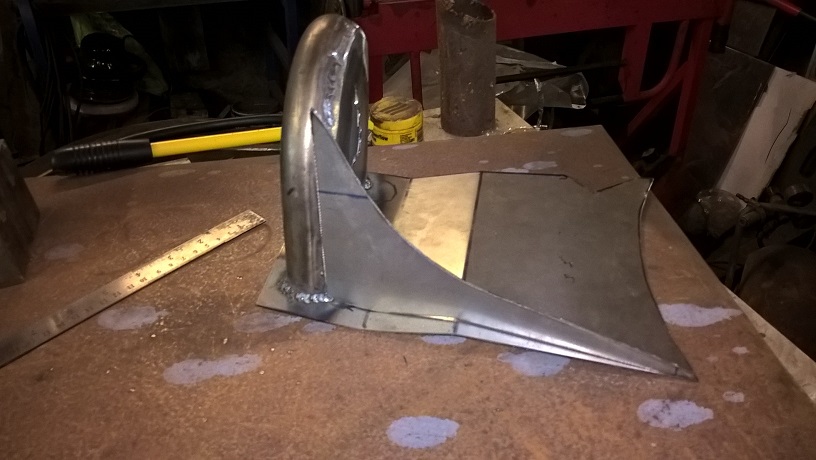
welded the top plate to the hoop...then the hoop to the support plate
marked out the gusset...cut punched and welded
test fit...to get the correct position for the down brace..this is also going to be the firewall position and fixing...i will add a chassis plate at the base later
welded and gusset added..
test fit...
cheers mark
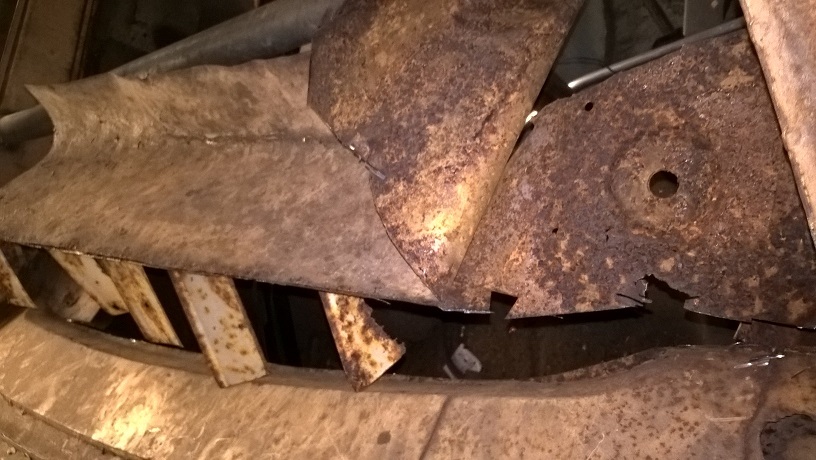
More cutting and welding..and cutting and welding...
Cut the rust out the inner roof 1/4...
welded the new panels in ...then added a load spreader for strength..then finished with a trim edge..
i will do the inner roof edges later..
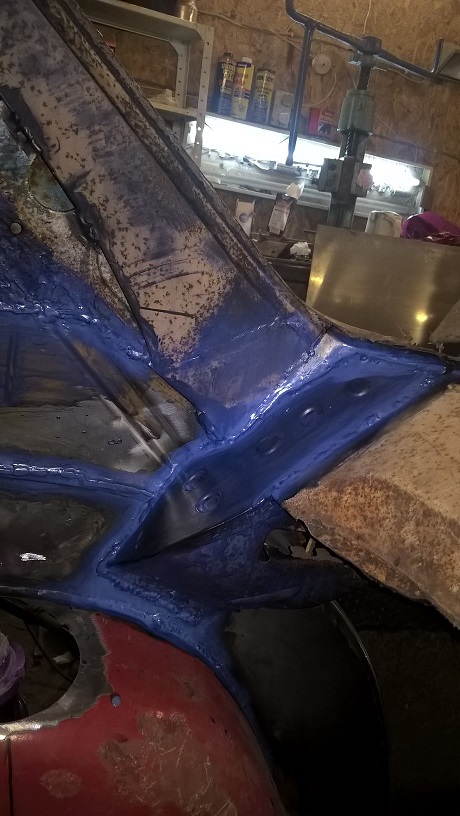
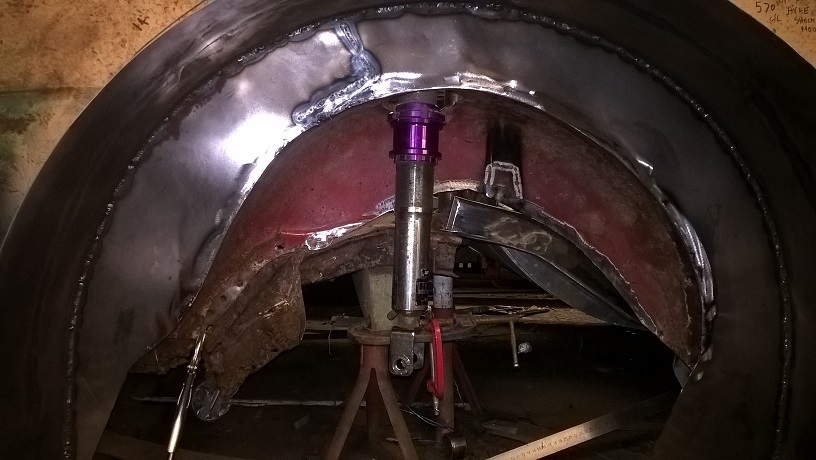
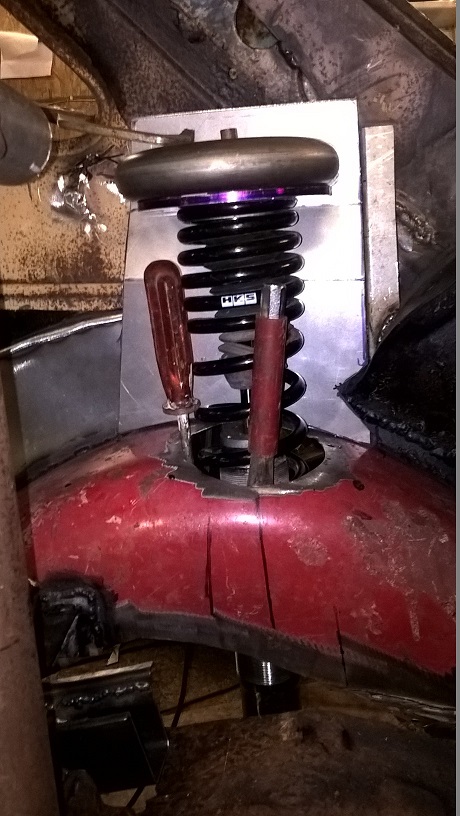
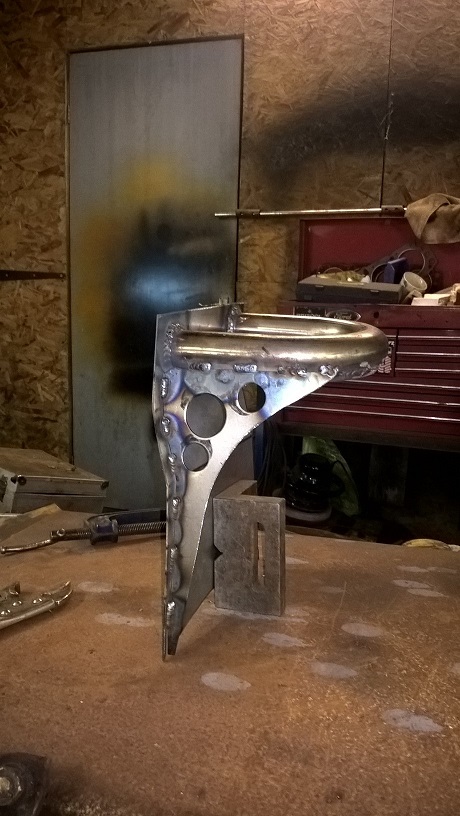
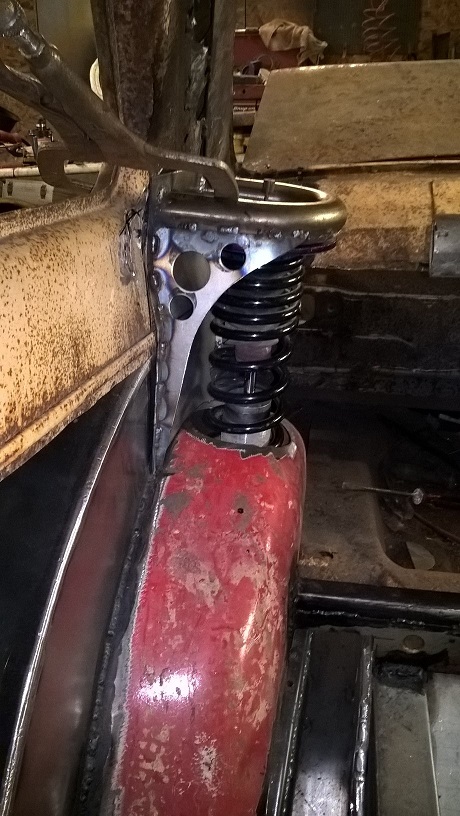
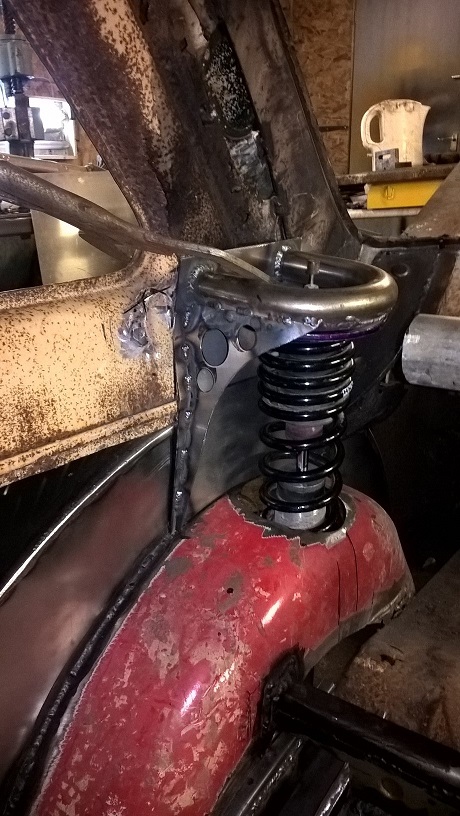
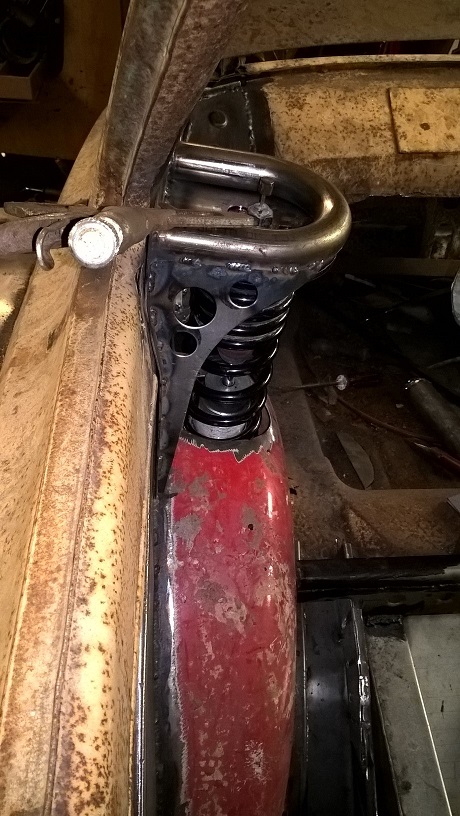
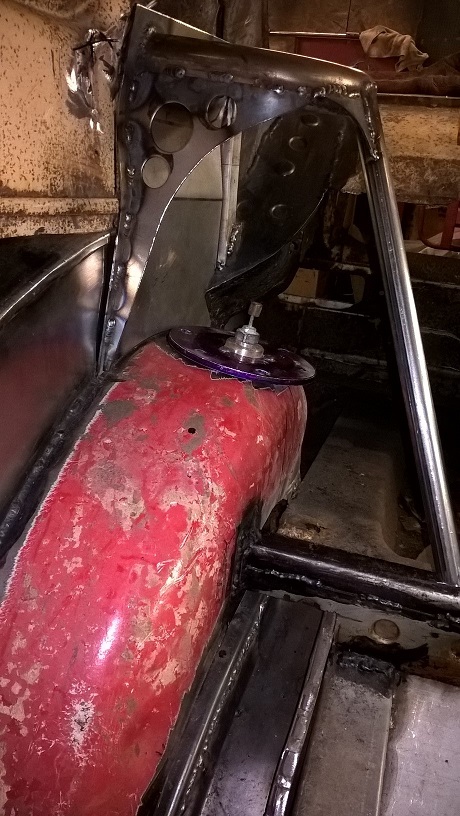
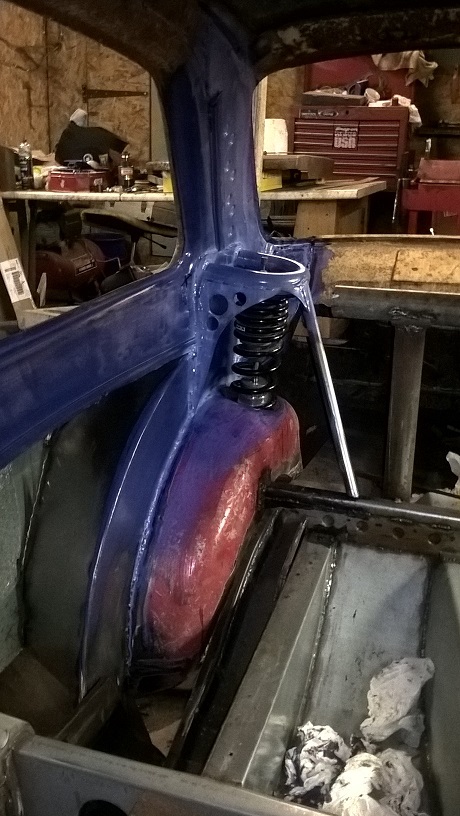
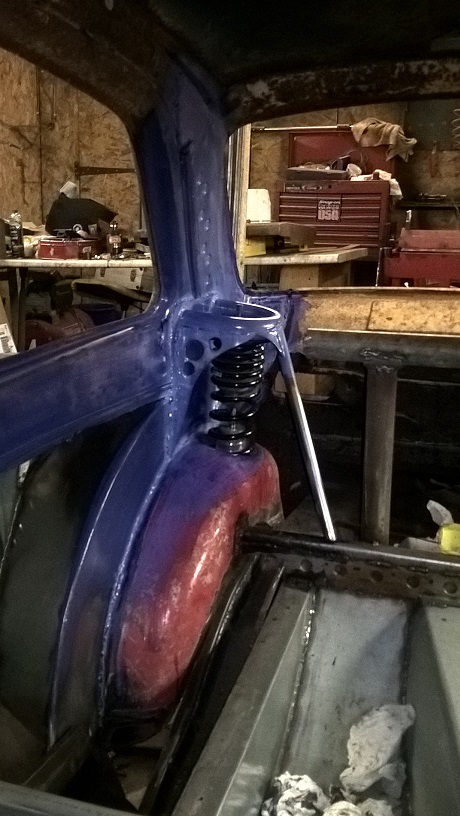
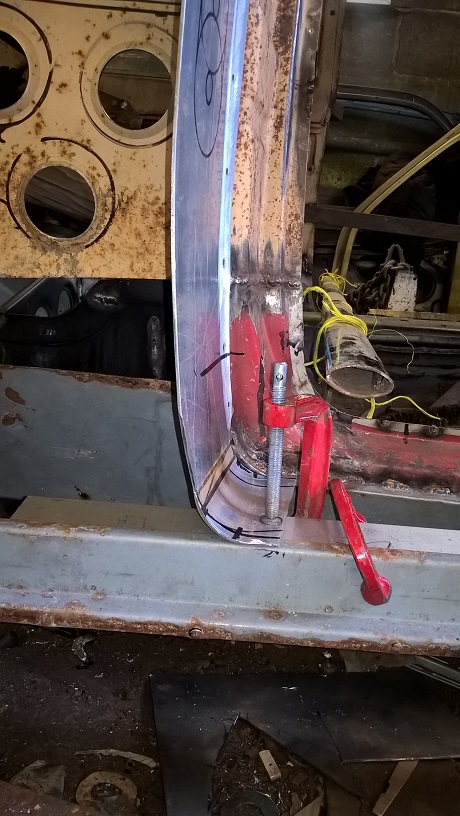
welded the coilover tower in place...still have the rear support/firewall end plate to do.. and the cross brace to the other side...(cant do that untill i start the other side)
checked coil over for fit and angle..
gave everything a coat or rust primer...
next... finish the floor to sill/arch...then remove rear boot floor and chassis rail...
E.C.T. Cheers mark
Nice work.
08 ford mustang 4.0l v6 4.10 gears5 speed auto vortech sc 16psi intercooled custom intake/meth inj.
..
Thanks....looks better in real life...(im crap at taking photos)...cheers mark
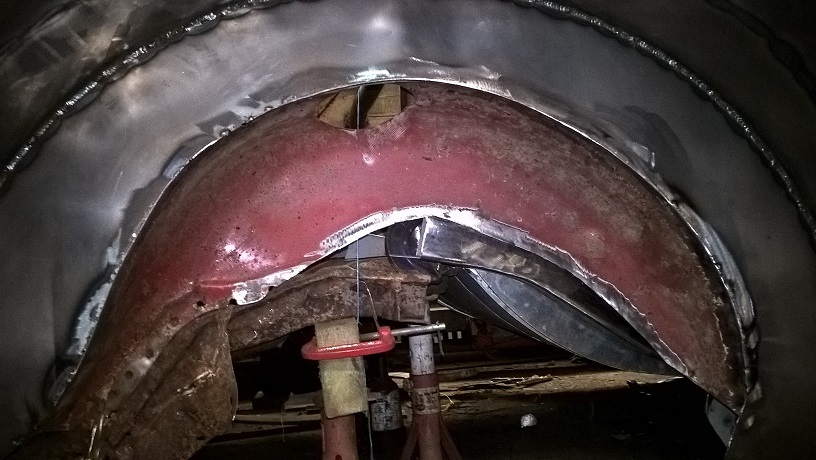
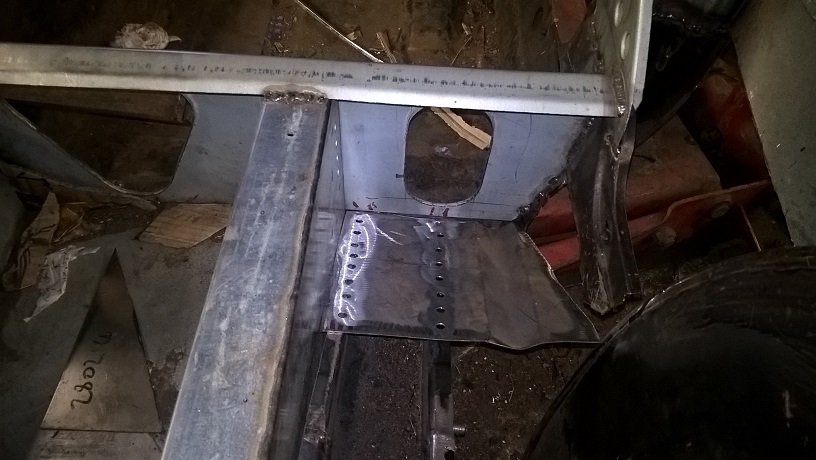
Moving on with the floor...made the floor panels...and pre drilled them for plug welding to the chassis rails later on...
Once all the floor panels were welded in....i started on the cross brace gussets...finished and welded in lower.
I boxed in the top part between gearbox tunnel and link box...then made a supporting gusset..to tie the mount bars ect together...
.Next i boxed in the inner to outer sill at the rear arch...then fitted the lower part of the sill...this sill wont be seen so no grinding required..
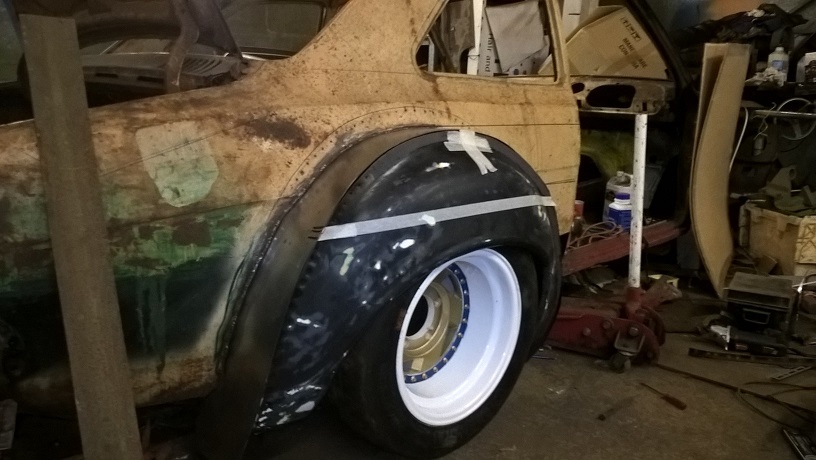
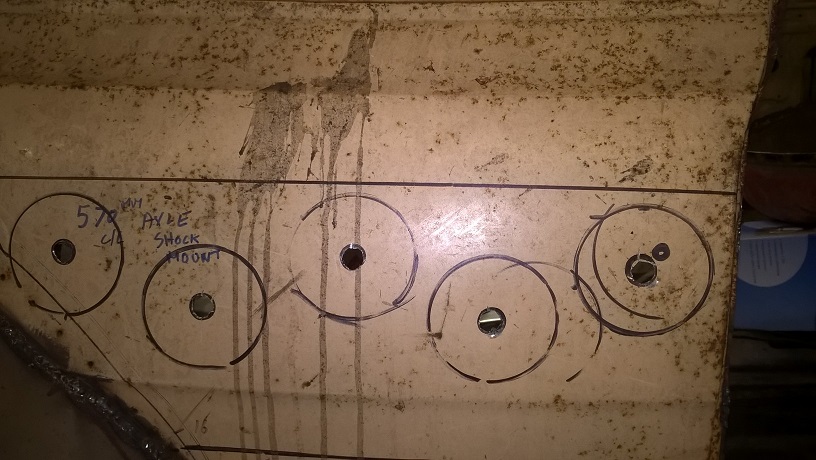
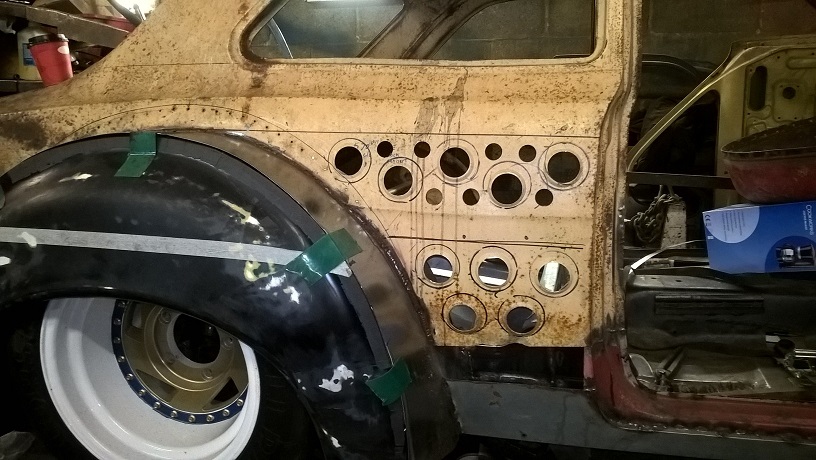
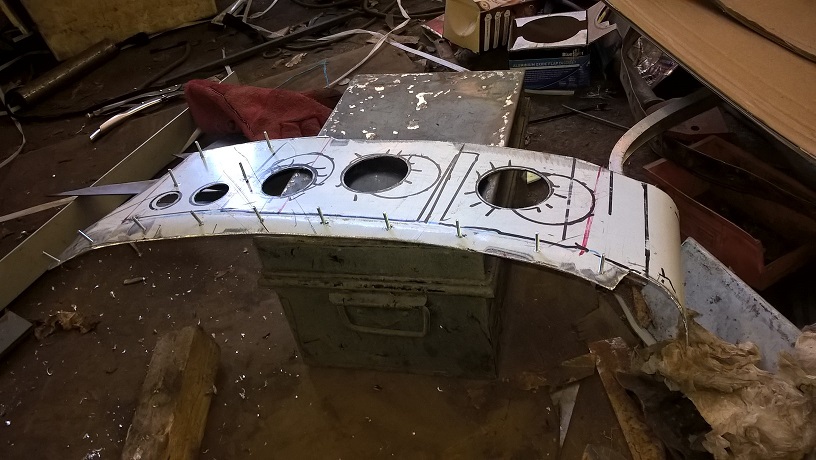
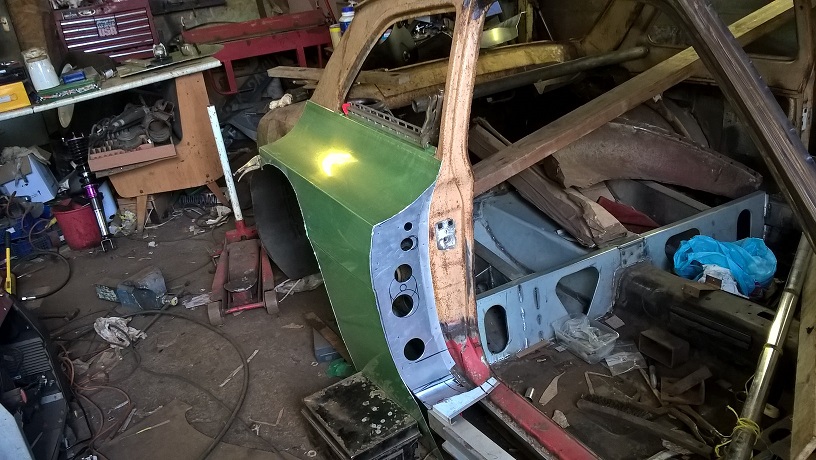
i then fitted the wheel and the bubble arch in the tub...so i could get my body lines...marked and ready for hole swaging..
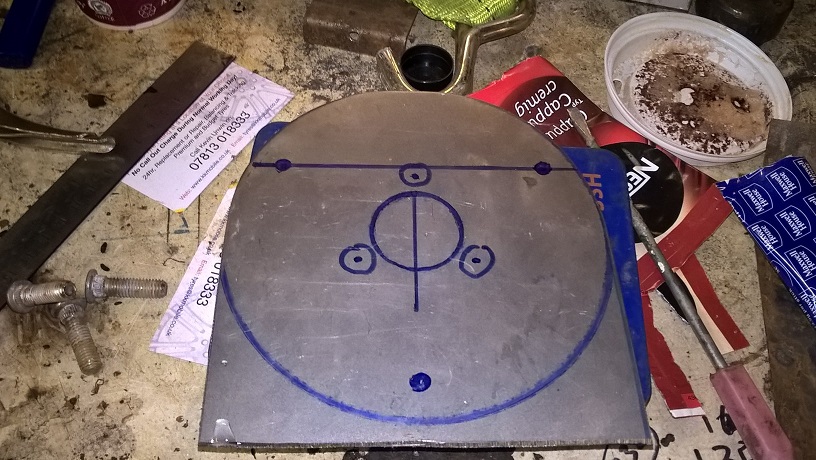
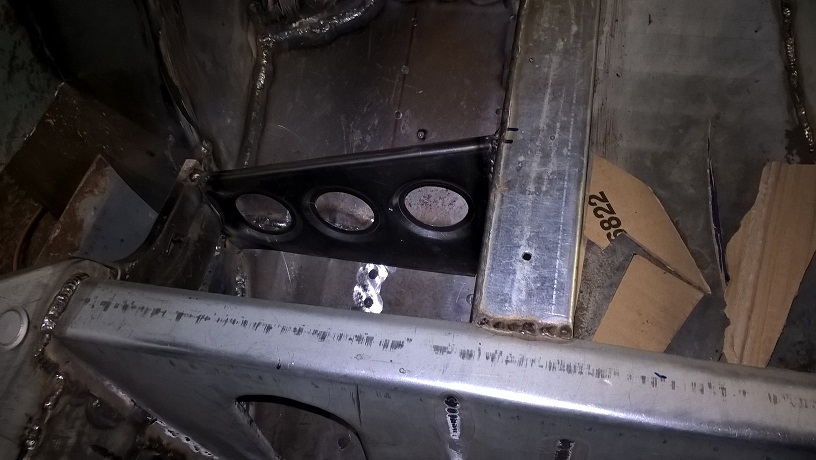
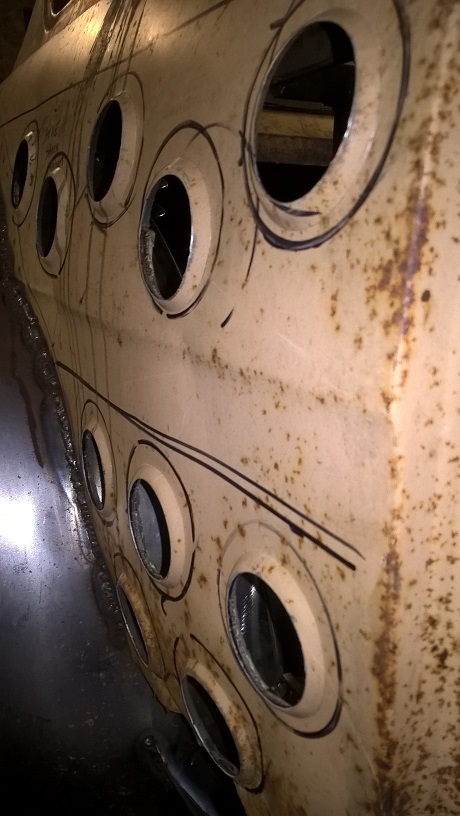
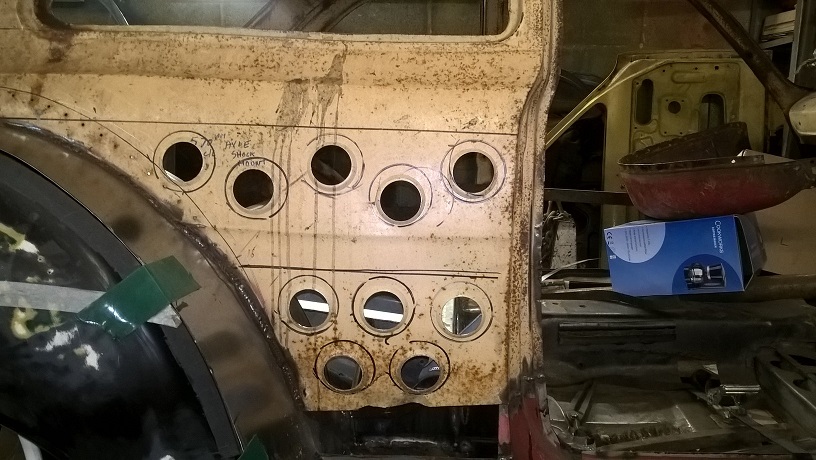
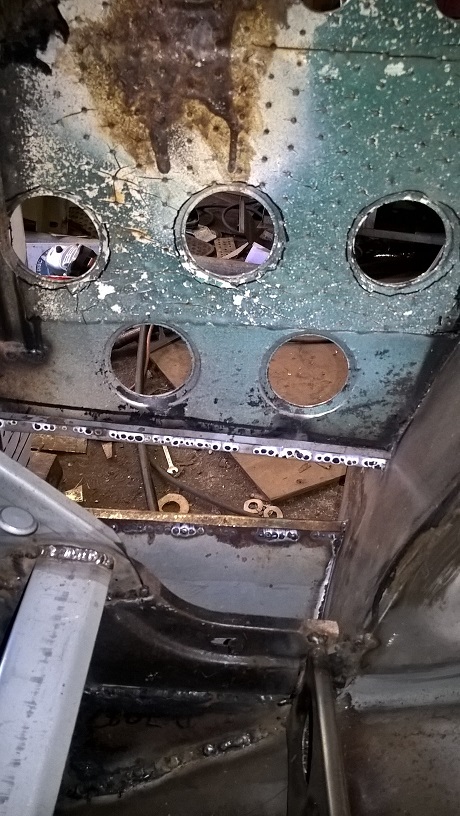
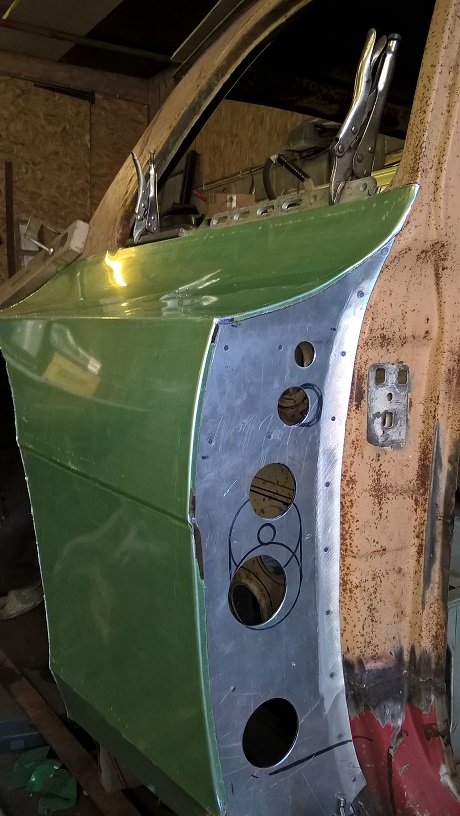
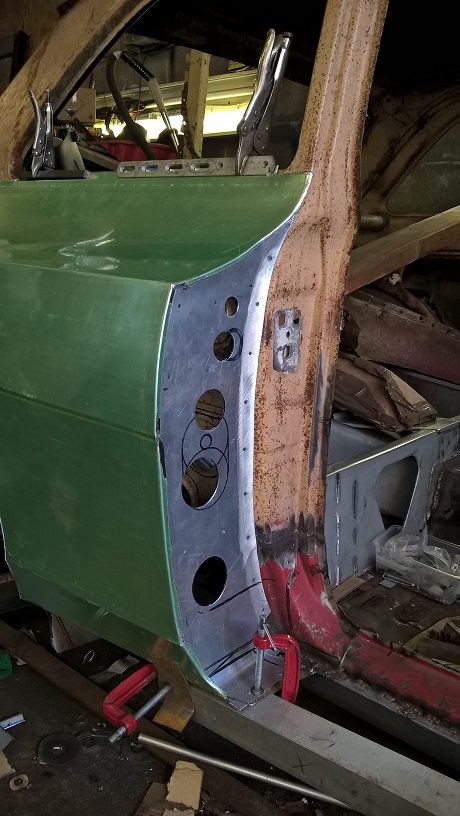
Because the outer body 1/4 panel is now going to be an inner panel...i decided to loose some weight by cutting some swaged holes...
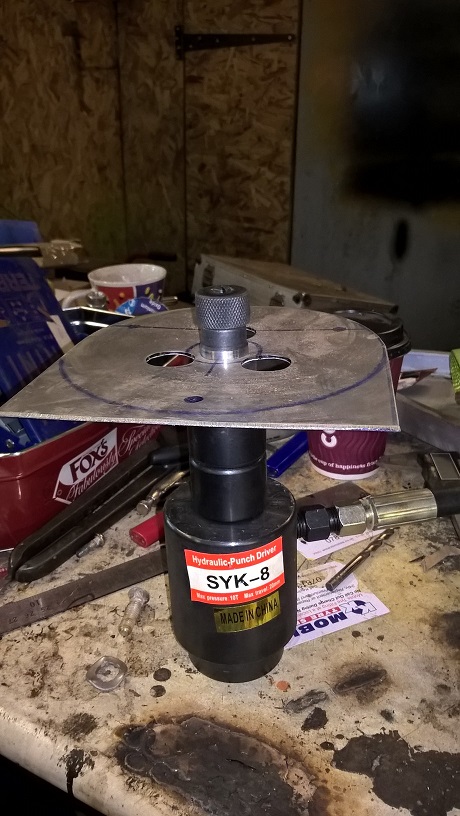
I dont have a swager...but i do have my £49.99 chinese hole punch....and i found that using two dies together i can swage holes easie..so
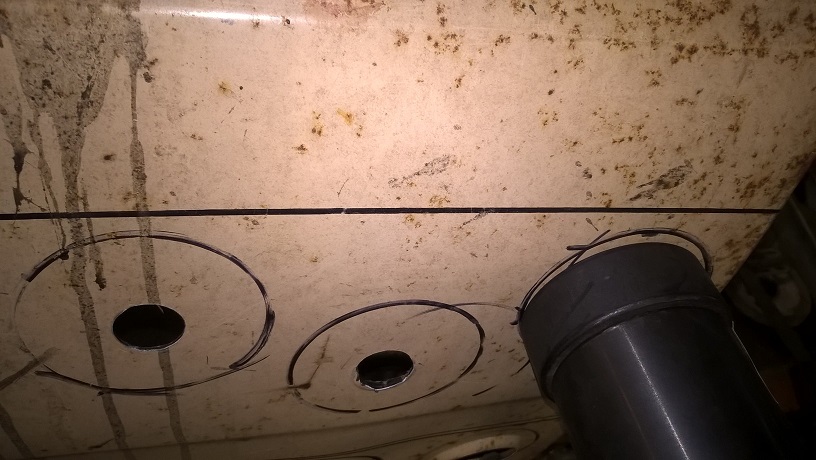
marked and drilled...and first punch 22mm hole..
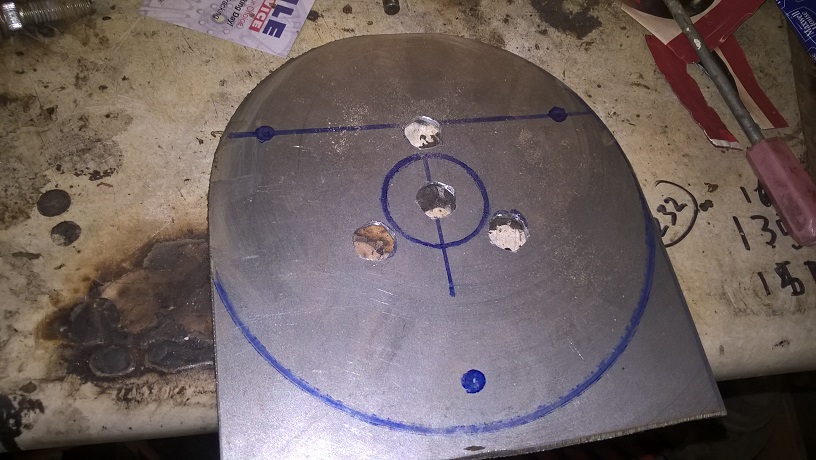
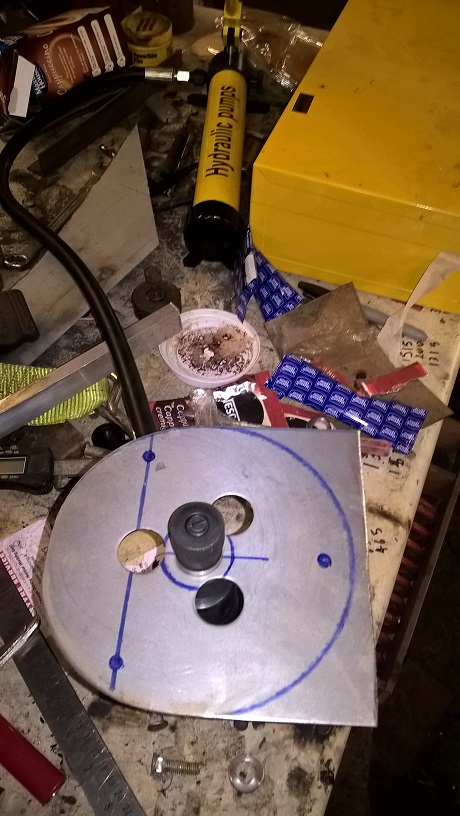
Then using two dies and the punch as the locking nut..swage the holes...i swaged mine outward...
When swaged looks like this,.
Then just punch the central hole out..
Added some 25mm holes between...now ready for the support ribs and extended door close to be made ...
cheers mark
Last edited by madragon199; 31-03-2016 at 15:27.
Loving the build as usual. I cant wait to see how the quarter panel work out.
To finish first, you must first finish
looks the nuts
sideways is the best way to turn a corner
Loving it
WOW that's one mental build
LoL...Me to....but everything takes twice as long as i planned....but its getting there....
Any luck with the exhauste/4 2 1 dimensions....im thinking ahead to try and get it to exit out the drivers sill...
cheers mark
Haven't commented much but watching in awe.
I didn't realize you could use the hydraulic hole punch like that. I'll have to dig mine out and have a try.
Also can't wait to see both how you tackle the rear quarters and the finished product.
Going to be one mean wide escort!
Loving it.
Shaun.
Thanks ,,,shaun..
With the hydraulic punch method...you cant go to close to an edge or it will kink...if you want to make gussets swage the holes first...then cut the metal to size...
Cheers mark
Friggin awsome build thread 👍
Cheers
Finlay
Cheers Finlay...
.Your build is one of the builds that inspired me...i love a mental/aggresive build...and i like the removable front end idea...so watch this space...
Cheers mark
Love watching Ratspeed develop , keep up the great work
..Cheers....havnt had any time latley...but back on it tommorow....cheers mark
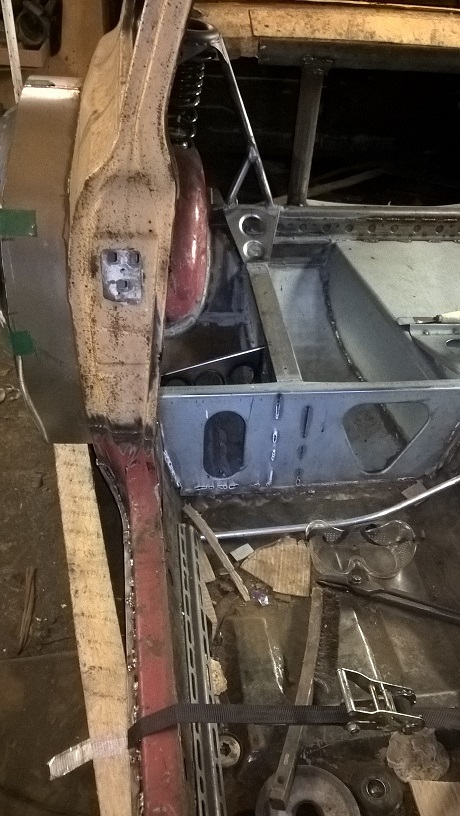
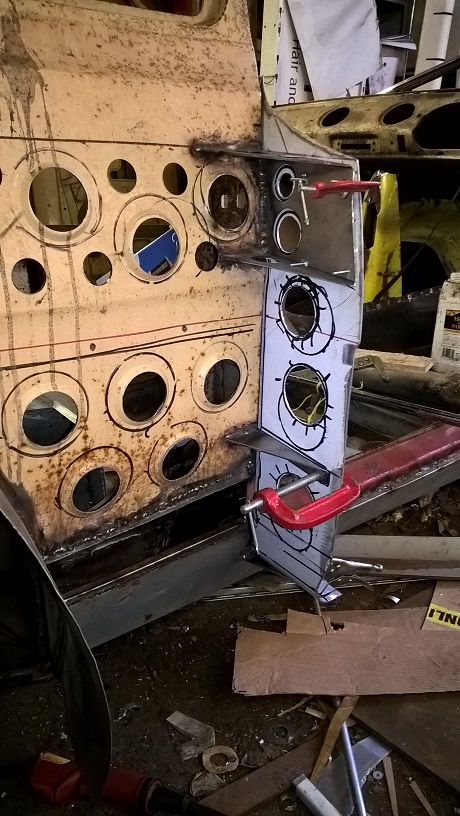
spent the day on it...not much fabrication work...but this little part is important...it dictates the finished rear quarter profile...the door shut...and the sill width and angle from the front wing...also i want to be able to remove it ....plus the exhaust needs to be able to fit inside the the sill extension....
so heres the pics...
ive just used a straight angle to make sure the sill intersections are correct..the finished shape will be slightly different...(needs to be wide enough for the exhaust)
This bracket/gusset also serves as the door latch fixing..
I used m3 clinch studs....for the fixings...
And i need access to the outer clinch studs so incorperated a letter box for my hand and arm for assy..
the piece needs 3 fixing points top one for door latch.. middle ..and lower for the piace and the sill attachment...(i will gusset the lower one later)
the piece (rear 1/4 door jam)..
I used 1.6mm ally for this part...the rear 1/4 ally skin will be in 1mm..so i wanted good support..
and the part test fitted...
Cheers mark
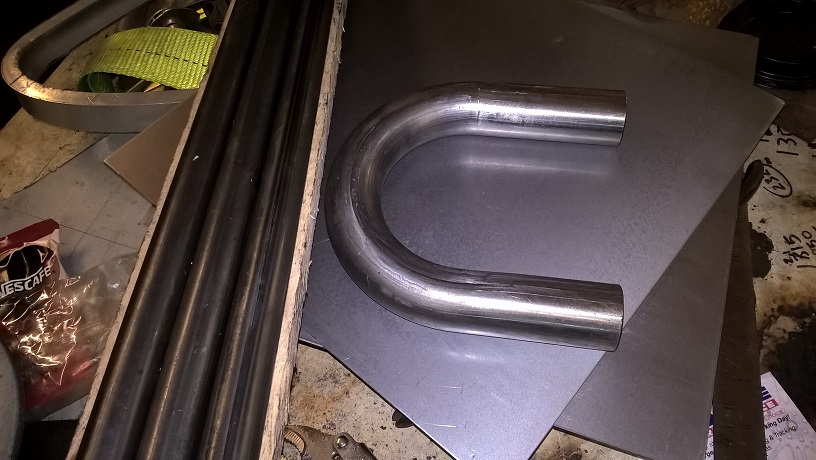
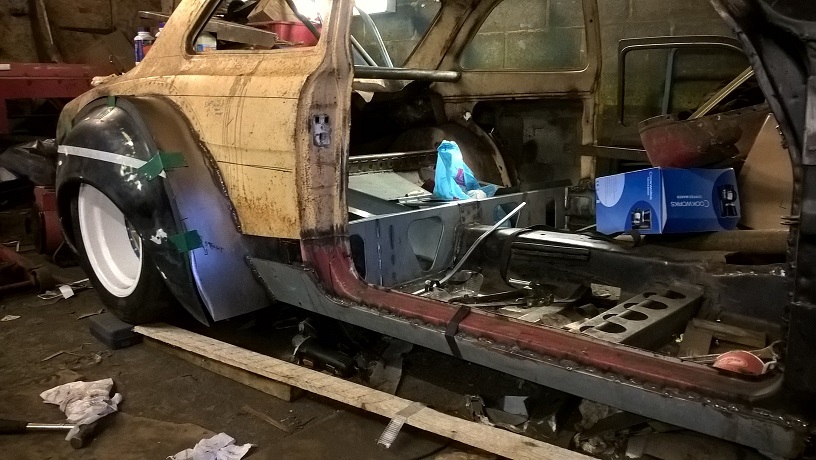
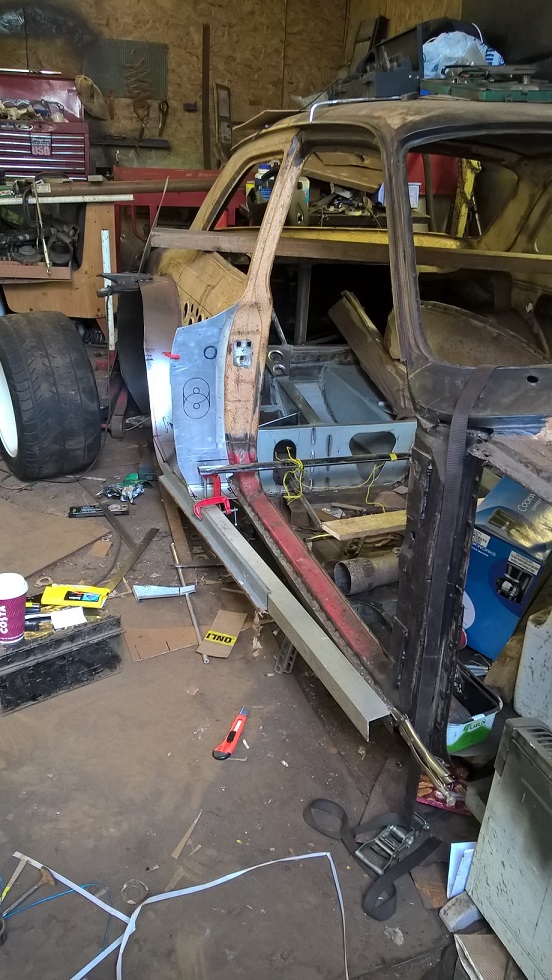
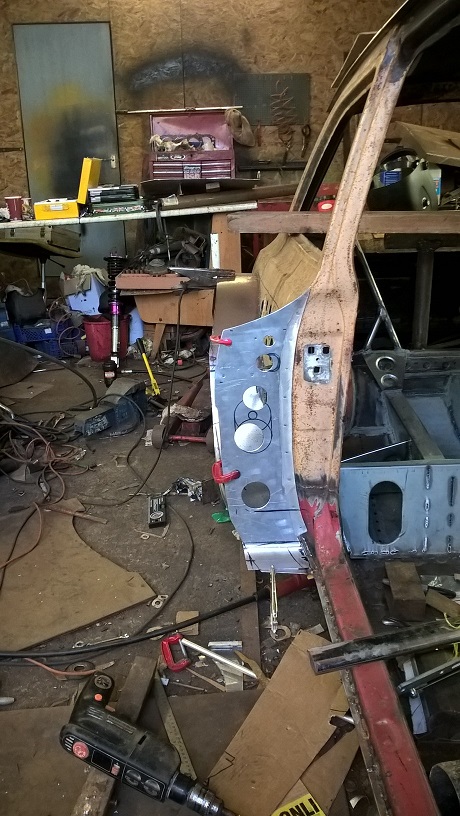
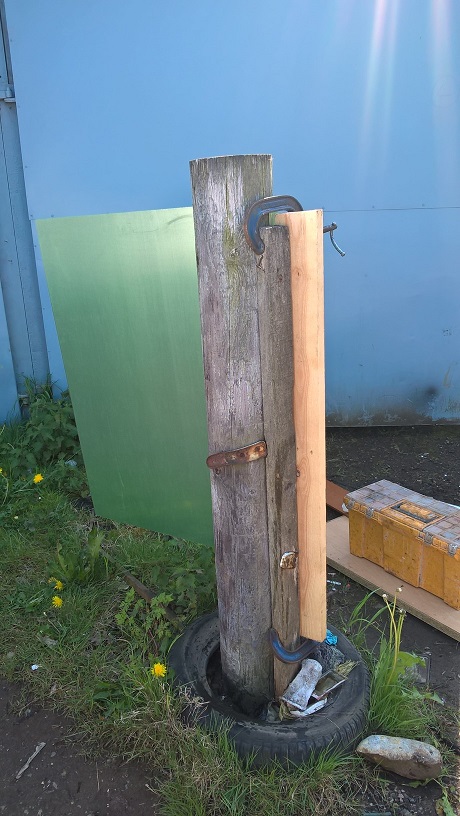
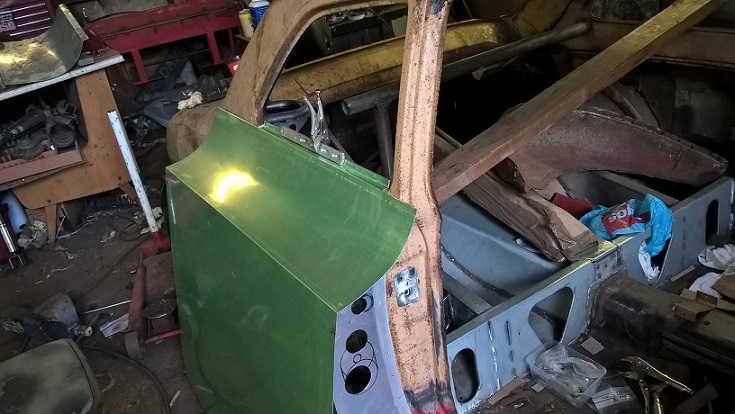
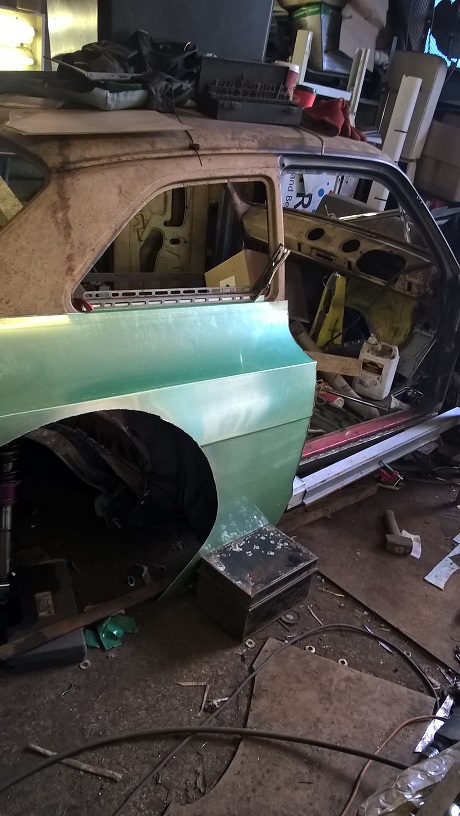
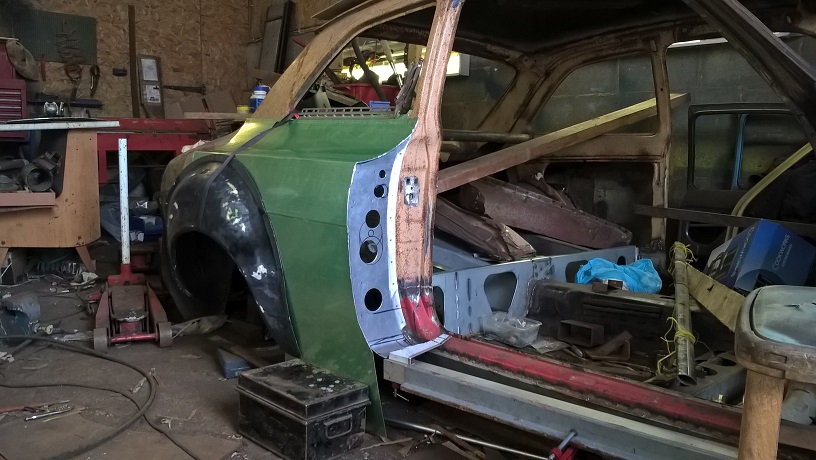
my alli sheet arrived....so thought id build the first half of the arch...(just to keep me motivated)...
The sheet is 1000mm X 1000mm...
First thing is the top radius its 30mm in from the edge and 223mm long...so..2 clamps a piece of wood and my workshop door stop(telegraph pole)
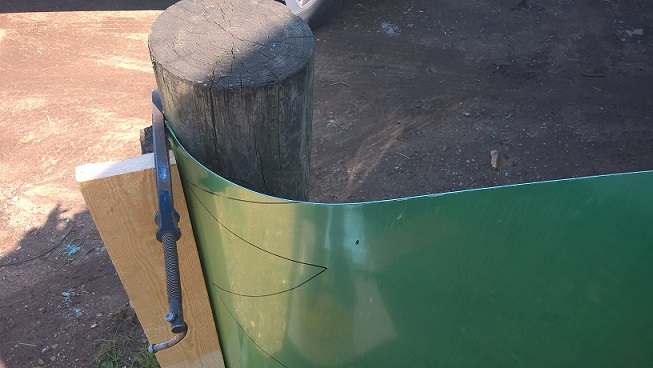
used my folder for the window bends and the first top bend...trial fit
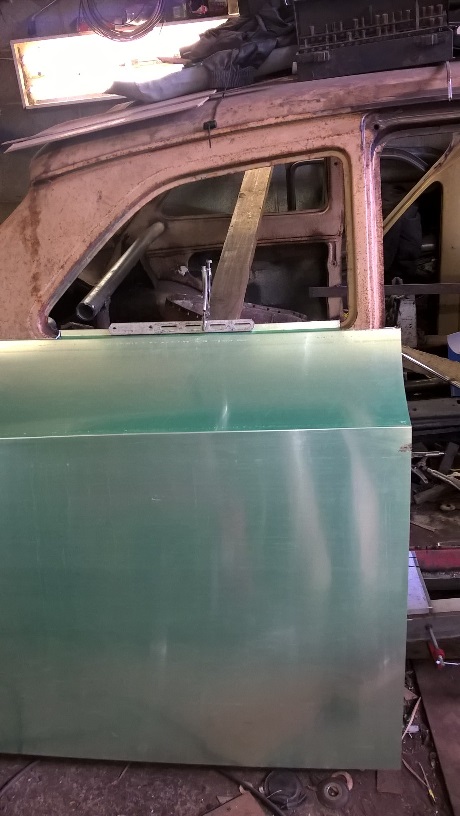
next bend is the swage line ..i bent the swage line before adding the reverse curve
Marked the cut lines with my sharpie and rough cut with the angle grinder...also added the swage radius....
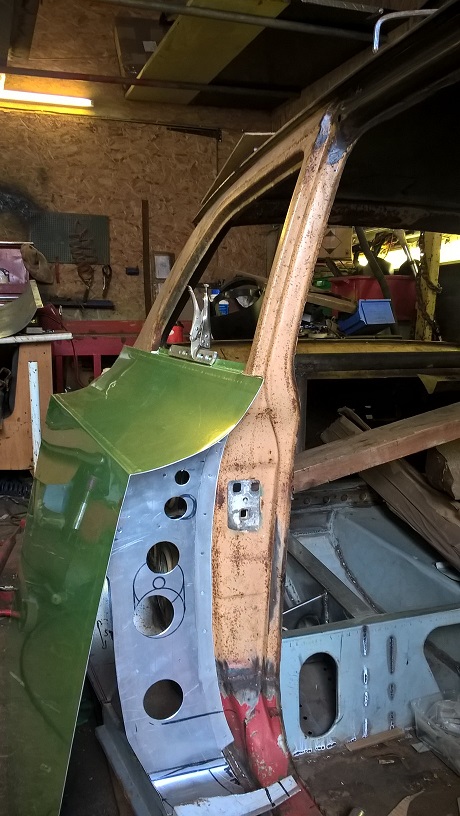
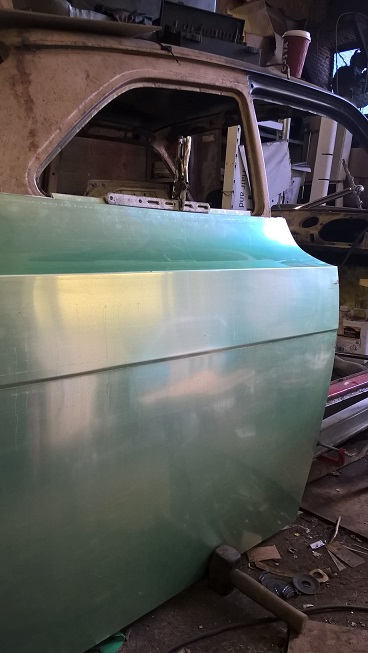
I think it looks a bit nascar ish like this...but not the look im going for ...so tried the arch on (just for the look)...i will joggle the new panel so the arch fits flush..(later)
Better....
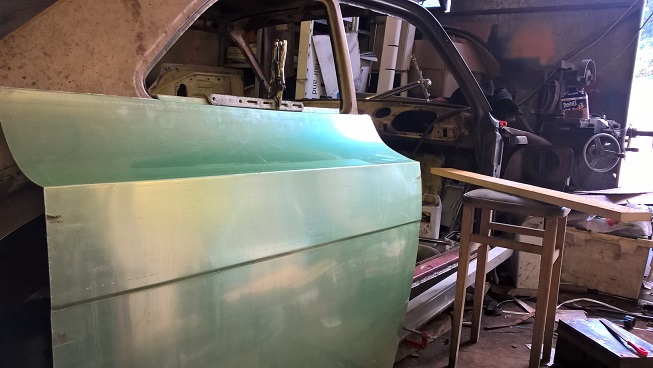
Next edged the front lip to join to the side plate ..just used a hammer and a ratchet strap...came out ok..
Also added the bottom swage line and the lower fixing bend...
All for now cheers mark
Outstanding!
1970 Mk1 Escort Tarmac Rally Car
Wow!
I couldn't quite picture how you were going to fill that, however you make things look so easy....
Loving it.
Shaun
Mental as always.
Awesome
Matt
i bet everyone can't wait to see the endresult of this built !
Wow!
Thats mad looking!
In a good way.
lovely neat fab work too.
1700cc MK1 ESTATE DONE. MK1 2DR STARTED
WOW, this is going to be special..
 Posting Permissions
 Reply With Quote


Bookmarks