My ex Challenge Ka.. Project WallyKa

Collapse
X
 
  • Time
  • Show
Clear All
new posts
  • Tristan
    Mechanic
    • Dec 2009
    • 632

    My ex Challenge Ka.. Project WallyKa

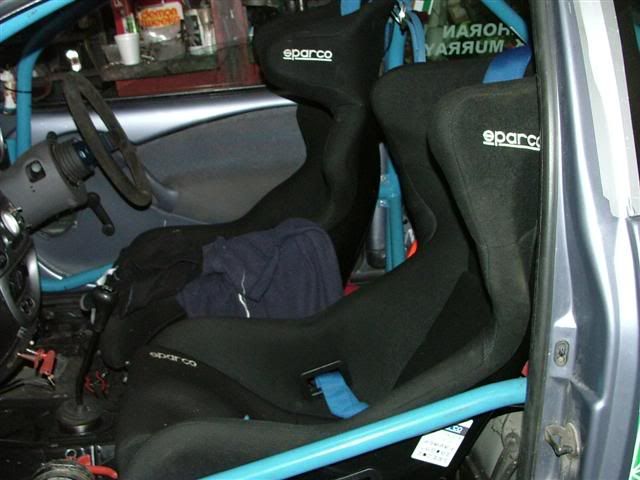
    a while back will know I bought an ex -KA Challenge rally car , to go rallying. Some things a man has to do , before he gets too old...

    So I'm gonna start a thread here if that's ok , see what you guys think of my tweakery , and hopefully you'll be able to suggest improvements.
    Last edited by Tristan; 10-01-2010, 16:11.
  • Tristan
    Mechanic
    • Dec 2009
    • 632

    #2
    Re: My ex Challenge Ka.. Project WallyKa

    I had a class win on the GSMC/Laois Mini-stages , and was delighted with that , then next time out was the Circuit of Munster . We were really on the pace in the morning , up there with Pug 106 Gti's etc , then DISASTER! I put my hand up , and admit , I got caught out , TWICE.... I ran wide on a fast right , loose clay/stones on the corner , and got beasched on a bank . Took about 5 mins to get back going . Then...We came flat out through a flowing section into a twistier bit , ordinarily we would have gotten through , but the road surface was all torn up , like hitting loose gravel , and we had a fairly scary spin . Bounced off both hedges , lucky not to roll! After that , the car felt "loose", something obviously not right in the back end , but we were just looking for a finish .

    Wishful Thinking.....

    Next drama was a puncture.... Fair enough , thats why ya carry a spare...but it just wasn't meant to be . I handbraked 'round a hairpin left on SS6 , back into gear , clutch out...and Nothing! all revs, no drive.... Literally . One of the outer CV joints wrung its splines. Nothing to do but roll the car to safety , and get out and enjoy the tropical heat .
    As the saying goes , "shure that's rallying"....

    So after assessment , I reckoned it was time to tidy up the loose ends , as the car had been (poorly) reshelled before I got it . Lots of silly things that could hurt reliability .
    Luckily (for me) , I've some good mates on an Irish forum http://www.driver.ie/forum who are clever beggars , so they chipped in with advice , help , and insults! Lol

    I fitted new engine mounts and a new clutch before Munster . The old mounts were well fcuked! And the new clutch plate is a useful 10mm or so bigger in diameter .


    You can see in the pics where I added some weld to the new LHS mount to strenghten them And as suggested by Chris Birkbeck , filled it with sealant . Also fitted new clutch slave cylinder s its inside the bell housing , so I wasn't gonna chance it! The rear (expensive)mount is a Birkbeck one .
    Last edited by Tristan; 12-01-2010, 22:01.

    Comment

    • Tristan
      Mechanic
      • Dec 2009
      • 632

      #3
      Re: My ex Challenge Ka.. Project WallyKa

      Then I decided there was far too many wires doing nothing , only addind to the weight and complexity , helll even airbag and radio wires were still installed! So painstakingly unpicked each wire that wasn't connected to anything , as far back as I could go.

      leaving me with this mess....


      Then , back to the front end to address in the most part a cooling issue . fitted a new Rad , thermostat (none in it!!!) , and opened the airway to the rad as much as possible , by cutting out some of the grille , and moving the rad over into the airflow a bit more .


      While in that area I had a look at the air filter and its air supply... I was never happy with that as it was right behind the coolant fan , therfore having hot air blown straight into it! So I made an insulation shield , out of alloy sheet with 2 layer carbonfibre bonded to it . The alloy should reflect back the heat , and the carbon insulate it . This now lets the hot air blow back underneath the filter and exit behind it , hopefully out the back edge of the bonnet .

      I raised the bonnet slightly too , and removed the rubber seal where the back of it closes . All to help promote airflow out of the engine bay!

      After that I decided to supply the filter with cold air front the front . Cheap and cheerful , a bit of heater ducting and 2 Gutter fittings . Lightweight and easy replace too.

      Comment

      • Tristan
        Mechanic
        • Dec 2009
        • 632

        #4
        Re: My ex Challenge Ka.. Project WallyKa

        here's the uprated Gearbox mount btw .

        Comment

        • Tristan
          Mechanic
          • Dec 2009
          • 632

          #5
          Re: My ex Challenge Ka.. Project WallyKa

          Whew! next on the list ( which seemed to keep getting longer....) was to move my navigators seat . No real pics of this , only well now the leggy lad is well back and down... eye level approximately the same as the wipers!


          I also went trawling my local breakers , and got a good drive shaft , a good axle and a new front end (front end shown in previous pics) Naturally I put 2 new outer CV joints on , just to safe!
          This time I decided to "properly" mount the side parts to the front moulding , so out came the RivNuts , and some stainless steel 6mm screws , and job jobbed .


          Enlisted my mate Tony , and we swapped the poly-bushes , brake pipes , and suspension onto the "new" axle .


          There was a slight bend in the old one , so off it had to come.

          Comment

          • Tristan
            Mechanic
            • Dec 2009
            • 632

            #6
            Re: My ex Challenge Ka.. Project WallyKa

            After getting everything refitted , I decided a quick spin up the road to check all was in order would be a good idea . Now I must first mention , whenever the car had been idle for a while , with the Kill Switch off , when you'd turn on the switch , and the ignition , you'd get a "Pop" from the intake , always puzzled me , as the rev counter would let a quick jump and the rad fan a quick spin too . Well..... for some reason the "Pop" this time was more like a "KABOOOOOOMMMMMM!!!!!!!!" . As you can see , the bottom of the inlet manifold plenham kinda , well , exploded! Gave me a bit of a shock tbh....I was almost afraid to get out of the car.

            Here it is after I removed it..


            I've since found out the injectors are high flow , almost twice standard , items , and they weep a wee bit while standing.... added to the fact the Motec ECU seems to momentarily energise the coil when all power is turned back on . So it was literally a case of an accident waiting to happen! Better at home than in service...

            Apparently Motec ECUs energise all outputs when you turn them on , so I put a switch on the Earth of the coil , and flip it on once the engine has turned over once or twice on cranking.

            Comment

            • Tristan
              Mechanic
              • Dec 2009
              • 632

              #7
              Re: My ex Challenge Ka.. Project WallyKa

              Its about 3mm wall plastic , so it must have been a fair bang... I had just lashed on some silver paint to reflect heat rather than absorb it .

              Back to the autobreakers for a manifold so... as per my usual happenings , more drama awaited me.
              "New" manifold fitted up 100% , I found a weeping coolant pipe near the back of the head when I had the manifold off , so sorted that , and blanked off the Idle Air Valve with ally plate too . There was a sensor , possibly Air temp , which had no hole on the new mani , so I just drilled one and clipped it in , in approxiamtely the same position as the old one.

              While the (Grp A Homologated , and larger) Throttle body was off , I radiused the sharp curve into the Plenham , and smoothed the ridges out of the throttle body either side of the butterfly. I also filled the hole to one side of the T/B with chemical metal , that feeds air to the Idle Stabilisation valve as that's no longer in use . All small things , but every wee bit should help .

              vs


              The T/B is a nice bit larger than standard .


              next thing was to refit the wiring and plumbing associated with the manifold . Coolant for the heater in the cabin is taken from one end , so I replaced that pipe with a new one as the old one was a bit "soft" , an oil leak on it at some stage I guess?

              Everything else clipped on , delighted with myself as the "new" mani came with all the loom for the Crank Speed sensor , Water Temp Sensor , Throttle Position Sensor , the 4 injectors , and all the plugs were perfect , unlike my original ones...most of them were cabletied on!

              Then I discovered a bit of a problem... when I went to connect the manifold loom to the car... BallCocks!


              I couldn't bring myself to re-use my sh1tty old wiring loom , so out came the multimeter and notebook , and I pin-tested the wires , which funnily enough are all Black (oh how I laughed......) , out of the plug ! Thanks Mr. Ford (you cnut!) 
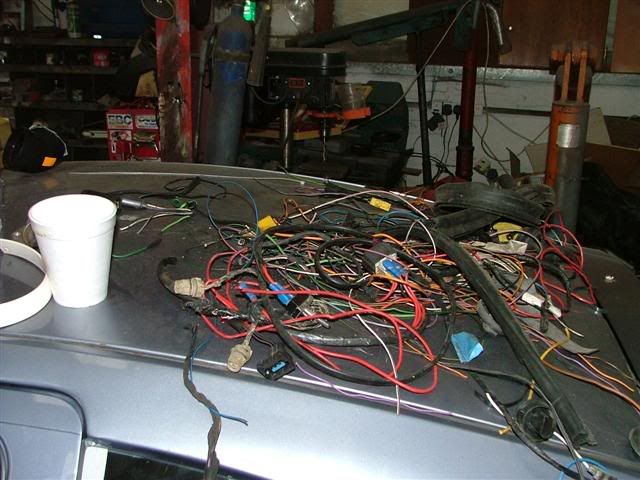
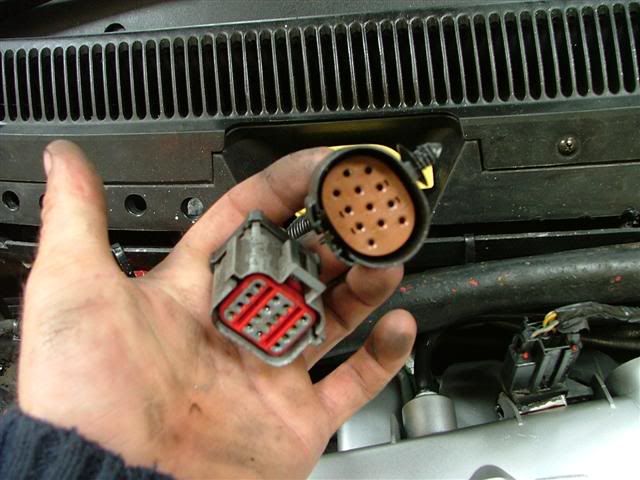
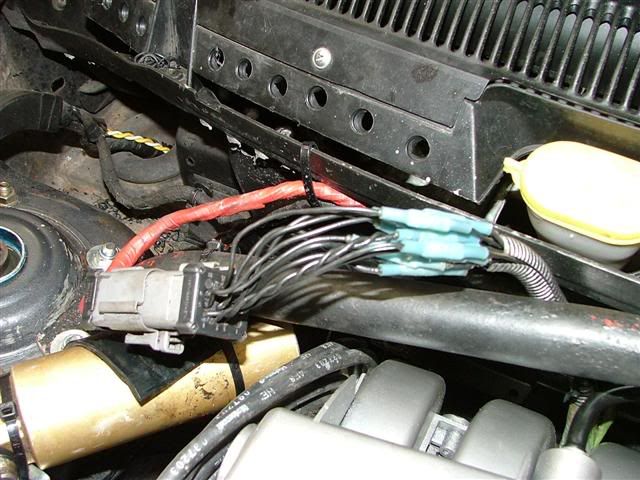
. Anyway... figured out what wires on each plug should match up with their counterparts on the other one , so broke out the Crimping Tool and connectors .
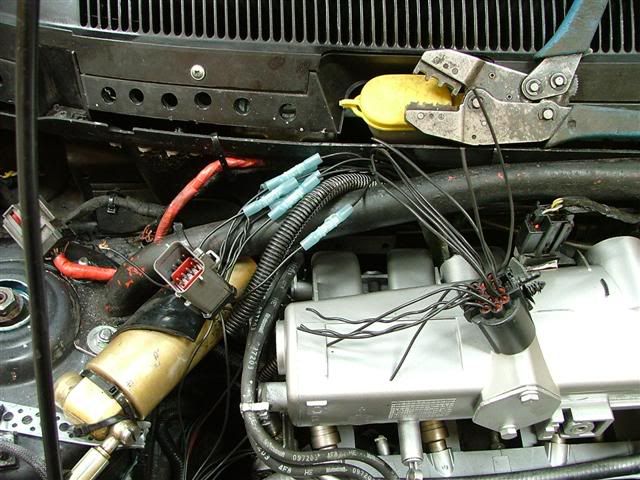


              You may notice 2 wires twisted together , these are the Crank speed signal I assume?

              I prefer these to Solder , as these have an integral Heat Shrink cover , and I find solder can make wire brittle , and break . Not good in the vibration of a forest!

              Heat gun on , shrink the heat shrink , a good cover of Loom Tape and cable tie to the Strut Brace . Simple.

              Comment

              Working...