Re: GavinR's Mk2 Rally Car - FLY
Good new making good progress
The barcud was unreal
Couldn't believe the pace of the top boys and the amount of people out spectating
And the amount of mk2s out as well!!!
-
Re: GavinR's Mk2 Rally Car - FLY
Hope you enjoyed watching the Barcud
I've entered a Targa in Suffolk on 24th Sept and also need her ready for the Exmoor Targa Rally on 7th October - I'm Clerk of the Course for the 3rd year and always go round as Car Zero to "wake up the marshals" and "check the bogey times" I have a back up plan for both events if I don't get her finished in time!
Onto the other side - cut away the floor and chassis section
Replacement section in place - not quite long enough!
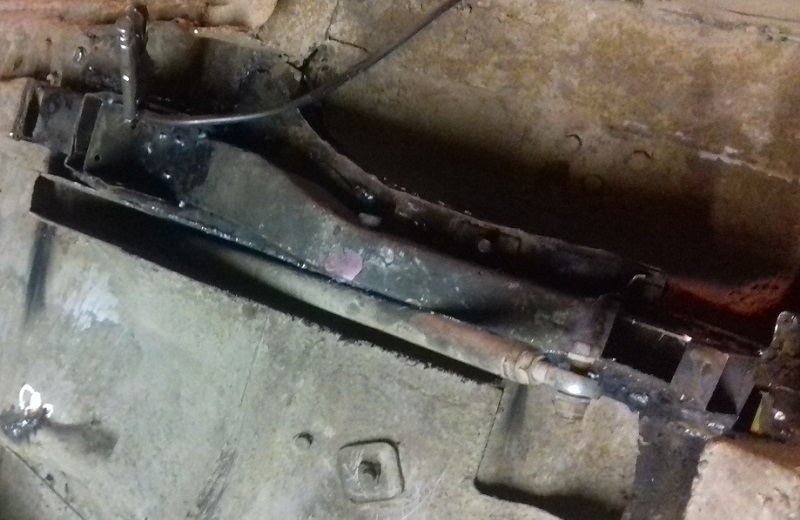
Next 18" needed replacing as well due to big cracks and past repairs - when I removed it I found it was full of mud contributing to it going rusty!
Section finished with skids
And more repairs around the panhard rod and added a notch above the axle to match the other side
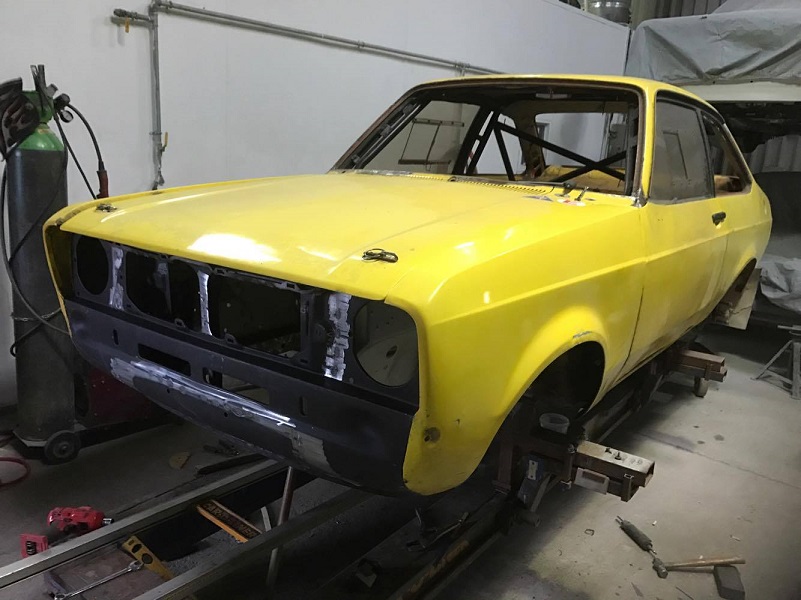
After refitting the suspension, etc, she went to the paint shop this morning - there's a chap who has a unit with a paint booth in the same complex as mine so I thought I'd give him a go, and he says he'll get her done in a week
Leave a comment:
-
Re: GavinR's Mk2 Rally Car - FLY
Good progress gavin
Are you aiming for any event or not set a deadline?
Im staying with friends in Carno this weekend and going to sample my first bit of proper Welsh Road rallyingLeave a comment:
-
Re: GavinR's Mk2 Rally Car - FLY
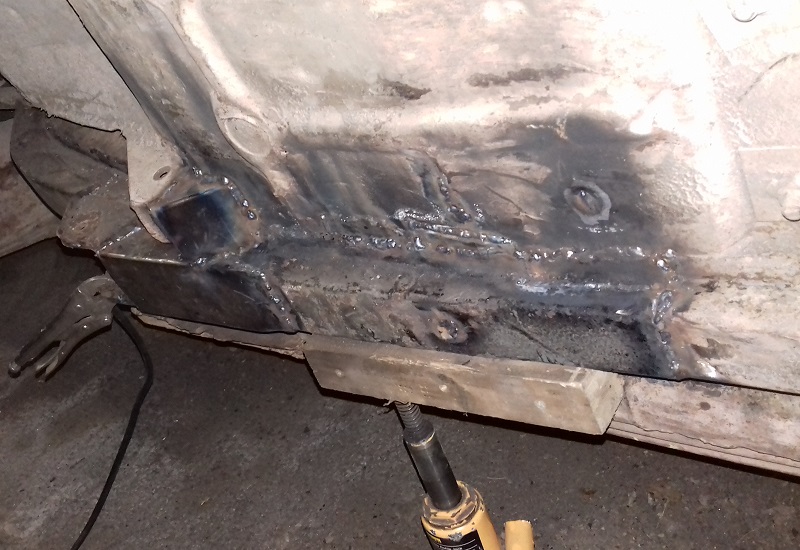
Onto the back end...
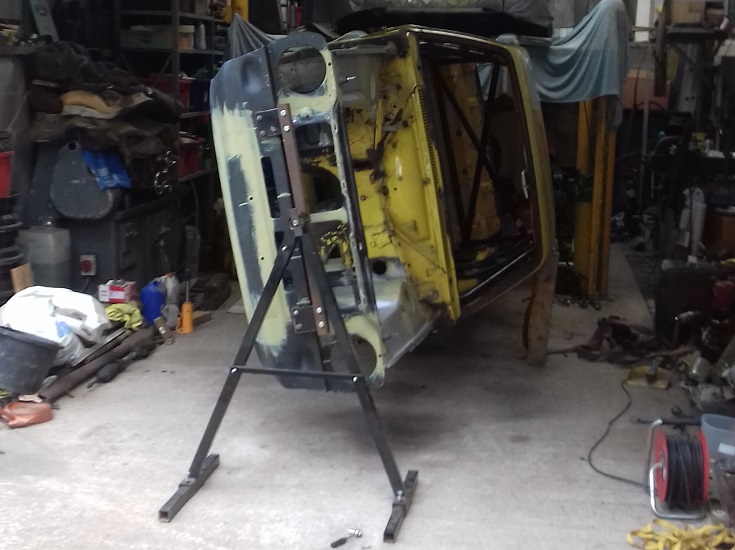
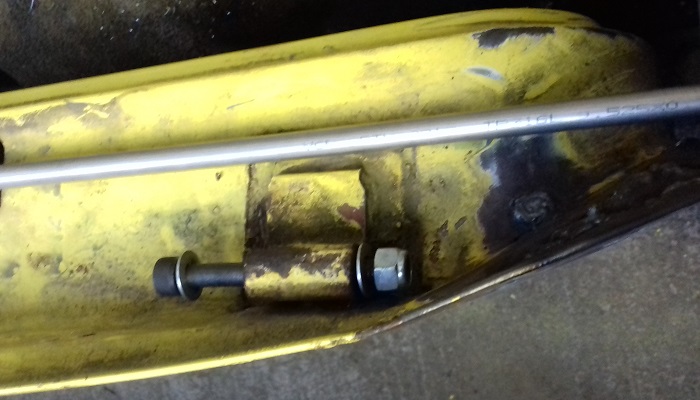
Dan Stone lent me a spit so I mounted Fly on it, after reinforcing the bumper mounts
It seemed very top heavy and I wasn't convinced there was enough clearance to go upside down, so I made some 5" drop plates and now it's a lot better balanced and will turn a complete 360 without too much effort
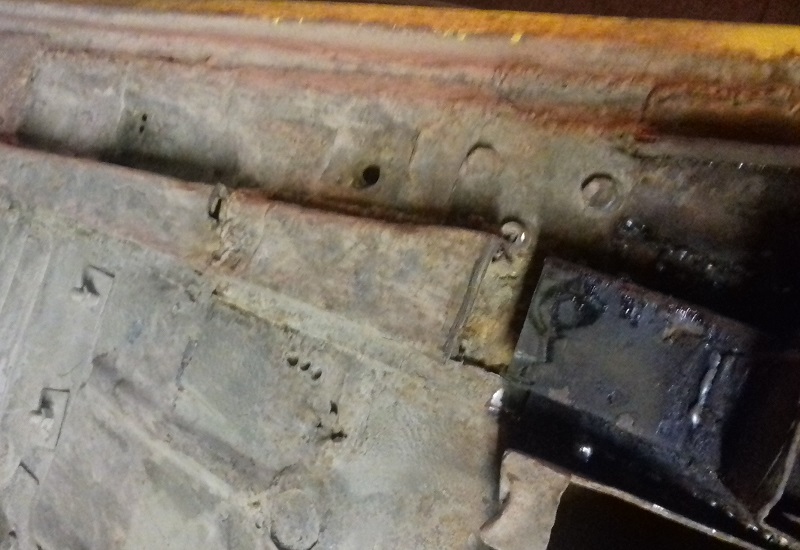
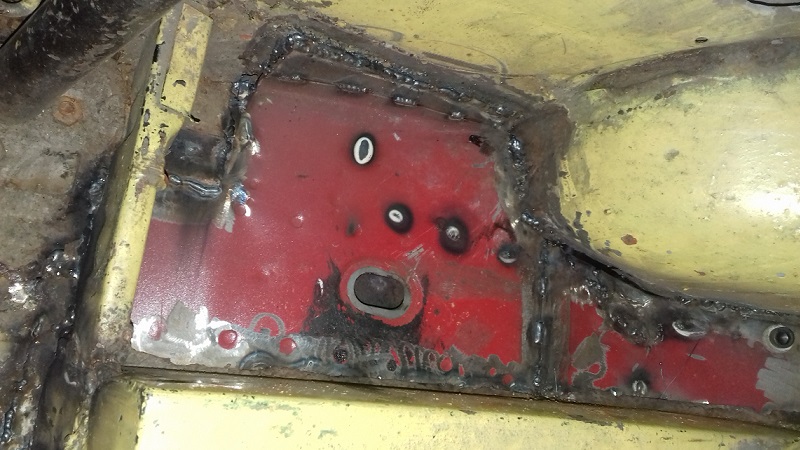
Chopped out a large section of rear chassis and floor, from in front of the spring hanger up to the turret, and also for the silencer tunnel
"New" floor, chassis section, skid plates and silencer tunnel welded in, and also another small section behind the axle
Inside needs a bit of finishing off - original red paint gives a clue that the chassis section came from a 4 door I chopped up in 2007 !
Next week I've just got to do the same to the other side
Leave a comment:
-
Re: GavinR's Mk2 Rally Car - FLY
good to see the old girl getting another lease of life should be good for a few years nowLeave a comment:
-
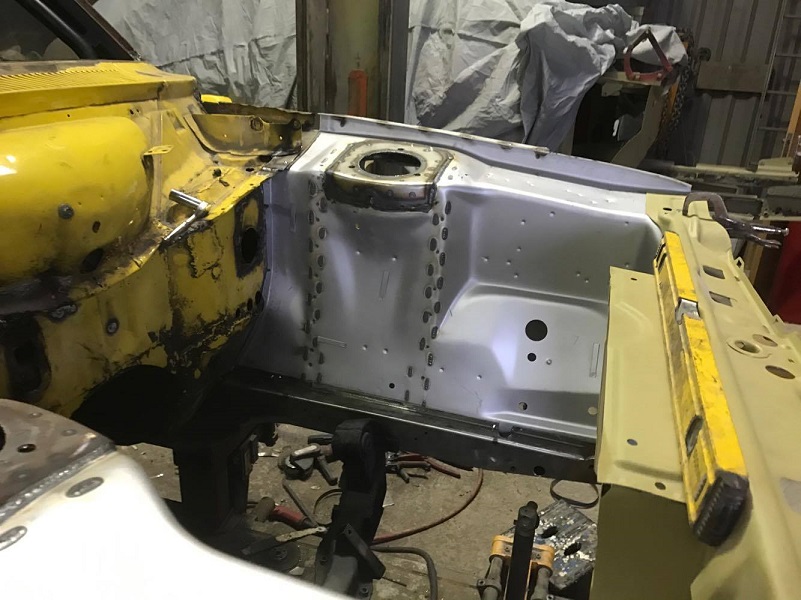
Re: GavinR's Mk2 Rally Car - FLY
I collected Fly from James yesterday - here are pics of the work he did
Loading onto the jig
Front end is a bit twisted
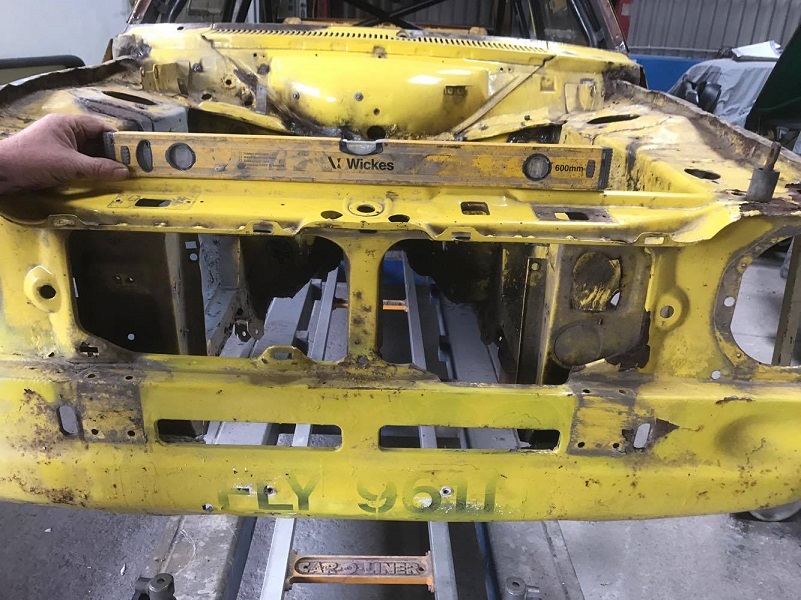
Driver's side was 15mm up and passenger side 10mm
Cut everything off
A bit of a mess where the bonnet hinges meet the inner wings and other panels - one of the resons I knew it needed doing was trouble welding to rust here!
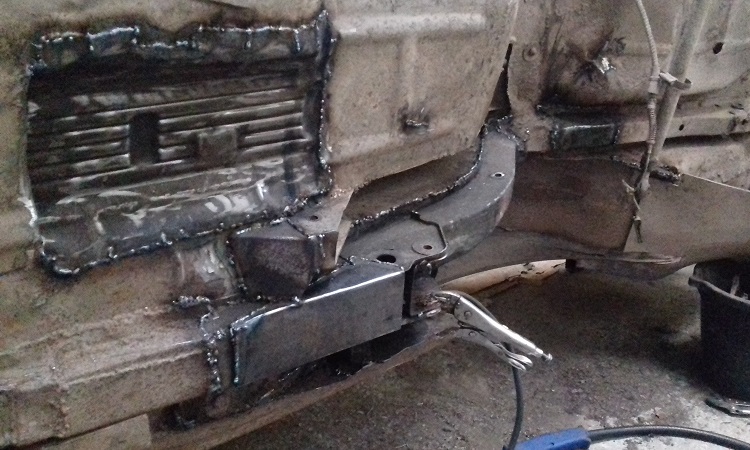
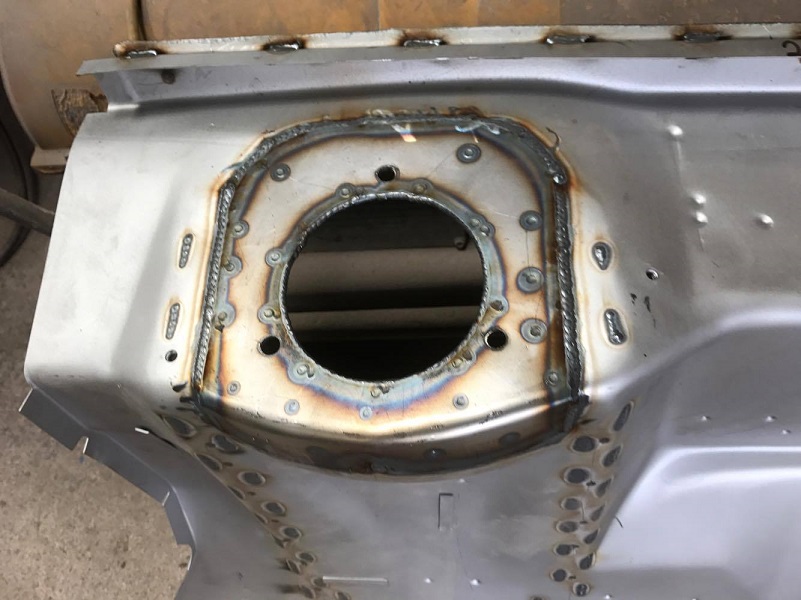
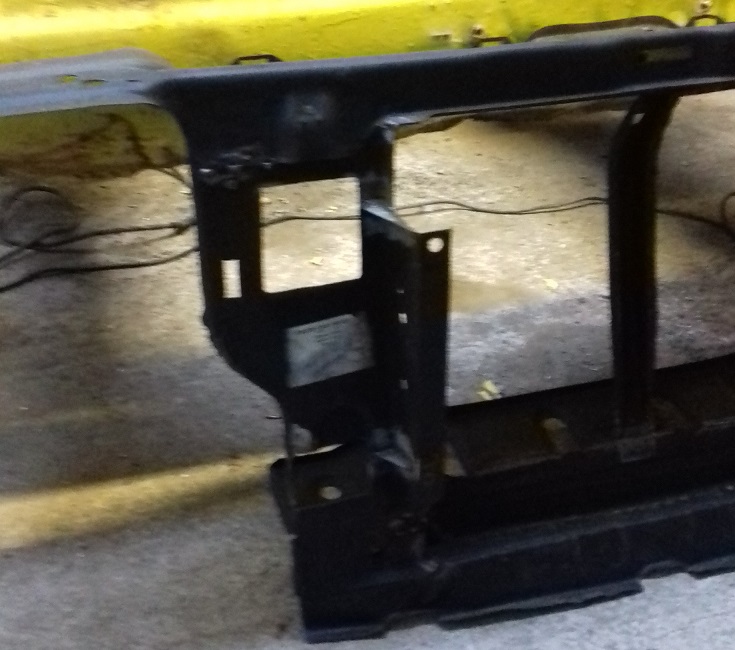
New chassis rail clamped into position. These came from Motorsport tools and are folded and welded instead of being pressed. All the bolt holes are in the right place, but the holes for the jig mounts were too low, so James had to pack his brackets up to make everything level. The tubes for the cross member are threaded to take the standard 3/8" UNF bolts.
And they supplied me Mk1 legs instead of Mk2, the only difference being the bumper iron reinforcements so I didn't bother getting them changed.

Removing the old rails showed how much the floor had been patched before. James took the sensible decision to cut it out and replace with thick steel plates so there was something solid to weld the new rails to.


Although the new inner wings came built up, they were just spot welded as a standard car would be, so James stitch and seam welded them for extra strength
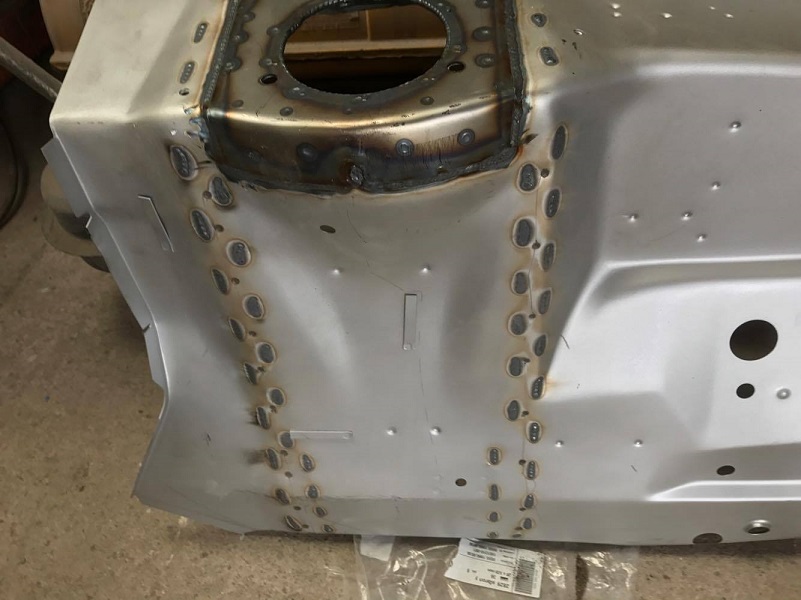
The chassis rail and inner wing didn't quite meet, but another plate and all was well
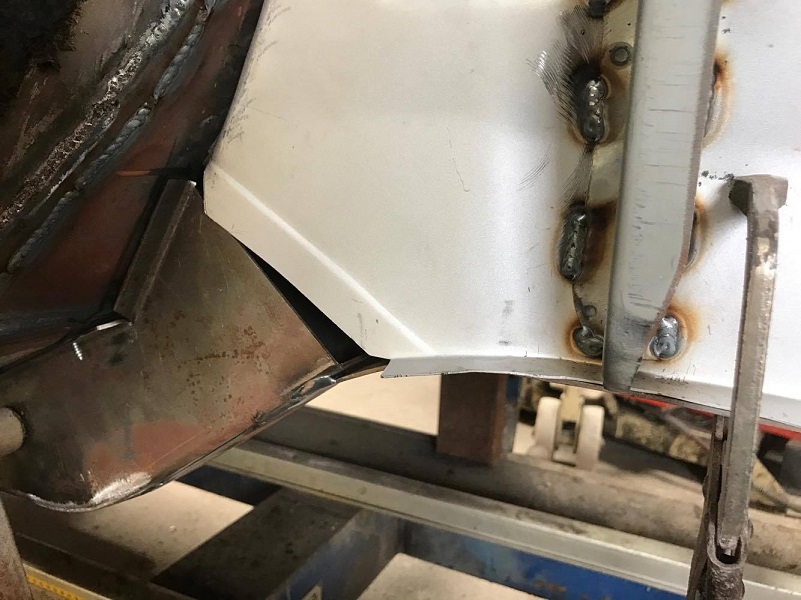
One side done
And the other - a standard front panel used to align everything. My inner front panel had twisted when I'd modified it for the radiator.
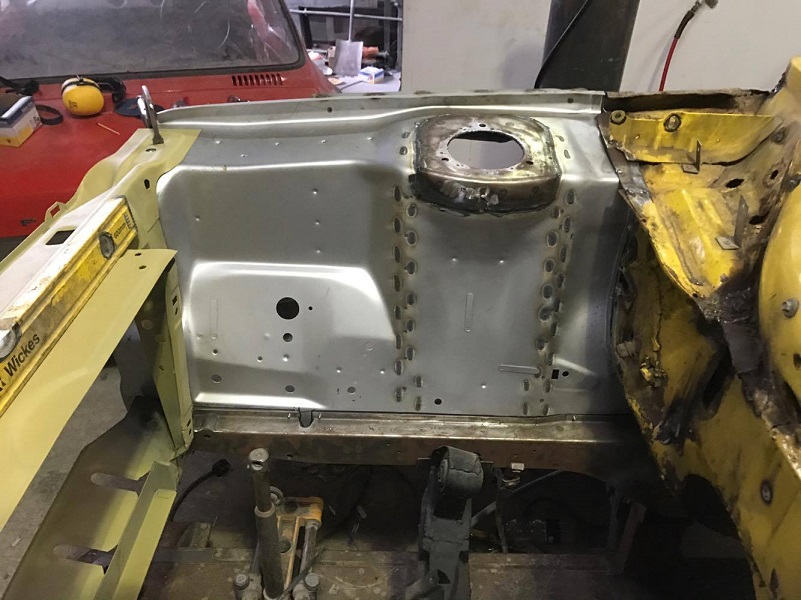
Nearly there
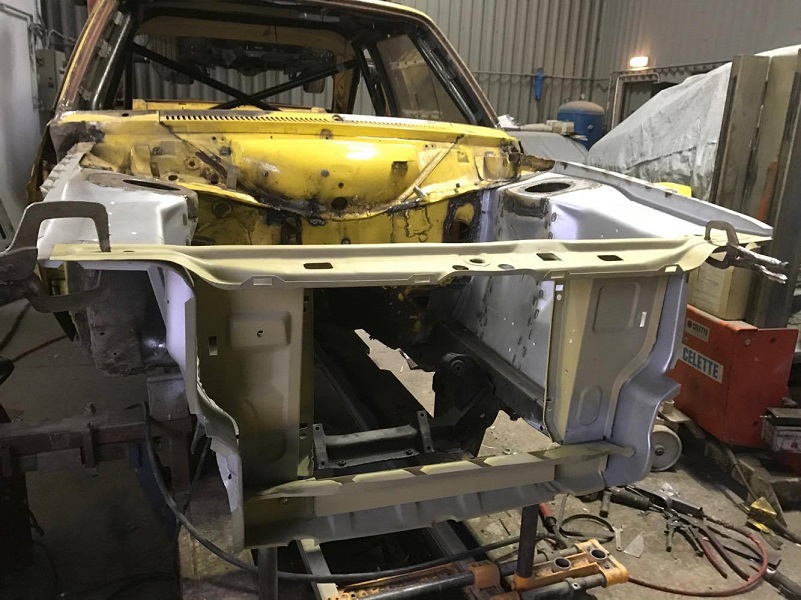
All back together and ready to come home. James added some primer over the welds before I collected her.
So back to me for some quick welding on the rear chassis, then hopefully she's being painted in August
Many thanks to James for his hard work over the last 2 weeks
Leave a comment:
-
Re: GavinR's Mk2 Rally Car - FLY
I've had a spare standard shell for years, but would rather keep that as a spare until I really need it!Leave a comment:
-
Re: GavinR's Mk2 Rally Car - FLY
wow she has seen some work Gavin! dare i say is it not time for a reshell?
Fair play for sticking with it though, you've alot of fabrication ahead looking forward to the updates
Leave a comment:
-
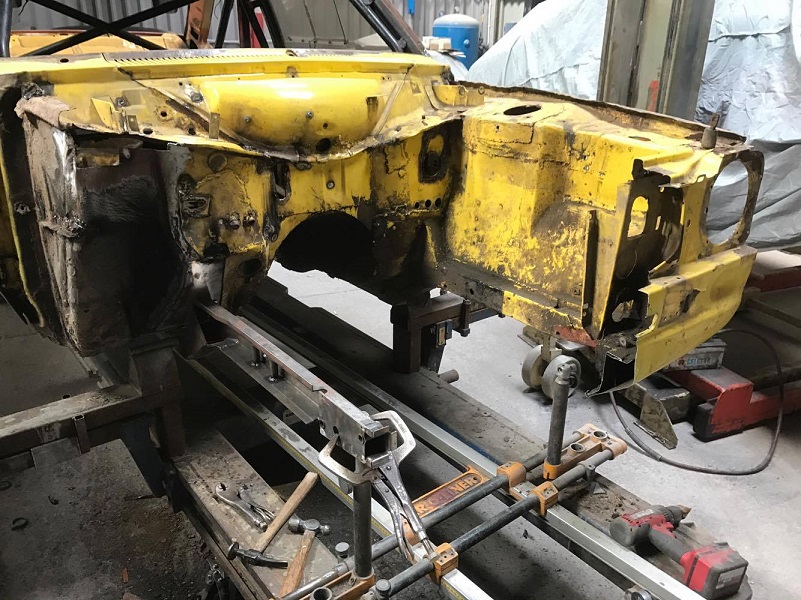
Re: GavinR's Mk2 Rally Car - FLY
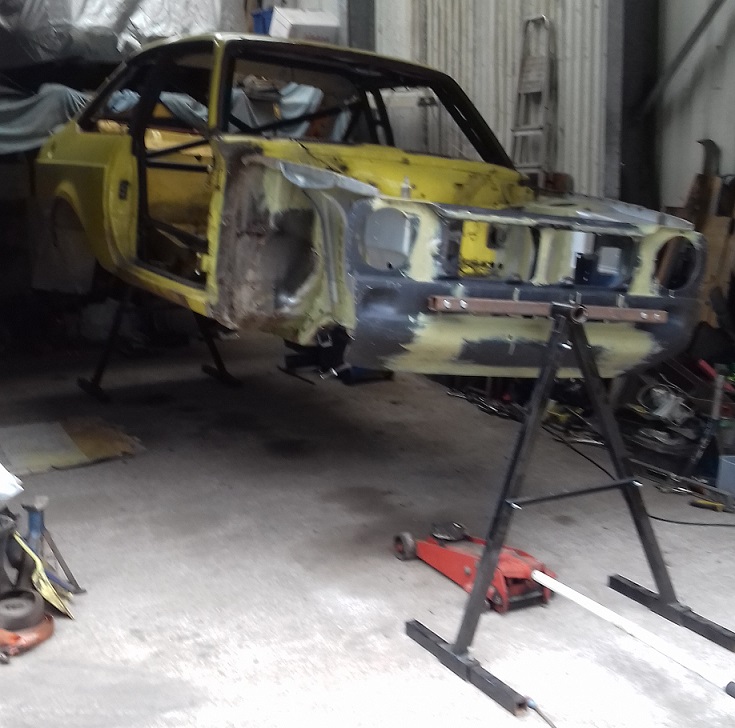
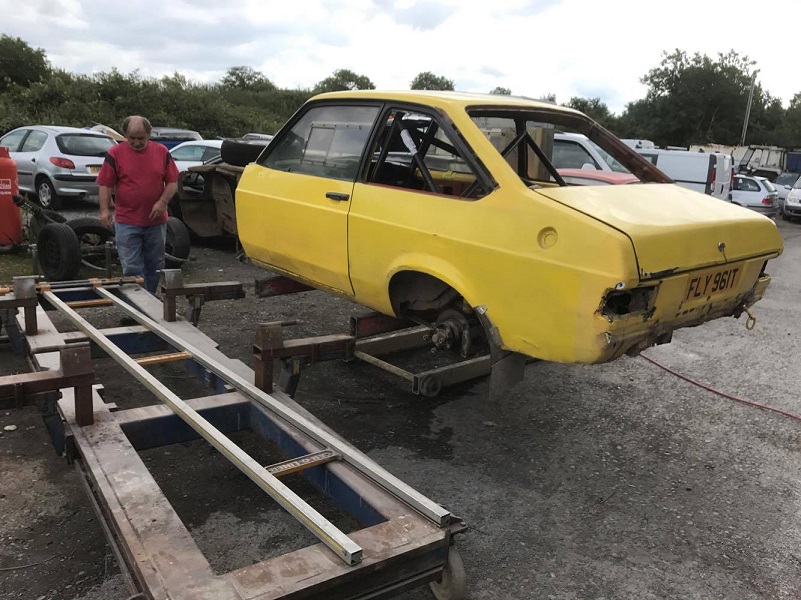
So I finished fully stripping Fly - it hasn't been this far back to a shell since 1993!
Just before Fly went down to James, I got on with welding the kick panels, bulkhead (inside and out), screen pillars, transmission tunnel (cracks around the gearstick hole).
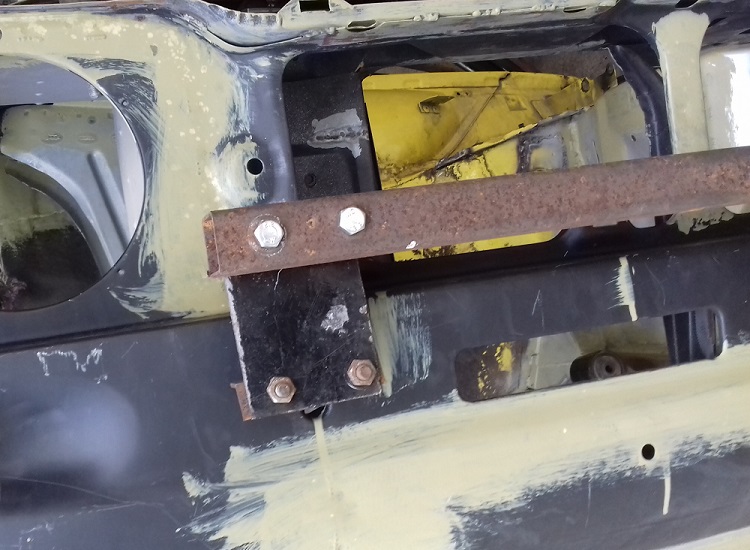
In the engine bay, I welded up some obsolete holes and cut out the wiring hole, turned it upside down and welded it back on. This should lower the wiring loom and make it come through the bulkhead underneath the air box - it was a bit tight before.

Quite a bit of welding on the rear panel, around the rear screen and where the quarter panel joins the bottom of the rear screen on one side.
I've modified the new inner front panel to match the old one - cut out for the rad, holes for the oil cooler and air flow to the air box.
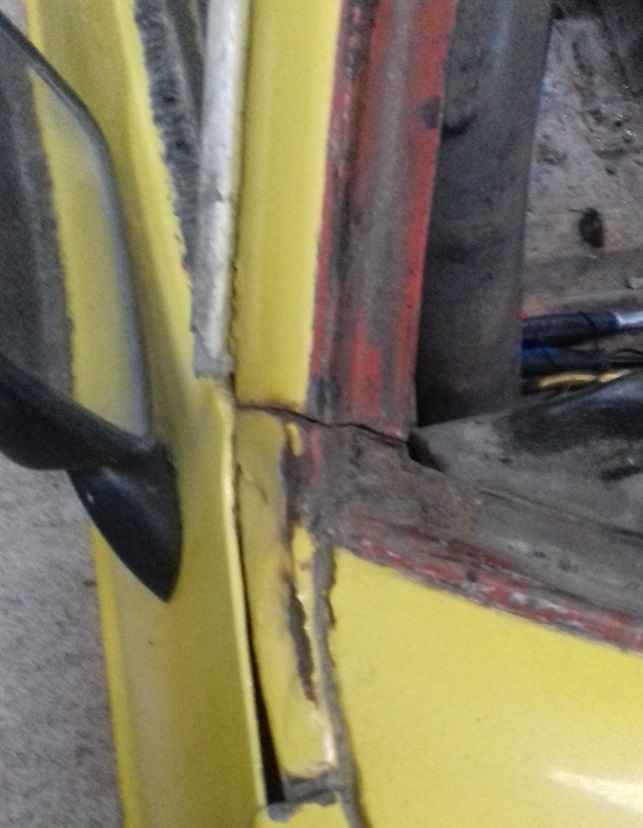
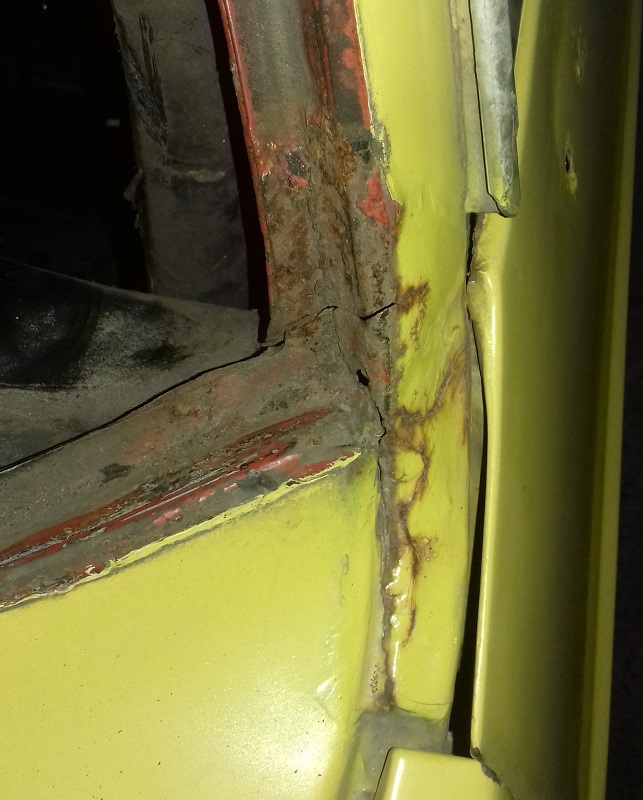
The driver's door also needed work on the front and rear corners, and there were cracks where the frame joins the door skin at the front.
On both doors, the hinge pins were loose - after 3 days of soaking in oil, I knocked the pins out with a variety of punches and a large hammer! Not sure how to fix the loose hinges, I found some 3/8" x 16swg stainless tube on eBay, which works out to 8.1mm ID and 9.5mm OD. I drilled out the worn hinge parts on the doors to 9.5mm, knocked a small piece of tube in and bolted them up with M8 x 75mm Allen Bolts and nylocs. This has eliminated the play in the hinges, and I readjusted the doors to line up with the rear quarters. It should make it easier for James to line up the front wings when that part is completed, and will make the doors easier to remove in the future
It is also repeatable - when the tube wears, I can just fit another bit
Leave a comment:
-
Re: GavinR's Mk2 Rally Car - FLY
I've been in that workshop for just over 2 years now - it has some good clear panels in the roof so is bright in the summerLeave a comment:
-
Re: GavinR's Mk2 Rally Car - FLY
Good to see her getting some love
Have you moved workshops
Looks nice a bright in thereLeave a comment:
-
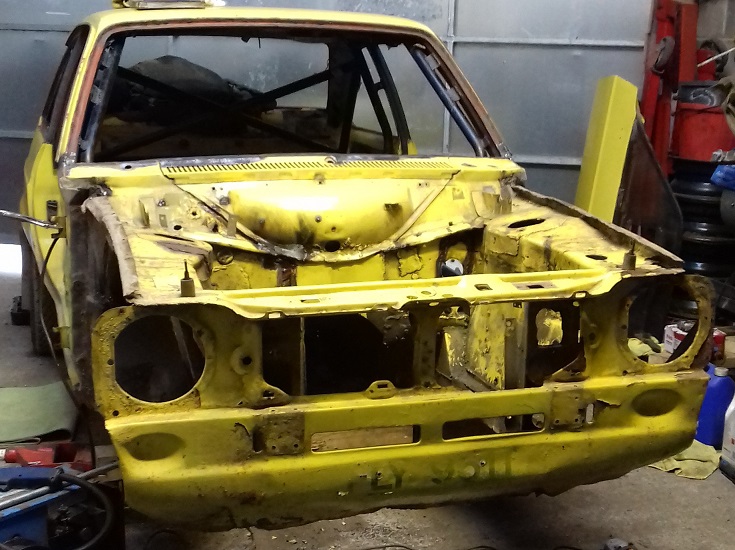
Re: GavinR's Mk2 Rally Car - FLY
Pictures...
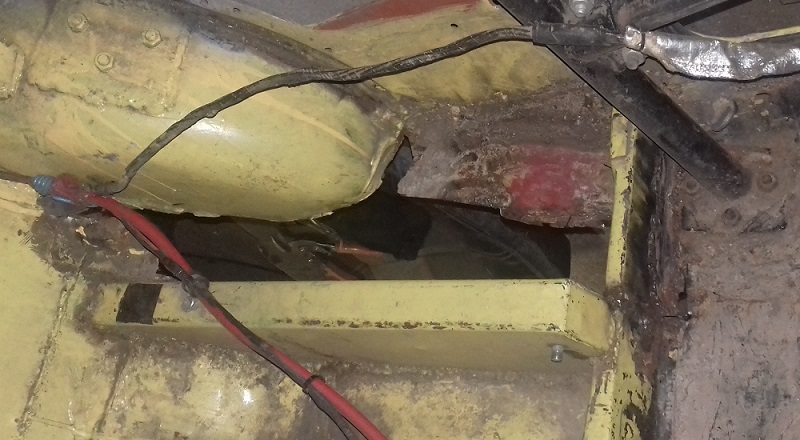
Did I mention the exhaust had got battered on the Somerset...
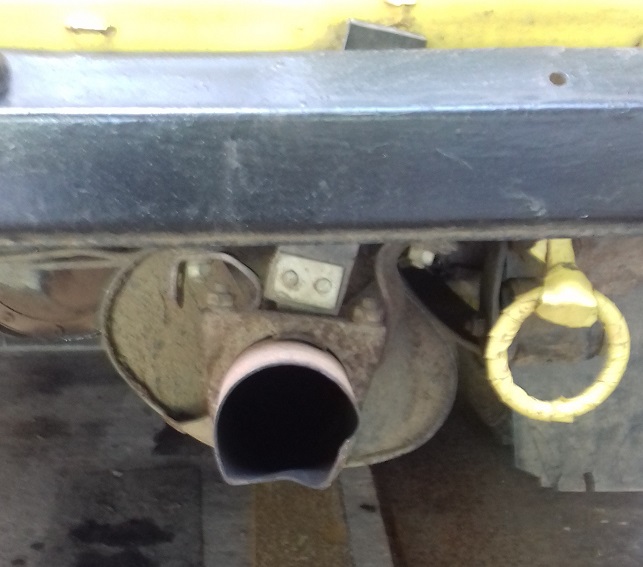

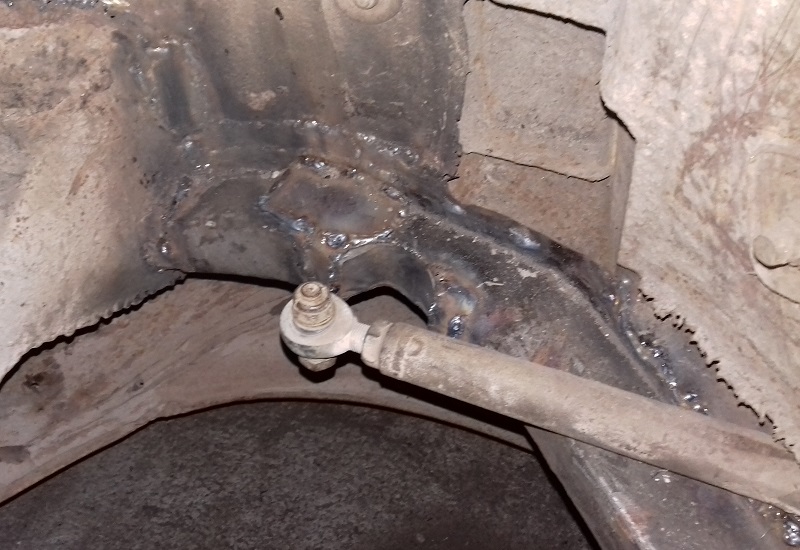
At least I now know where I need to make a recess in the floor for the silencer!
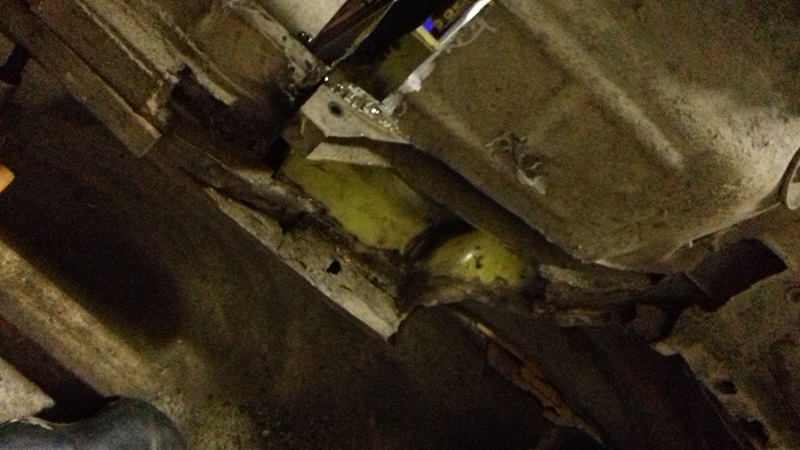
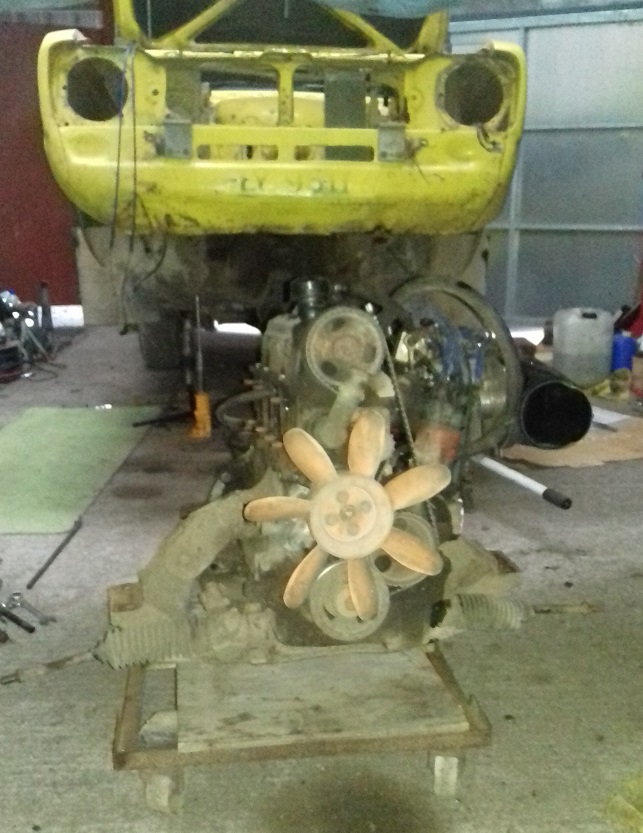
Decided it was easier to remove engine, box and cross member in one piece, but forgot just how tall a Pinto is!
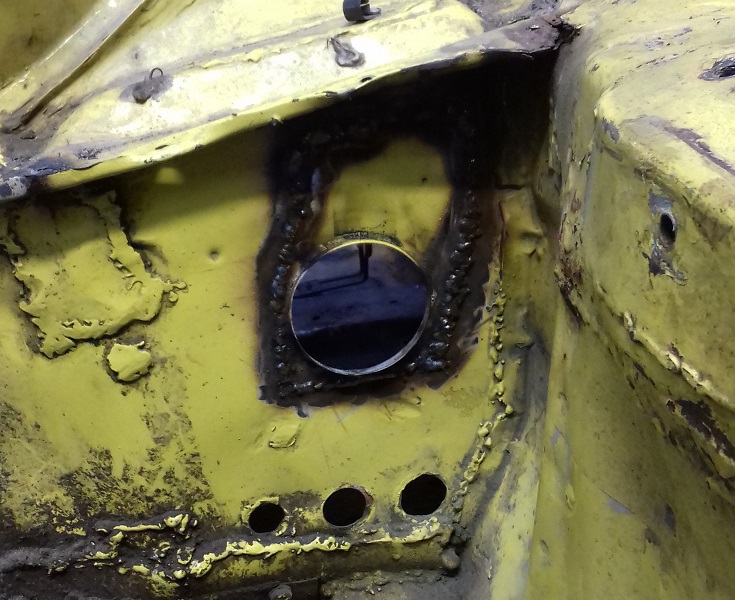
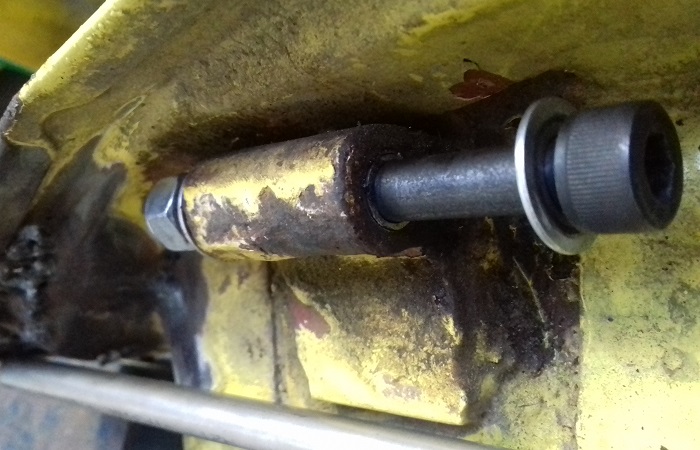
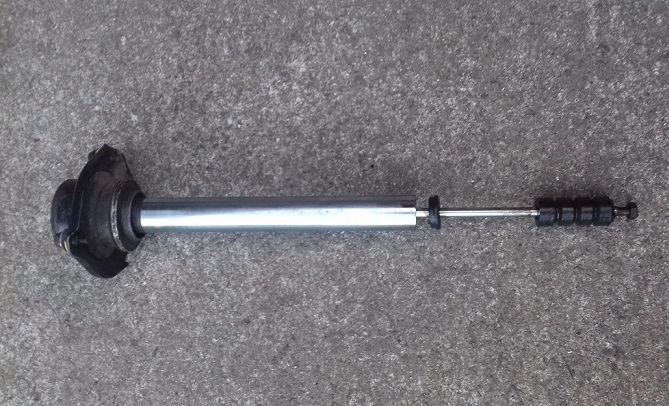
When I took the suspension off, I found a leaking insert so removed it to find the cap had come off
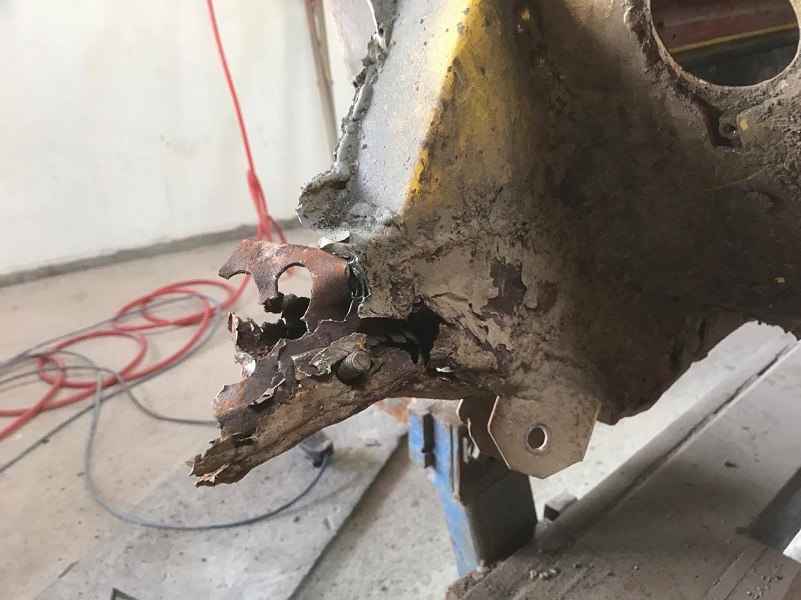
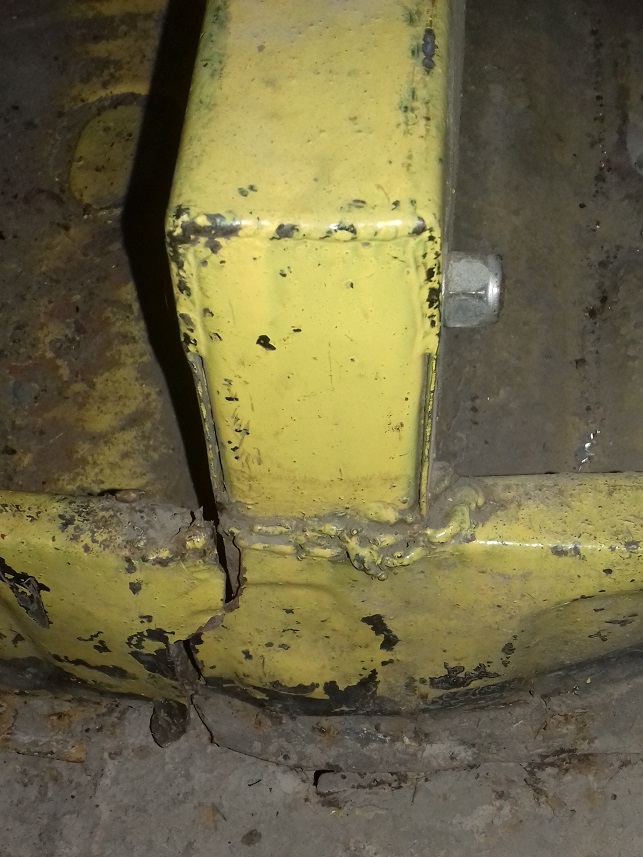
Both front chassis rails and inner wings will be replaced - the damage / rot here comes from having the sumpguard bolted through the chassis
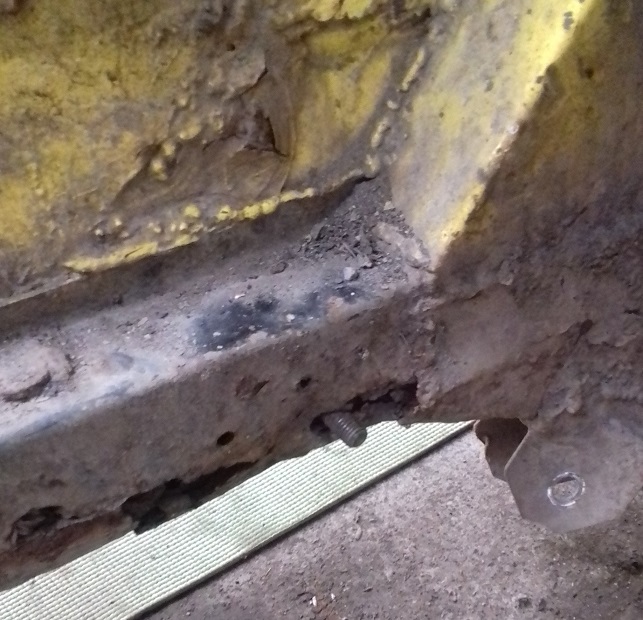
The sumpguard has a thick rubber pad between it and the crossmember which has pushed up the bottom of the crossmember
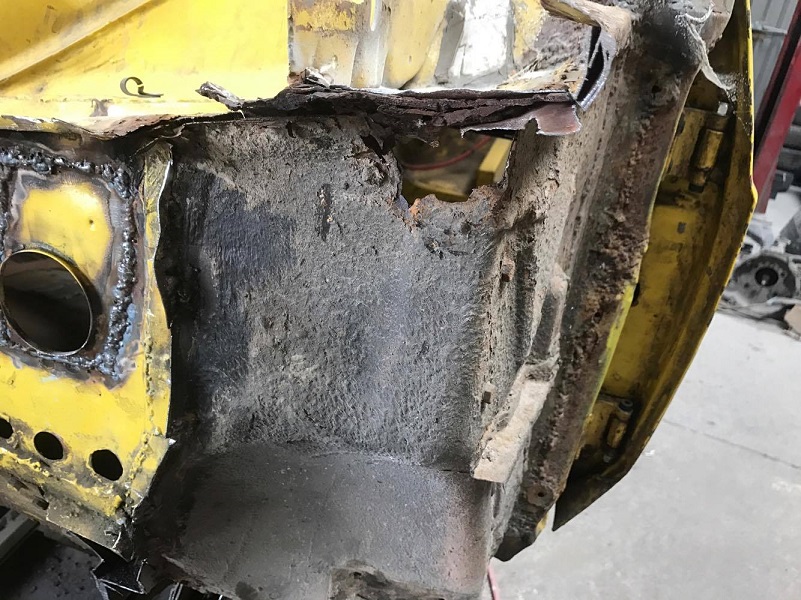
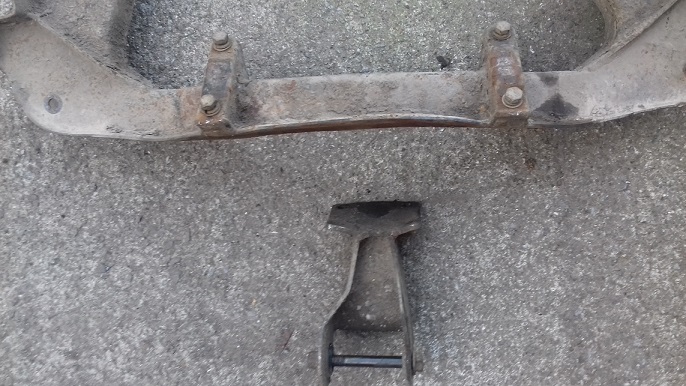
Although I didn't expect to find a distorted engine mount on the passenger side - it was still bolted solidly to the engine, but must have bent after a heavy landing
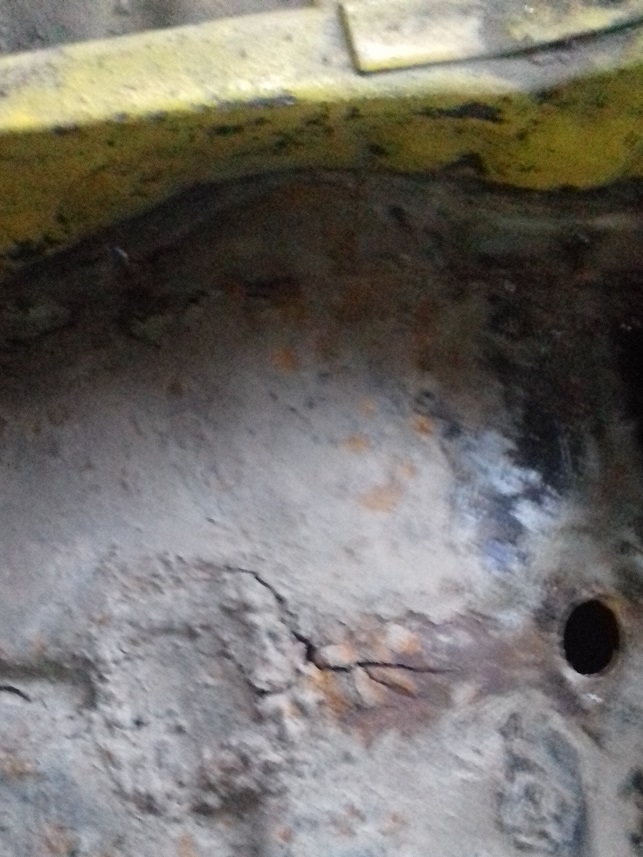
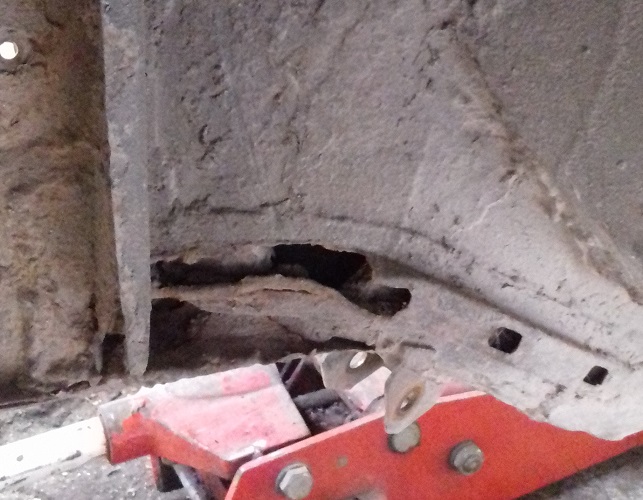
The driver's link box is still solid, but everything around it is going - this is after I've been poking around with a large screwdriver!
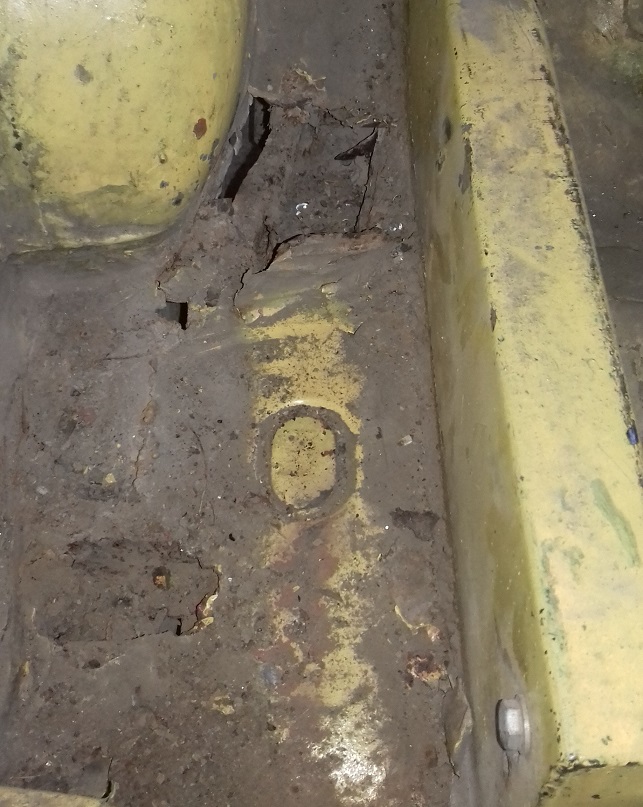
The bottom of the windscreen is not good, but it's only the outer skin so can be welded up easily
I've got all the bits now, mainly from Tim at TJ Motorsport.
James (Oddy) will do the front end for me, and I'll repair the back end, floor and link boxes as required...Leave a comment:
-
Re: GavinR's Mk2 Rally Car - FLY
Somerset Stages Rally - 8th April 2017
A round of the BTRDA forest championship, I'd done this event once before in 2013, and have been out marshalling the past few years.
Fly is due for a major rebuild this summer, and this event was 2 days before the MOT ran out, so I asked George if she wanted to sit in with me for a final one before the rebuild.
The event is based in Minehead and uses the Exmoor forests and Porlock Toll Road, both areas I know pretty well having organised the Exmoor Targa Rally in 2015 & 2016.
There was a smaller entry than usual with 100 cars and 7 in our class.
I went down on the Friday for scrutineering - and nearly failed, the first scrutineer not impressed with some rust on the inside of the A pillar, worried that in the event of a roll the foot of the cage might go through the floor, despite the very large 3mm steel plate on the floor. The chief scrutineer agreed we could run, but as I was going home anyway, I welded a plate over the rust.
We started with 6 forest stages, the first one delayed by an hour due to a couple of incidents. Once we were going, everything was working well, I remembered some sections but was mainly listening to the pacenotes - it's a lot faster than doing course car on the Targa when there are a lot of cone manoeuvres to slow the cars down! There were a few rough sections where the bedrock is the road surface so cannot be graded, but Fly was bouncing along quite well to George's amusement
After these it was back to Minehead for a quick tyre change service where we fitted very soft X22 wets for the 2 runs up Porlock. Even though it was dry, I knew I wouldn't be going quick enough in Fly to overheat them! We had 2 good runs, slightly quicker on the second one, but not enough power to set a good time.
A longer service this time - Richard and I checked Fly over and refitted the forest tyres, while George got us some Ice Cream for lunch - it was a hot day by the sea, so why not! The afternoon consisted of another 6 forest stages, some the same as the morning, but we did have the longest stage of 8.2 miles in Croydon. There were 2 stages in Chargot forest and these were quite rutted after being used in the other direction in the morning - I stayed in the ruts slithering along on the sumpguard and exhaust. After that the exhaust was blowing from the centre silencer as the rear end plate had been pulled back. The long stage was smoother and the final one in Timberscombe was good, so it didn't get any worse.
At the finish in Minehead we were surprised to be 2nd in Class, although 3 minutes behind the class winners in a Sunbeam.
It was a very enjoyable day and great to be back in the forests, many thanks to George for co-driving and Richard for servicing
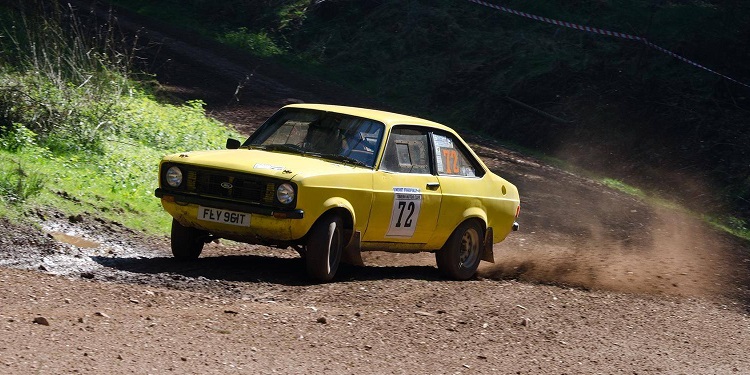
This pic (from Blueline Photography) is at Chargot in the afternoon.
Next event will be September providing everything is rebuilt in time - I dropped the engine off yesterday and Fly is stripped ready for a new front end...Leave a comment:
-
Leave a comment: